Page 13For technical questions, please call 1-800-444-3353.SKU 98871
SAFETYSERVICE BASIC WELDINGWELDING TIPS SETUP
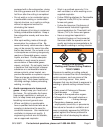
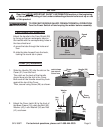
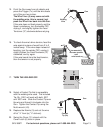
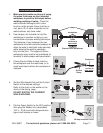
15. Point the Gun away from all objects and
press the Trigger (1c) until the wire feeds
out of the gun two inches.
The Wire Liner (4) may come out with
the welding wire, this is normal, just
push the Wire Liner back into the Gun.
If the wire does not feed properly and the
Spool is stationary, turn the welder OFF,
unplug it, and slightly tighten the Feed
Tensioner (37) clockwise before retrying.
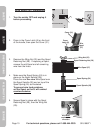
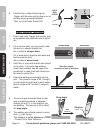
16. To check the wire’s drive tension, feed the
wire against a piece of wood from 2 to 3
inches away. If the wire stops instead of
bending, turn the welder OFF, unplug it,
slightly tighten the Feed Tensioner (37)
clockwise, and try again.
If the wire bends from the feed tension,
then the tension is set properly.
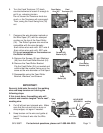
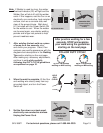
17. TURN THE WELDER OFF.
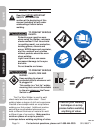
18. Select a Contact Tip that is compatible
with the welding wire used. The included
Tip (2b, .035”) will work with both .030”
and .035” wire. Slide the Contact Tip over
the wire and thread it clockwise into the
Gun. Tighten the Contact Tip using the
Multi-wrench (43).
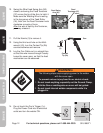
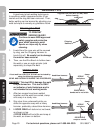
Replace the Nozzle (3) and cut the wire
19.
off at
1
/
2
” from tip (
1
/
2
” stickout).
Swing the Cover (31) closed until the 20.
Cover Latch (8) locks in place.
Welding
Wire
Gun
2”
2-3”
Incrementally
increase tension
until
wire bends.
90 AMP FLUX WIRE WELDER
120 V~
60 Hz
Gun
WIRE-FEED SPEED
0
1
2
3
4
5
6
7
8
9
10
MAX
MIN
ON
OFF
Gun
Nozzle
(3)
Contact
Tip (2b)


