


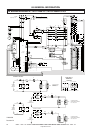

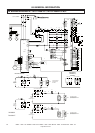
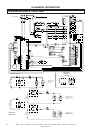

IRN37 - 160K - CC & IRN50 - 200H & IRN75 - 160K - 2S & IRN - 100 - 200H - 2S & IRN 250 - 300H - 2S
http://air.irco.com
65
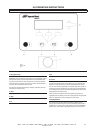
9.0 OPERATING INSTRUCTIONS
9.1 BASIC OPERATION
WARNING
Ensure that all protective covers/guards are in place before
attempting to start the machine.
WARNING
The compressor can operate in a pressurized shutdown
mode. If the compressor stops automatically, the airend,
separator tank and oil system can contain high pressure air.
This can be relieved by pressing the emergency stop button
and can be verified by unscrewing the coolant fill plug which
has a vent hole through which any residual pressure will be
vented. Downstream of the separator tank may still contain
system pressure which must also be vented.
NOTICE
The language and units of measure displayed on the Intellisys
controller will be pre−set before leaving the factory. If these
are required to be changed, contact your local Ingersoll Rand
Service Department, Distributor or Air Center.
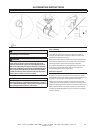
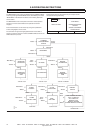
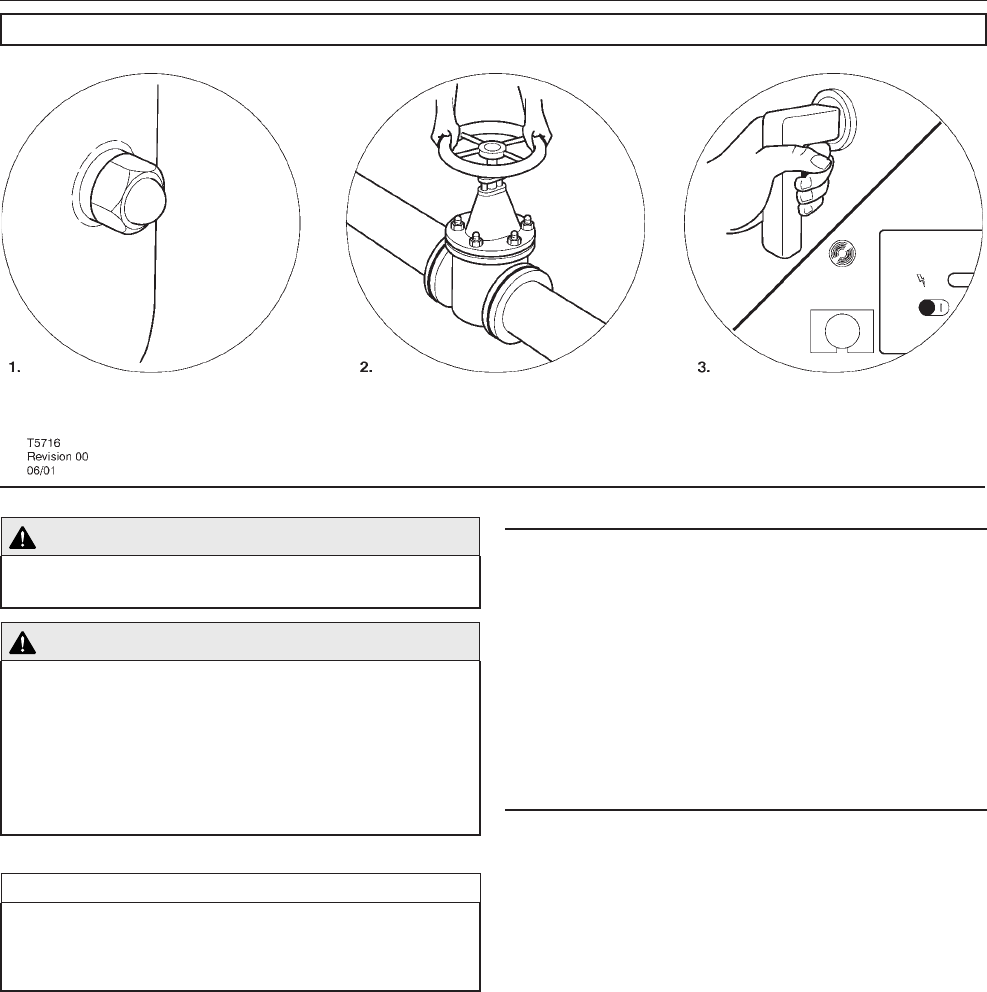
Prior to starting
Refer to diagram T5716 above.
Check that the coolant level is at least visible in the center of
the sight glass, add coolant if necessary. Refer to maintenance
procedures for setting correct level.
Ensure that the discharge air isolation valve is open. Switch on the
main electrical isolation switch. The control panel will illuminate,
indicating that the line and control voltages are available.
The contrast of the display may be adjusted by turning the small
screw which is on the right hand side of the controller when
accessed through the starter cabinet door.
Initial check sequence
The controller will perform an initial check sequence if the
compressor (1) receives initial power to the controller or (2) has
experienced an alarm reset. While the initial check sequence occurs,
the controller will display a “Checking Machine” message.
During the initial check sequence, the controller will check the
control system for proper operation. During this time, if any items
are found inoperative an alarm will occur and the unit will not start.
After completion of the initial check sequence, the controller will
then display “READY TO START’. This process should be completed
within 10 seconds.