


11
Adjustments
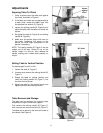
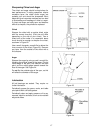
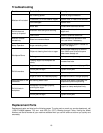
Squaring Table To Chisel
1. Place a square upon the table and against
the chisel, as shown in Figure 6.
2. If the table and chisel are not perpendicular
to each other, loosen the table’s stud with
the attached hex wrench (A, Figure 6).
3. Loosen the locking handle (B, Figure 6) and
adjust the table until the table and chisel are
square.
4. Re-tighten the stud (A, Figure 6) and locking
handle (B, Figure 6).
5. Make sure the pointer aligns with zero on
the scale. Loosening the screw on the
pointer will allow slight adjustment of the
pointer if necessary.
NOTE: The locking handle (B, Figure 6) can be
rotated out of the way. Simply lift up on the
handle, rotate it on the pin, then release the
handle, making sure it seats itself properly on
the pin.
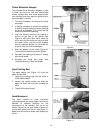
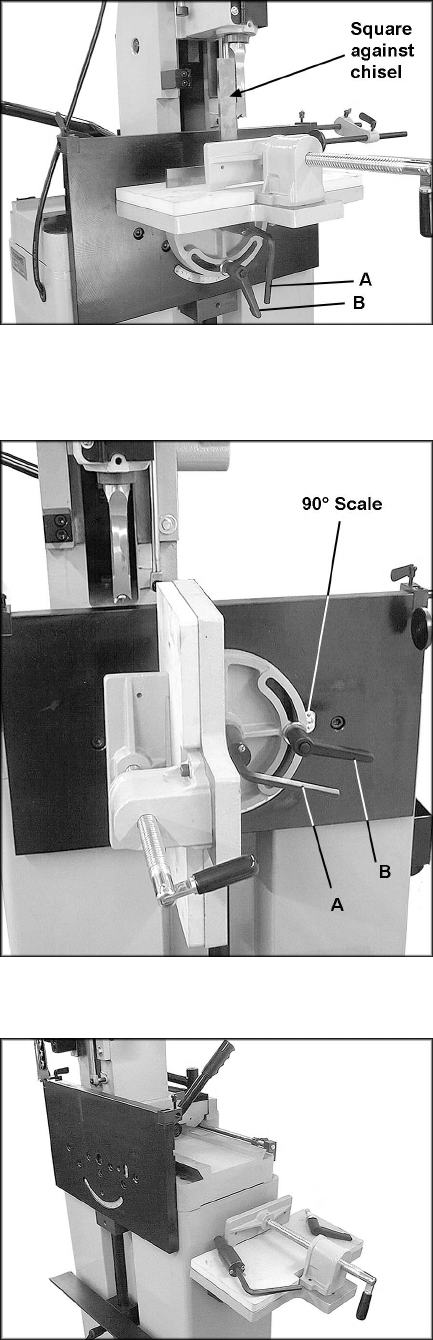
Setting Table to Vertical Position
For table angles from 45° to 90°:
1. Loosen the stud (A, Figure 7).
2. Unscrew and remove the locking handle (B,
Figure 7).
3. Rotate the table to vertical position and
install the locking handle (B, Figure 7) into
the other hole as shown.
4. Adjust the table to the desired angle and
tighten both stud and locking handle.
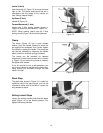
Table Removal and Storage
The table can be removed for mortising large
workpieces using the lower work support.
First remove the locking handle (B, Figure 7),
then unscrew and remove the stud (A, Figure 7).
The table can be stored in the rack at the side of
the cabinet. See Figure 8.
Figure 6
Figure 7
Figure 8