


15
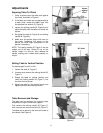
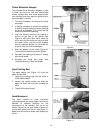
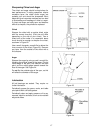
Gib for Front-to-Back Movement
1. Remove the two screws on the pleated dust
cover (F, Figure 18) and move the dust
cover out of the way.
2. Loosen the three hex nuts (G, Figure 18)
with a 10mm wrench.
3. Turn the three set screws (H, Figure 18)
with a 3mm hex wrench, until play is
eliminated on the gib (J, Figure 18).
4. Re-tighten the three hex nuts (G, Figure 18)
NOTE: Hold the set screws so they do not
turn during the tightening process.
5. Re-install the pleated dust cover (F, Figure
18) before operating.
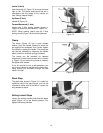
Gib for Lateral Movement
1. Remove the two screws on the pleated dust
cover (F, Figure 19) and move the dust
cover out of the away.
2. Loosen the three hex nuts (K, Figure 19)
with a 10mm wrench.
3. Turn the three set screws (L, Figure 19) until
all play is eliminated on the gib (M, Figure
19).
4. Re-tighten the three hex nuts (K, Figure 19).
NOTE: Hold the set screws so they do not
turn during the tightening process.
5. Re-install the pleated dust cover (F, Figure
19) before operating.
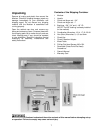
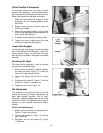
Tool Storage
The cabinet shelf contains a perforated cushion
for the accessories, as shown in Figure 20.
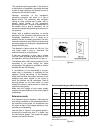
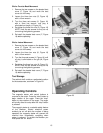
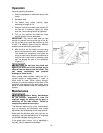
Operating Controls
The magnetic starter with control buttons is
mounted to the motor. Press the “start” button to
begin rotation of the auger. Press the “stop”
button to stop rotation of the auger. The auger
will quickly coast to a stop after the “stop” button
is pressed.
The magnetic starter is a valuable safety feature
of the Mortiser. Should electrical power
suddenly be cut off while the mortiser is being
operated, the magnetic starter will prevent the
machine from immediately re-starting when
power is restored. To re-start the Mortiser you
must press the “on” button.
Figure 18
Figure 19
Figure 20