


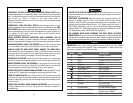
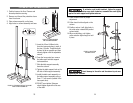


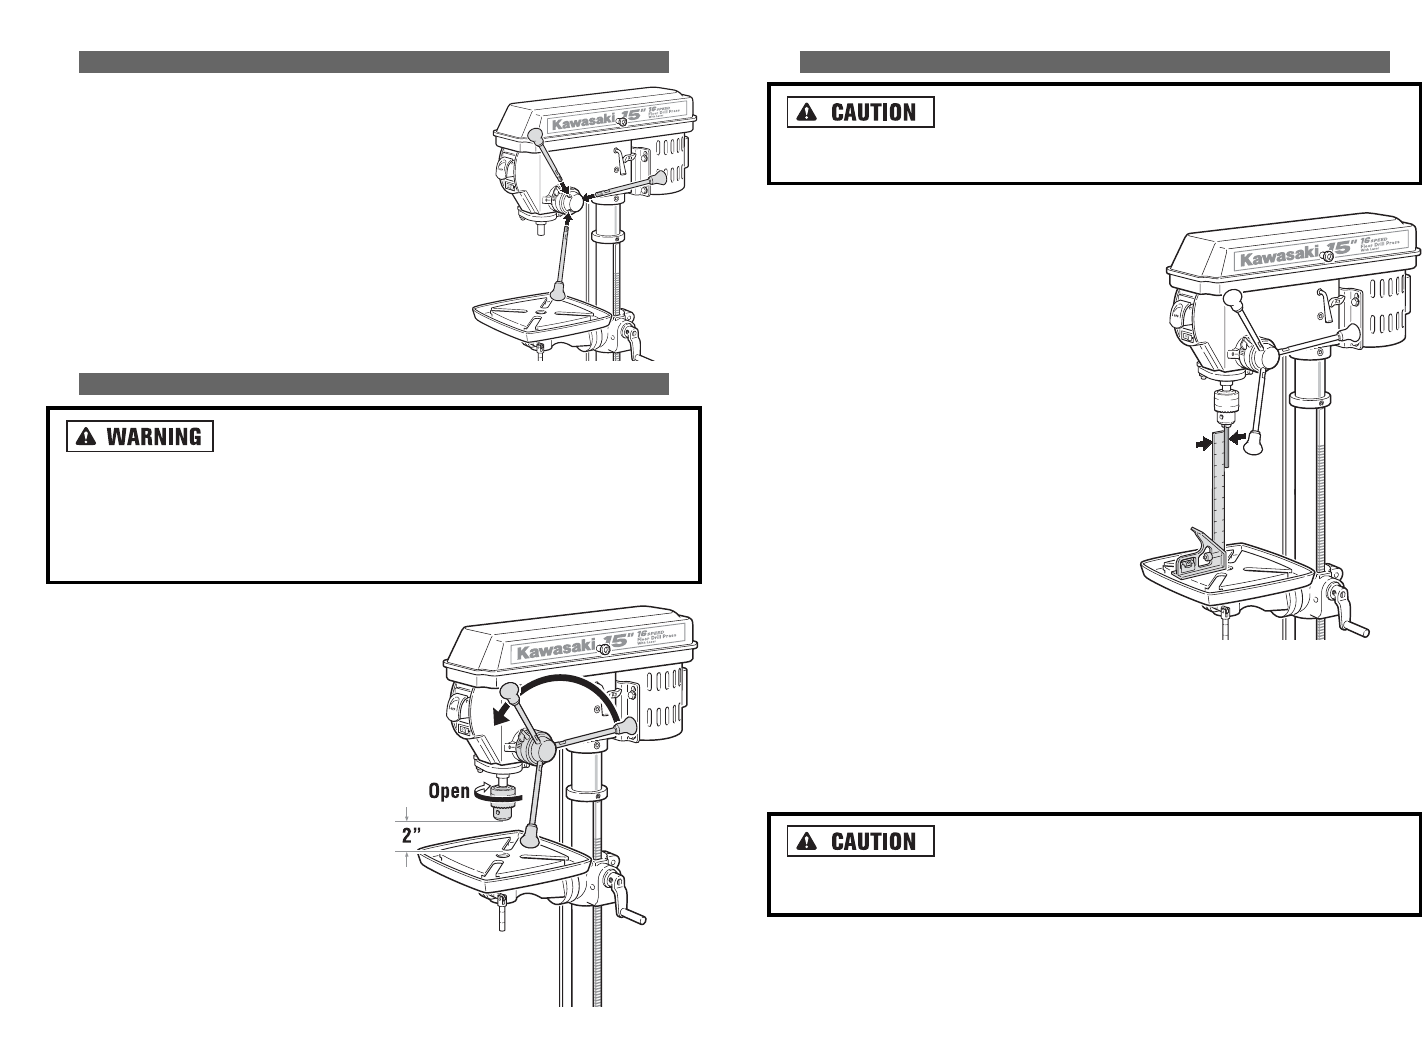
SQUARING THE WORKTABLE
The combination square must be “true” when used to
square the worktable. See Tools Required for Assembly. This is essential in
order to do precision drilling.
1. Insert a straight, ground steel rod, approxi-
mately 3" long (not included) into the drill
check and tighten.
2. Raise the table to working height.
3. Place the combination square on the table
surface with the ruler portion setting
beside the ground rod. There should be no
gaps from either the table side or the rod
side indicating a true 90 degrees.
4. Should an adjustment be necessary, loosen
the setscrew beneath the table bevel lock
with the 3 mm hex wrench.
5. Using an adjustable wrench, loosen the
bolt on the front of the table bevel lock.
6. Align the table by rotating it until the
combination square and the ground rod are
in line.
7. Set the scale on the table bevel lock so
the “0” reading is in line with the pointer on
the table support.
8. Using an adjustable wrench, re-tighten the bolt on the front of the table bevel lock.
9. Using the 3 mm hex wrench, re-tighten the setscrew on the bottom of the table
bevel lock.
The scale and pointer on the table bevel lock are only for
approximate degree setting. ALWAYS use a square or precision protractor
(available from a hardware retailer) to make precision drilling operations.
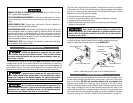
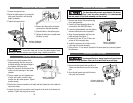
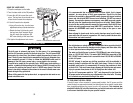
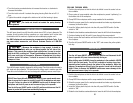
INSTALLING THE FEED HANDLES
1. Locate the (3) three feed handles in the loose
parts box.
2. Screw the feed handles into the threaded holes in
the pinion shaft located on the head assembly
just above the drill chuck.
3. Tighten the feed handles.
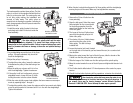
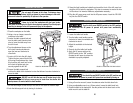
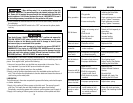
INSTALLING THE DRILL CHUCK
The slightest piece of dirt or debris on either the arbor
shaft or the drill check can cause the shaft to wobble. Should the drill check
wobble, the drilling operation will not be smooth and the added tension
could cause the cutting tool to break sending pieces of metal flaying in many
directions. Failure to follow this step could lead to severe damage to the drill
press and possibly severe injury to the operator.
1. Locate the drill chuck in the loose
parts box.
2. Thoroughly clean out the tapered hole
in the drill chuck.
3. With a clean cloth, thoroughly clean
the arbor shaft. Ensure there is no
debris or burs on the shaft.
4. Slide the drill chuck over the arbor
shaft as tightly as possible.
5. Turn the chuck sleeve clockwise and
completely open the chuck jaws.
6. Unlock and raise the worktable until it is
approximately two (2") below the chuck.
7. Turn the feed handles counterclock-
wise bringing the drill check down
against the table.
8. Press the drill chuck against the worktable
until it is completely pressed onto the
arbor shaft.
FIGURE 13. INSTALLING
THE DRILL CHUCK
FIGURE 14. SQUARING
THE WORKTABLE
FIGURE 12. INSTALLING
THE FEED HANDLES
19