


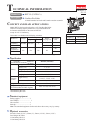

[3] DISASSEMBLY/ASSEMBLY
[3] -1. Replacing Driver
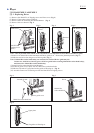
Front cover
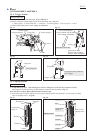
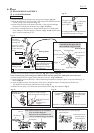
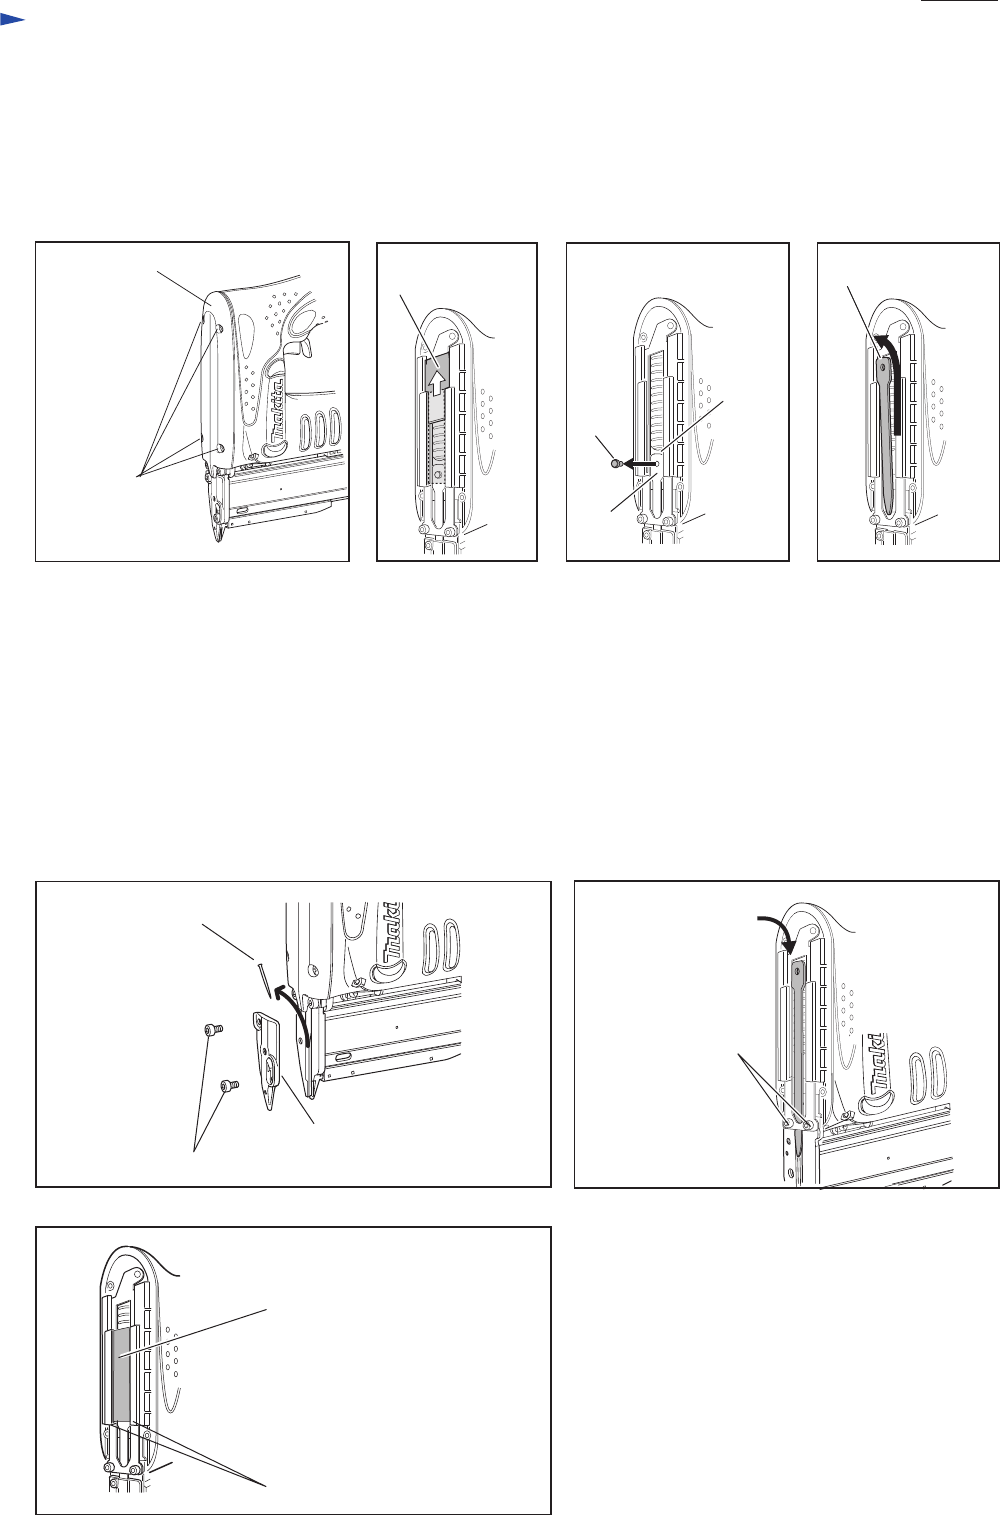
(1) Remove four Bind PT3x16 Tapping screws and Front cover. (Fig. 2)
(2) Remove Upper plate as drawn in Fig. 3.
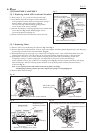
(3) Remove Pin 4 for connecting Driver and Hammer. (Fig. 4)
(4) Remove Driver as drawn in Fig. 5.
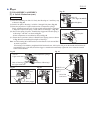
Note: A few of pin nails often remain in the tool, and if so, it is impossible to insert Driver into Driver guide.
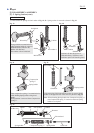
(5) Remove two M4x6 Hex socket head bolts and Driver guide cover. Remove the jammed pin nails. (Fig. 6)
(6) Slide the new Driver into the groove of Driver guide. (Fig. 7)
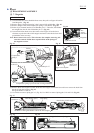
Note: If M4x10 Hex socket head bolt(s) are loosened, the stroke of Driver guide may tilt.
In that case, slide Driver into the groove of Driver guide before securing M4x10 Hex socket head bolt(s),
and then secure M4x10 Hex socket head bolt(s).
(7) Insert Pin 4 for connecting Driver and Hammer.
(8) Set Driver guide cover in place with two M4x6 Hex socket head bolts.
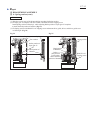
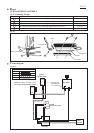
(9) Slide the side ends of Upper plate into the guides of Housing set. (Fig. 8)
(10) Assemble Front cover to Housing set with four Bind PT3x16 Tapping screws.
Bind PT3x16
Tapping screw
(4pcs.)
Fig. 2 Fig. 3 Fig. 4 Fig. 5
Fig. 6 Fig. 7
Slide Upper plate
upward.
Slide Driver upward.
Driver
Hammer
Pin 4
Driver
Driver guide cover
M4x6 Hex socket head bolt
M4x10 Hex
socket head bolt
Jammed pin nail
Upper plate
The guides on Housing set
Fig. 8
Repair
P 3/ 15