


[3] DISASSEMBLY/ASSEMBLY
[3] -4. Trigger Section
DISASSEMBLING
DISASSEMBLING
(1) Remove Front cover and Housing R. (Fig. 2 and Fig. 9)
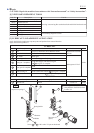
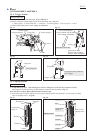
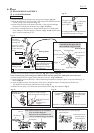
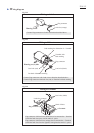
(2) Remove the parts around trigger section in the following order. (Fig. 13)
1. Safety trigger 2. Light switch arm 3. Link plate 4. Torsion spring 4 5. Pin 2.5 (3pcs.) 6. Pin 3
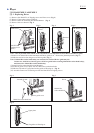
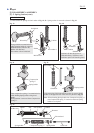
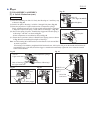
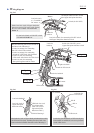
(3) Disassemble guide plate in order of Figs. 14, 15 and 16.
2. Light switch arm
1. Safety trigger
3. Link plate
6. Pin 3
4. Torsion spring 4
5. Pin 2.5
Fig. 13
Fig. 14
Fig. 15 Fig. 16
Fig. 17 Fig. 18
Trigger
Disconnect the hooks.
Turn swing arm.
Guide plate can be pulled out
from Trigger.
Swing arm
Guide plate
Two Torsion springs 3
(One is hooked with the other.
Refer to Figs. 33 and 34.)
(Projection to hook
the short end of Tortion
spring 3: Refer to Fig. 33.)
Trigger
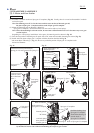
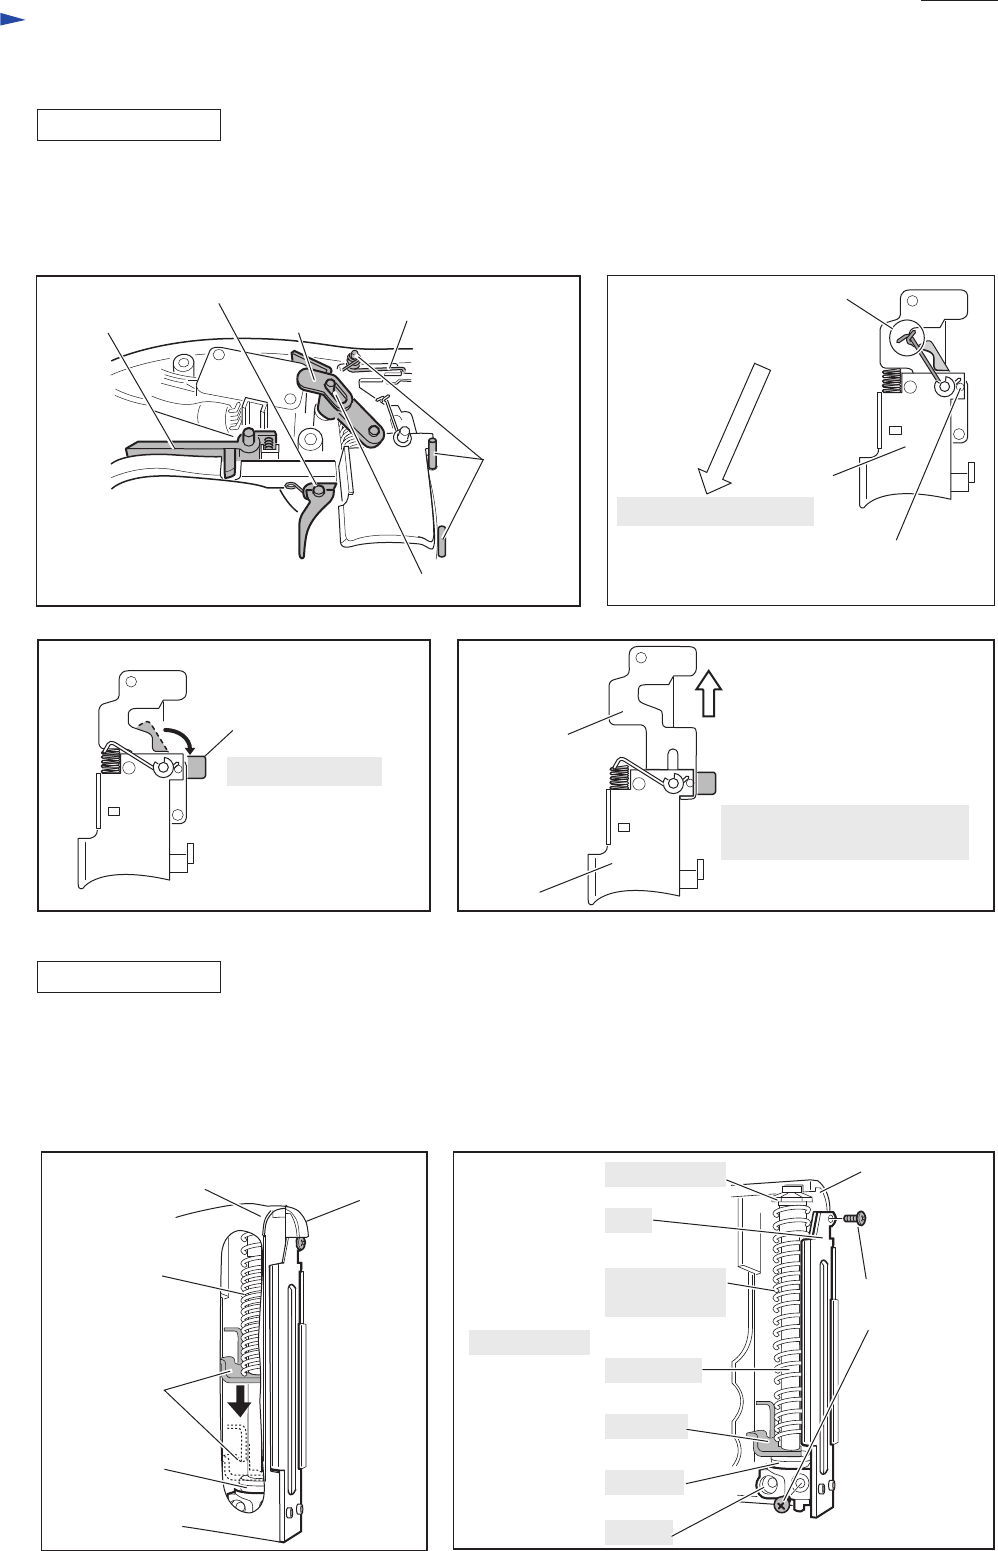
[3] -5. Spring Section
Bind PT3x16
Tapping screw
Housing R Housing L
Housing L
Cushion
Hammer
Compression
spring 17
Holder
Spring holder
Cushion
Hammer
Compression
spring 17
Guide bolt
Rail
Spring section
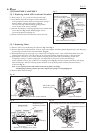
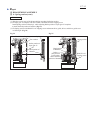
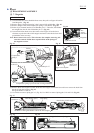
(1) Install Battery BL1430. Slide Sliding door section of Magazine to make anti-fire mechanism invalid.
Pull Trigger in a blink and release it until Hammer reaches the lowest position. (Fig. 17)
Note: Be sure to remove Battery BL1430 after the above step.
(2) After removing Housing R and Front cover, separate Spring section from Housing L by removing Two Bind
PT3x16 Tapping screws . (Fig. 18)
Repair
P 5/ 15