Dust bag
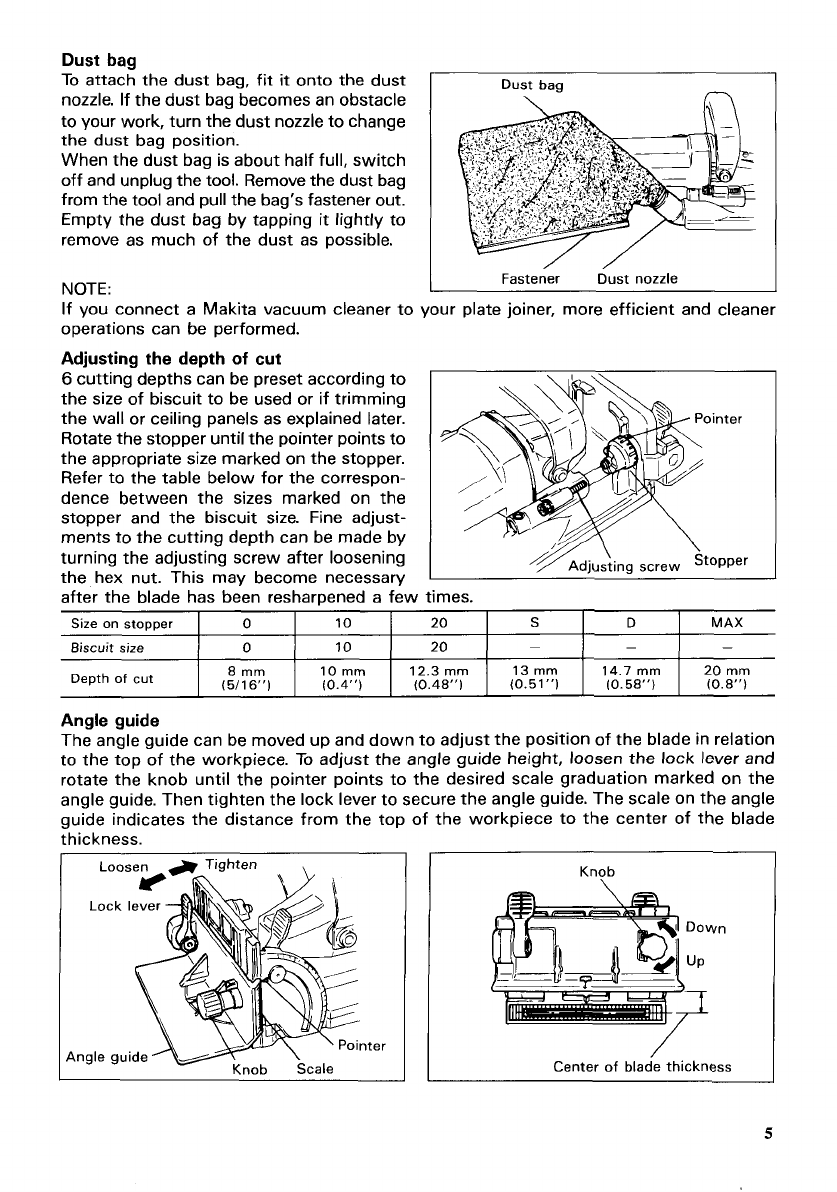
To attach the dust bag, fit
it
onto the dust
nozzle.
If
the dust bag becomes an obstacle
to your work, turn the dust nozzle to change
the dust bag position.
When the dust bag is about half full, switch
off and unplug the tool. Remove the dust bag
from the tool and pull the bag's fastener out.
Empty the dust bag by tapping
it
lightly to
remove as much of the dust as possible.
Size on stopper
0
10
20
S
h
Dust bag
D
MAX
Fastener Dust nozzle
NOTE:
If you connect a Makita vacuum cleaner to your plate joiner, more efficient and cleaner
~
-
Biscuit
size
0
10
20
operations can be performed.
Adjusting the depth
of
cut
6
cutting depths can be preset according to
the size of biscuit to be used or
if
trimming
the wall or ceiling panels as explained later.
Rotate the stopper until the pointer points to
the appropriate size marked on the stopper.
Refer
to
the table below for the correspon-
dence between the sizes marked on the
stopper and the biscuit size. Fine adjust-
ments to the cutting depth can be made by
turning the adjusting screw after loosening
the hex nut. This may become necessary
after the blade has been reshamened a few
-
times.
8
mm
(5/16")
Depth
of
cut
10"
12.3"
13"
14.7" 20mm
(0.4")
(0.48") (0.51") 10.58")
(0.8")
Angle guide
The angle guide can be moved up and down to adjust the position
of
the blade in relation
to
the top of the workpiece.
To
adjust the angle guide height, loosen the
lock
lever and
rotate the knob until the pointer points to the desired scale graduation marked on the
angle guide. Then tighten the lock lever to secure the angle guide. The scale on the angle
guide indicates the distance from the top of the workpiece to the center of the blade
thickness.
Knob
\
Down
Center
of
blade thickness
5


