


11
The measurement should be the same at
both ends of the rear rail. Adjust as needed.
3. Tighten the three screws with a 12mm
wrench.
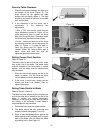
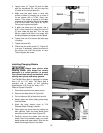
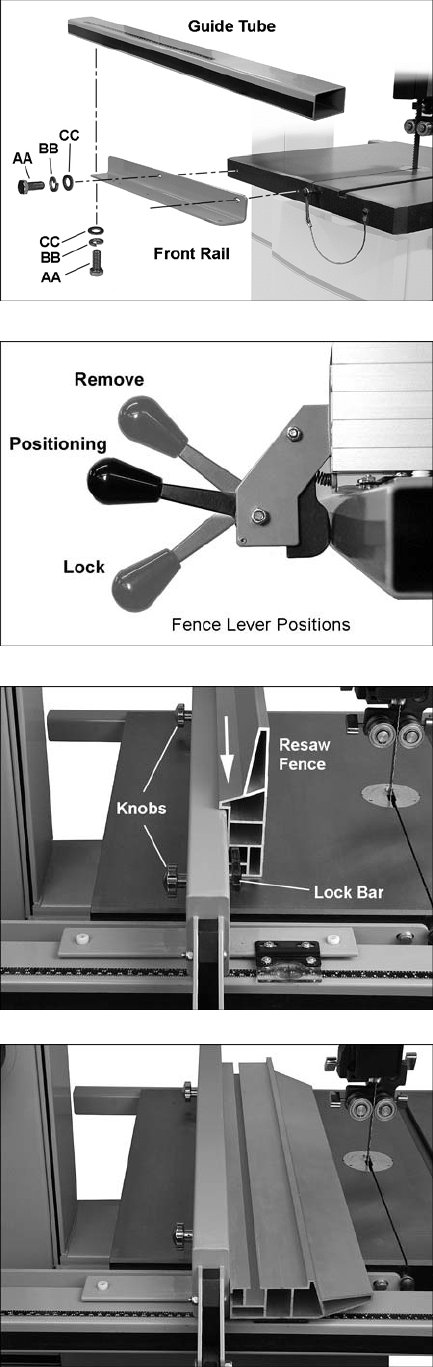
Front Rail and Guide Tube
Refer to Figure 6.
4. Install the front rail to the front edge of the
table, using two 5/16-18 x 3/4 hex cap
screws (AA), two 5/16 lock washers (BB),
and two 5/16 flat washers (CC), through the
slotted holes in the rail. Place the screws
approximately center of the slots; this can
be adjusted later as needed. Tighten the
two screws with a 12mm wrench.
5. Install the guide tube to the bottom holes in
the front rail, using five 5/16-18 x 3/4 hex
cap screws (AA), five 5/16 lock washers
(BB), and five 5/16 flat washers (CC). Hand
tighten only. Pull the guide tube away from
the table as far as it will go, then tighten all
five screws in the guide tube with a 12mm
wrench. Do not overtighten.
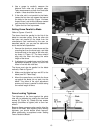
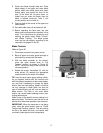
Fence Assembly
Refer to Figures 7 and 8.
Place the fence body onto the guide tube (as
shown in Figure 8). Raise the fence lever all the
way up to install or remove the fence from the
guide tube. Midway lever position allows the
fence to slide along the guide tube. Lowest lever
position locks the fence in place.
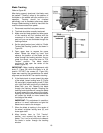
Resaw Fence
Refer to Figures 8 and 9.
Loosen the lock bar using the knobs, until the
lock bar protrudes enough to slide the aluminum
resaw fence on from one end, as shown in
Figure 8. Re-tighten the knobs.
NOTE: The aluminum resaw fence can be
installed in one of two positions; vertically
(resaw position), as shown in Figure 8; or
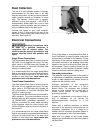
horizontally as shown in Figure 9. Horizontal
position is useful for smaller workpieces. (The
zero setting of the cursor cannot be used with
the horizontal fence position.)
Figure 6
Figure 7
Figure 8 (resaw fence vertical position)
Figure 9 (horizontal fence position)