23
The 45° stops can be checked in similar fashion,
using an angle gauge similar to that shown in
Figure 37.
To adjust the miter gauge angle for operations:
1. Loosen the handle (A).
2. Rotate the gauge body until the pointer (B)
lines up with the desired angle on the scale.
You may have to pivot the 90° stop plate (C)
out of the way to allow the body to rotate.
3. Tighten the handle (A).
4. There are three stops – at 90°, and 45° left
and right. Each of these can be adjusted by
loosening the hex nut (D) and turning the
screw (E) as needed. Re-tighten the hex nut
(D) when adjustment is finished.
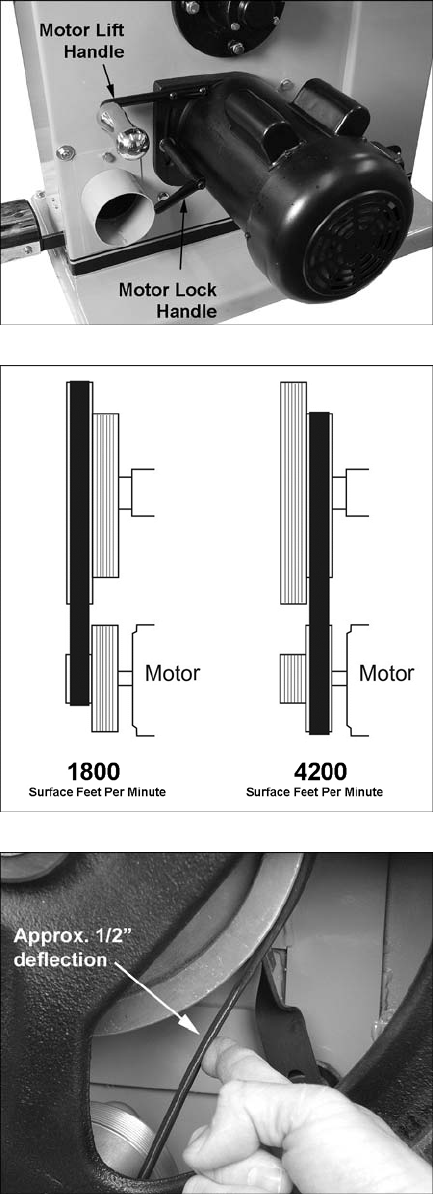
Blade Speed Adjustment
Refer to Figures 38 through 40.
The band saw will operate at 1800 and 4200
SFPM (surface feet per minute). Figure 39
shows the appropriate belt position to achieve
each speed.
To change the speed:
1. Disconnect machine from power source.
2. Loosen the motor lock handle and raise the
motor lift handle to release tension on the
belt.
3. Tighten the motor lock handle to keep motor
in raised position.
4. Slide the belt onto the appropriate set of
pulleys.
5. Loosen motor lock handle and allow motor
to lower. The weight of the motor itself
should produce the proper tension for the
belt. Check the tension by pushing with
moderate pressure against the center of the
belt (Figure 40). An adequately tensioned
belt will deflect about 1/2”. If tension isn’t
strong enough, push down on the motor.
6. Tighten the motor lock handle.
Drive Belt Tension and Replacement
The drive belt and pulleys are properly adjusted
at the factory. However, belt tension should be
occasionally checked when the band saw is
new, as a new belt may stretch slightly during
the breaking-in process.
If the belt becomes worn, cracked, frayed or
glazed, it should be replaced as follows:
Refer to Figures 38 and 40.
1. Disconnect machine from power source.
Figure 38
Figure 39
Figure 40


