


35
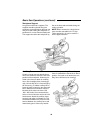
Cutting Crown Molding Angled to the
Table and Fence
The advantage of cutting crown molding
in this position is that no bevel setting is
required. Small changes in the miter
angle can be made without affecting the
bevel angle. When using this method the
saw can be quickly and easily adjusted for
corners that are not 90° (square).
Making a crown molding support jig:
A crown molding support jig needs to be
constructed to help hold the molding in
place during this cutting operation.
1.Get a straight piece of wood typically 1/2
inch thick by 23-1/2 inches long (28
inches long if using the table extension)
and approximately 5 inches wide. The
actual width of this piece will depend on
overall width of the crown molding and
what the top and bottom angles are.
2.Drill holes and temporarily mount this
piece similar to building an Auxiliary
Fence. However, do not cut the blade
slot at this time.
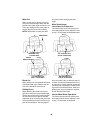
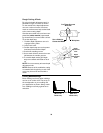
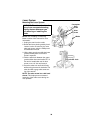
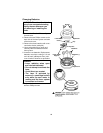
3.Position a piece of crown molding that
you are going to cut so the bottom part
(part which is installed against the wall)
is against the wood fence. Make sure
the angles on the crown molding are
held firmly against the wood fence and
table of the miter saw. Mark the height
on the fence.
4.Remove the wood fence and cut to this
width.
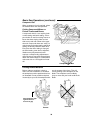
5. Use small nails and glue to attach a top
piece (typically 1/2 inch thick by 1-1/2
inches wide by 23 inches long. Make
sure the nails are not located below the
sawblade.
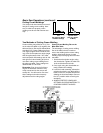
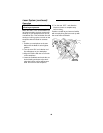
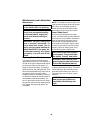
6. Securely reattach the completed jig to
the miter saw fence and make a full
depth, 45° left and right miter cut.
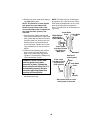
Using the crown molding support jig:
1.Position the molding so the bottom (part
which is installed against the wall) is
against the wood fence.
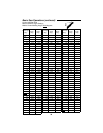
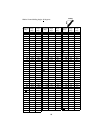
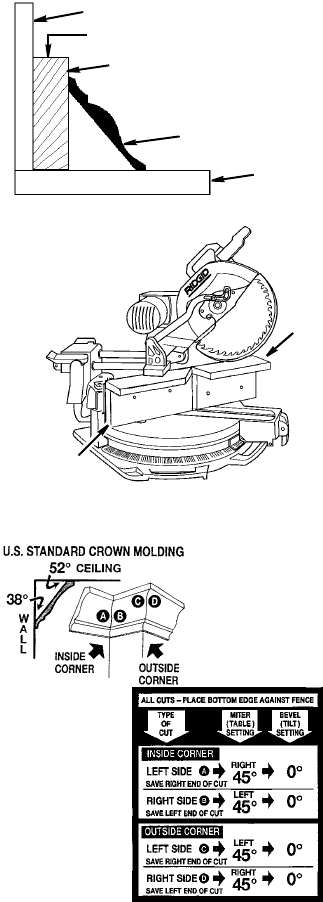
2.Use the chart to select the proper miter
angle. Tighten the miter lock knob.
3.Activate switch. Lower head, make the
cut. Wait until the blade comes to a
complete stop before allowing the head
assembly to return to the “UP” position
and/or removing the workpiece.
4. ALWAYS PRETEST COMPOUND
SETTINGS ON SCRAP MATERIAL TO
CONFIRM CORRECT ANGLE.
Fence
Wood Fence
Mark height of
fence here
Molding
Up-side Down
Table
Crown
Top
Piece
Molding
Support Jig