


16
Assembly (continued)
Pulley Alignment and Speed
Adjustment
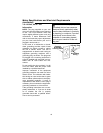
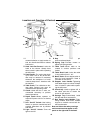
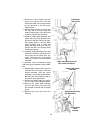
Checking Pulley(s) Alignment
WARNING: To reduce the risk of
injury due to accidental starting
always turn drill press off and
remove switch key before making
belt adjustments.
Pulley alignment is set at the factory and
should not require further adjustment.
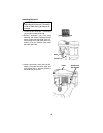
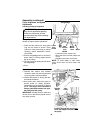
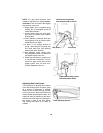
1. Place the idler pulley from loose parts
bag into the head as shown. Place
belts from loose parts bag on pulleys
following speed adjustment instruc-
tions below.
2. Place a straightedge such as a piece of
wood, metal, or framing square across
the top of pulleys.
3. The top of all three pulleys should touch
the straightedge.
4. If not:
Straightedge
Belt
Tension
Lock
Handle
Motor
Mount
Nuts
Motor
Lower
Belt
Guard
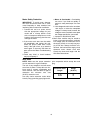
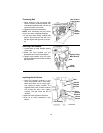
• Loosen the motor mount nuts.
• Move the motor until the pulleys are
in line.
• Retighten the motor mount nuts.
NOTE: To avoid rattles or other noise,
motor frame must not touch lower belt
guard.
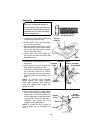
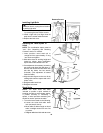
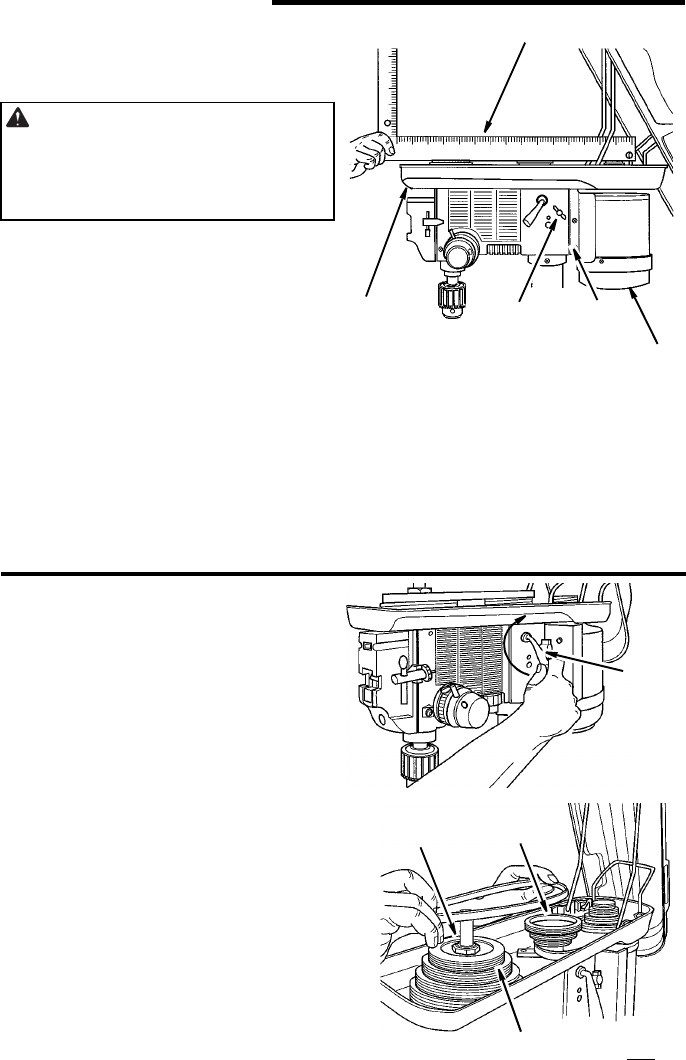
Speed Adjustment
1. Release belt tension lock handles
located on each side of drill press head
by turning them counterclockwise.
2. Loosen belt tension by turning belt ten-
sion handle clockwise.
3. Use speed chart inside belt guard to
choose speed for drilling operation.
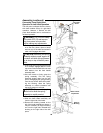
Install belts in correct position for desired
speed. The longer of the two belts is
always positioned between the spin-
dle pulley and idler pulley.
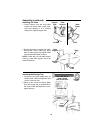
IMPORTANT: Visually check to make sure
the four ribs on the belt are placed into the
four pulley grooves.
Belt
Tension
Handle
Idler
Spindle
Pulley
Pulley
Properly aligned belt should not
touch the stepped surface on
the pulley