


22
Assembly (continued)
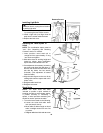
WARNING: For your own safety
turn switch OFF (O) and remove
plug from power source outlet
before making any adjustments. To
reduce the risk of injury from thrown
parts due to spring release, follow
instructions carefully and wear eye
goggles.
Quill Return Spring
NOTE: The return spring tension is set at
the factory and should not require further
adjustment.
If you switched your drill press from right
hand operation to left hand operation, fol-
low the procedure below to adjust spring
tension.
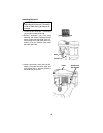
1. With the chuck at its highest possible
position, turn the depth scale clockwise
until it stops and tighten the depth
scale lock. This will prevent the quill
from dropping while tensioning the
spring.
NOTE: For right hand operation (feed
handle on right side) turn the depth scale
counterclockwise until it stops and
tighten the depth scale lock.
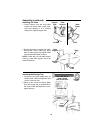
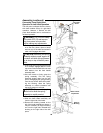
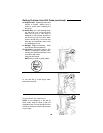
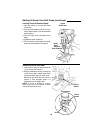
2. Check to make sure spring housing is
mounted correctly. When spring hous-
ing is placed on the right side (feed
handles mounted on left side), the
housing screws face out as shown.
When spring housing is placed on the
left side (feed handles mounted on
right side), the housing screws face
toward the head as shown.
3. Lower table for additional clearance.
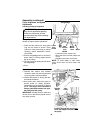
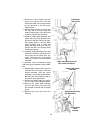
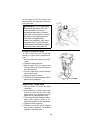
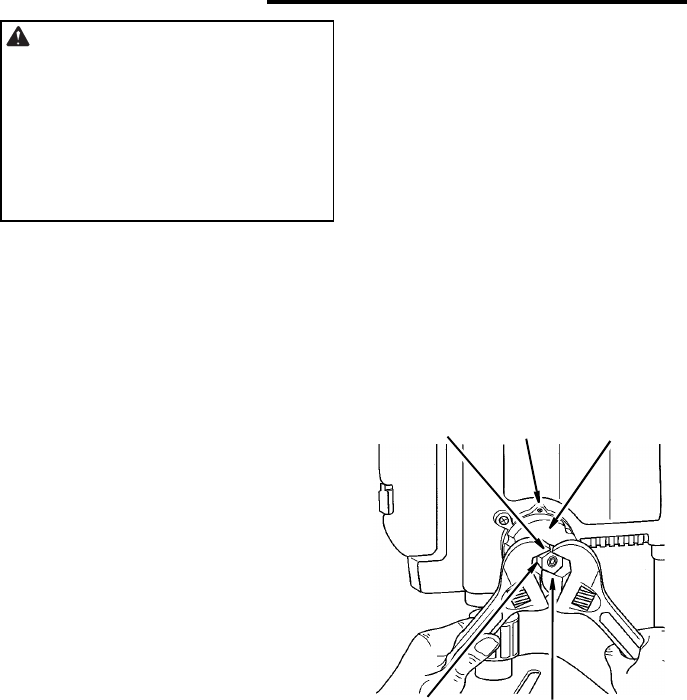
4. Firmly hold the spring assembly
against the head keeping it engaged
with the 4mm cap screw while loosen-
ing and removing the outer nut only.
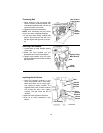
5. Loosen inner nut (approximately 1/4
inch) and disengage spring housing
from the 4mm cap screw. Using both
hands turn spring clockwise to the
next notch and engage with the 4mm
cap screw.
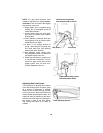
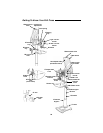
Notch
Nut (Outer)
Nut (Inner)
Spring
Cap
4 mm Cap
Screw