


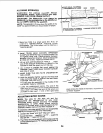
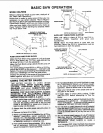
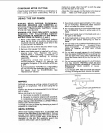
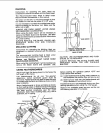
COMPOUND MOTER CUTTING
COMPOUND MITER CUTTING is a combination of
miter cutting and bevel crosscutting. The cut is
made at an angle other than 90° to both the edg_
and the flat side of the wood,
Adjust the miter gauge and the blade to the desirec
angle.,. Make sure miter gauge is locked.
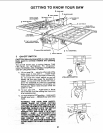
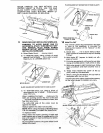
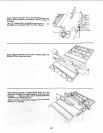
USING THE RmPFENCE
RIPPING, BEVEL RIPPING, PLOUGHING,
MOLDING, RESAWING AND RABBETING are
performed using the RIP FENCE together with the
AUXILIARY FENCE/WORK SUPPORT, PUSH
STICK OR PUSH BLOCK.
WARNING: FOR YOUR OWN SAFETY, ALWAYS
OBSERVE THE FOLLOWING SAFETY
PRECAUTIONS iN ADDITION TO THE SAFETY
iNSTRUCTIONS ON PAGES 2, 3, and 4.
1. Never make these cuts FREEHAND (without
using the rip fence or auxiliary devices when
required) because the blade could bind in the
cut and cause a KICKBACK.
2. Always lock the rip fence securely when in use.
3. Remove miter gauge from table.
4. Make sure blade guard is installed for all thru-
sawing type cuts. Replace the guard
IMMEDIATELY following completion of
resawing, rabbeting, dadoing, or molding
operations.
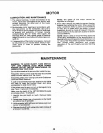
Frequently check the action of the
ANTIKICKBACK PAWLS by passing the
workpiece alongside of the spreader while saw
is OFF.
Pull the workpiece TOWARD you. If the PAWLS
do not DIG into the workpiece and HOLD it _ ..
the pawls must be SHARPENED. See
"Maintenance" section.
5. Have blade extend approximately 1/8 in. abow
top of workpiece. Additional blade exposun
would increase the hazard potential.
6. Do not stand directly in front of the blade in casq
of a KICKBACK. Stand to either side of th,
blade.
7. Keep your hands clear of the blade and out c
the path of the blade.
8. If the blade stalls or stops while cutting. TURf
SWITCH OFF before attempting to free th_
blade.
9. Do not reach over or behind the bladeto pull th,
workpiece through the cut.., to support long o
heavy workpieces.., to remove small cut-c1
pieces of material or FOR ANY OTHEI
REASON.
!0. Do not pick up small pieces of cut-off materi_
from the table. REMOVE them by pushing ther
OFF the table with a long stick. Otherwise the
could be thrown back at you by the rear of th
blade.
11. Do not remove small pieces of cut-off materi_
that may become TRAPPED inside the blad
guard while the saw is RUNNING. THIS COULI
ENDANGER YOUR HANDS or cause
KICKBACK.
Turn the saw OFF. After the blade has stoppe
turning, lift the guard and remove the piece.
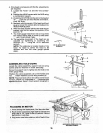
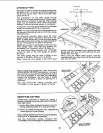
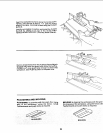
RiPPiNG
RIPPING is known as cutting a piece of wood with
the grain, or lengthwise. This is done using the rip
fence.
Position the fence to the desired WlDTH OF RIP and
lock in place.
Before starting to rip, be sure
A. Rip Fence is parallel to sawblade.
B. Spreader is properly aligned with sawblade.
C. Antikickback pawls are functioning properly.
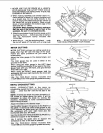
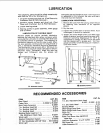
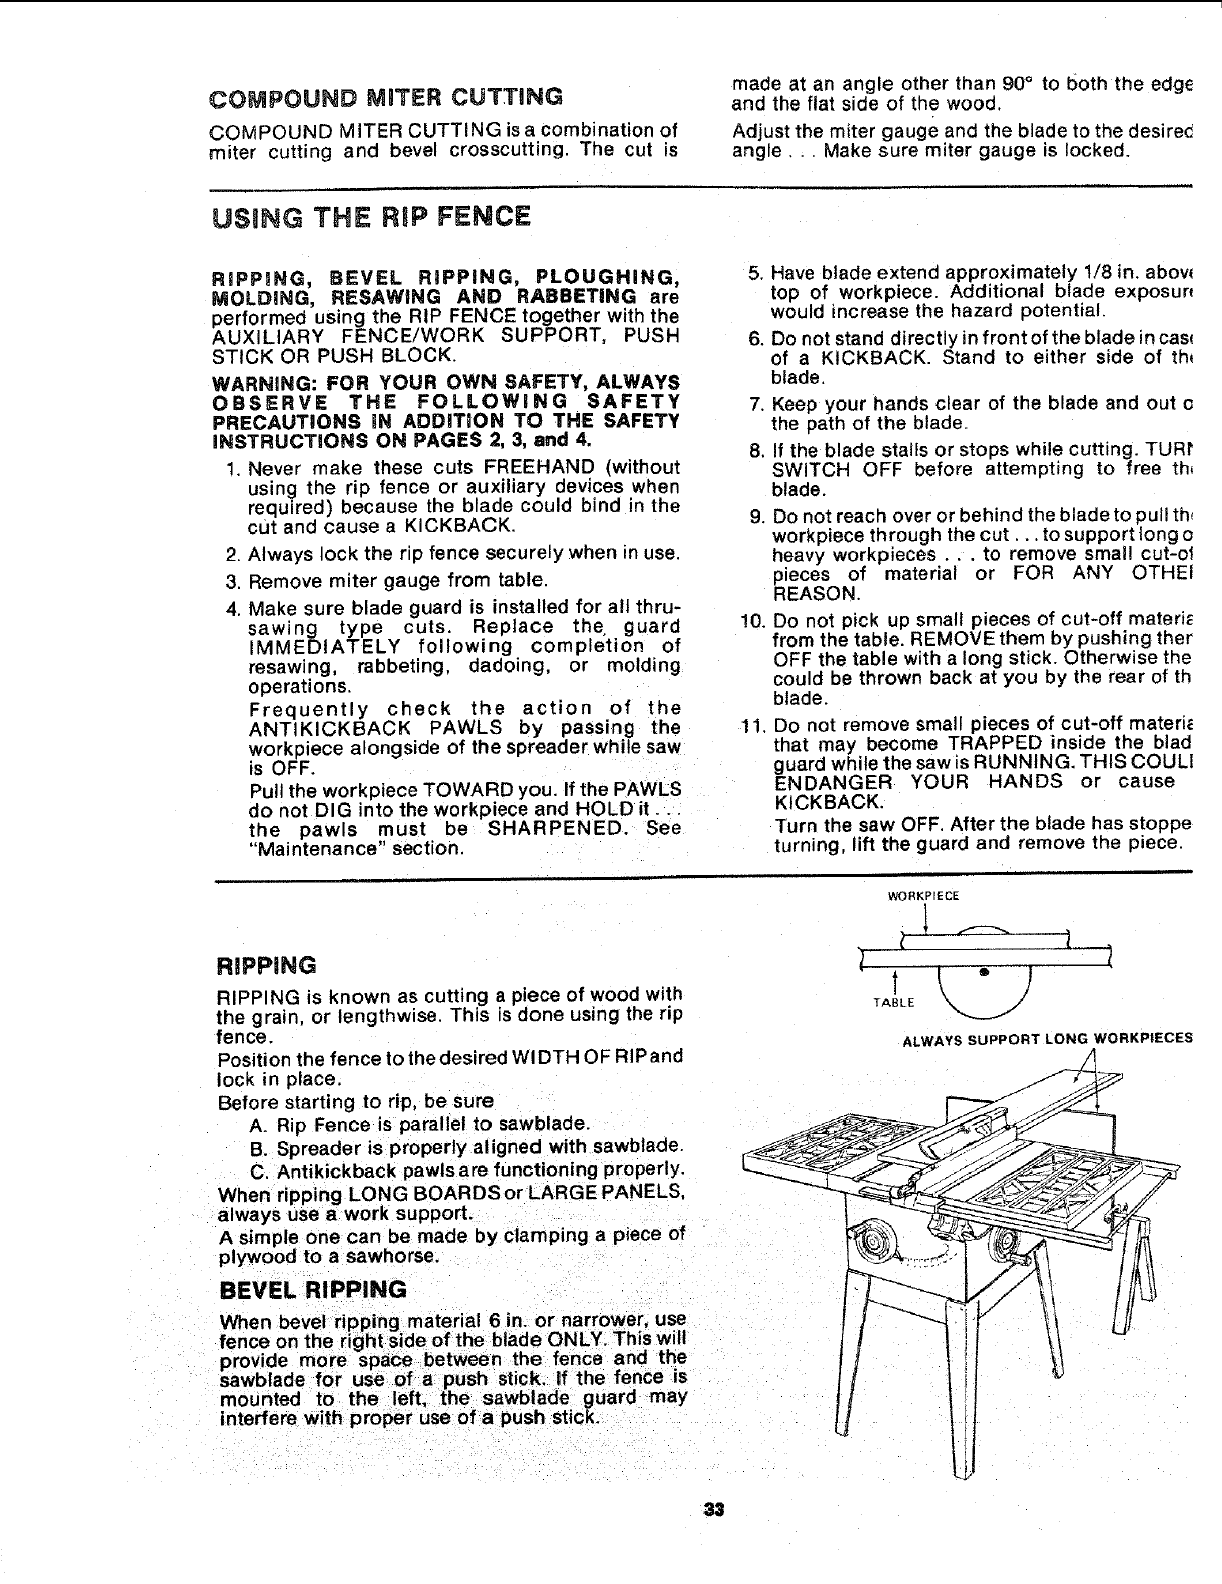
When ri pping LONG BOARDS or LARGE PANELS.
always use a we rk support ....
A simple one can be made by clamping a piece of
plywood to a sawhorse.
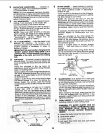
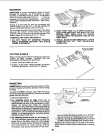
BEVEL RIPPING
fWhen bevel ripping material 6 in. or narrower, use
ence on the right side of the blade ONLY. This will
mounted to the left, the sawblade guard may
interfere with proper use of a push stick.
WORKPIECE
IF-.
L " )
TABLE
ALWAYS SUPPORT LONG WORKPIECES
33