


-20-
W1668 13
1
⁄4" Oscillating Drill Press
ADJUSTMENTS
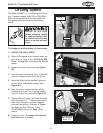
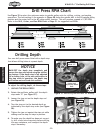
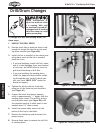
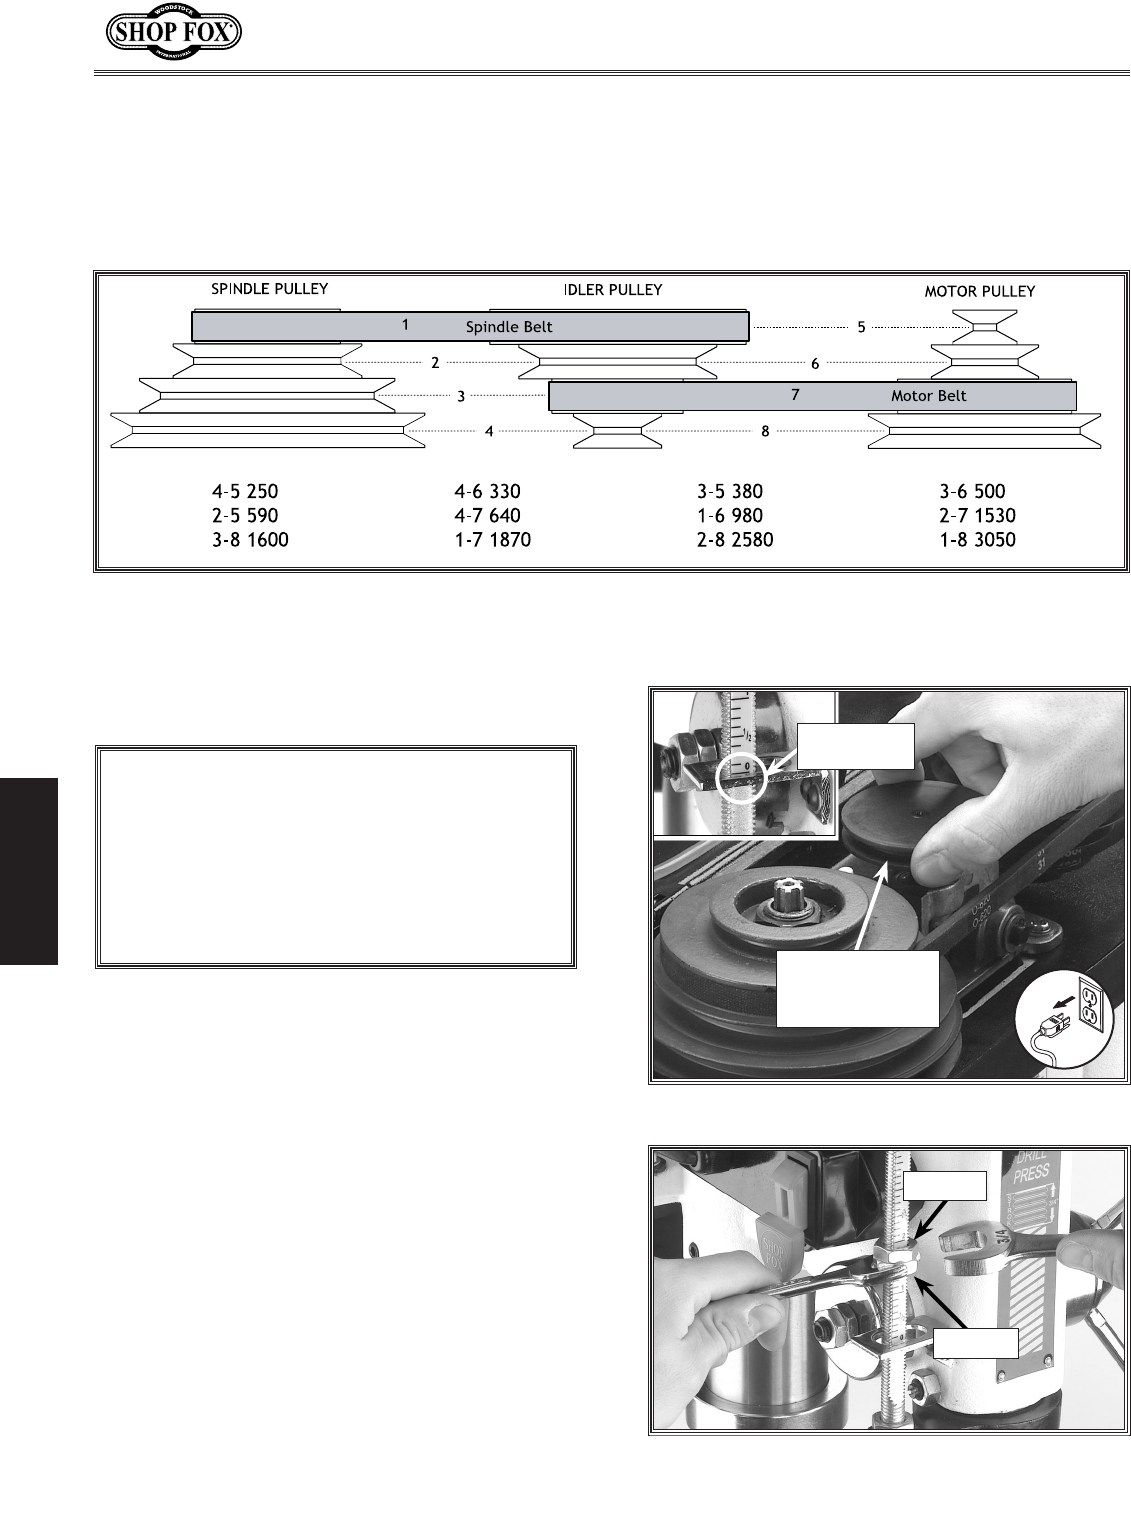
Use Figure 35 to select the optimum motor-to-spindle pulley ratio for drilling, cutting, and sanding
operations. The belt setting in the example in Figure 36 shows the spindle belt in the #1 spindle pulley
position and the motor belt in the #7 motor pulley location. This will produce a speed of 1,870 RPM.
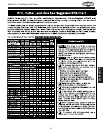
Refer to the Drill, Cutter, and Saw RPM Chart on Page 21 for suggested tool RPMs.
Figure 36. Drill Press RPM Chart.
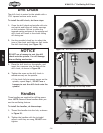
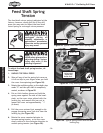
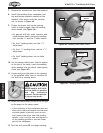
Your new drill press comes fitted with a depth stop
that allows drilling holes at a preset depth.
To adjust the drilling depth, do these steps:
1. UNPLUG THE DRILL PRESS!
2. Rotate the oscillator pulley until the depth
stop reads “0” (see Figure 37).
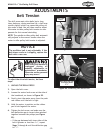
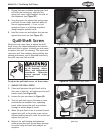
3. Loosen the jam nut on the depth stop rod
(see Figure 38).
4. Turn the stop nut to the desired depth as
indicated by the depth stop scale (see Figure
38).
5. Tighten the jam nut against the stop nut while
making sure the stop nut stays in position.
6. To make sure the depth has been set correct-
ly, drill a hole into scrap stock before drilling
into any workpiece, and readjust the depth
stop if necessary.
Drilling Depth
NOTICE
BACK-OFF the depth stop completely and
secure the stop nuts before using the oscillat-
ing feature. If the depth stop is left adjusted
for a shallow hole, or the nuts rattle down to
the stop while in operation, the depth stop
will bottom out and break the oscillator.
Drill Press RPM Chart
Figure 38. Actual stop depth being measured.
Jam Nut
Stop Nut
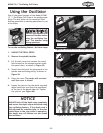
Rotate Oscillator
Pulley Until
Depth Stop Reads
Zero.
Depth Stop
Reads “0”
Figure 37. Retracting the oscillator for drilling.