


-26-
For Machines Mfg. Since 8/11
Model SB1001 8K
™
Lathe
OPERATION
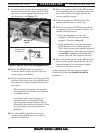
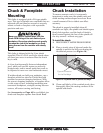
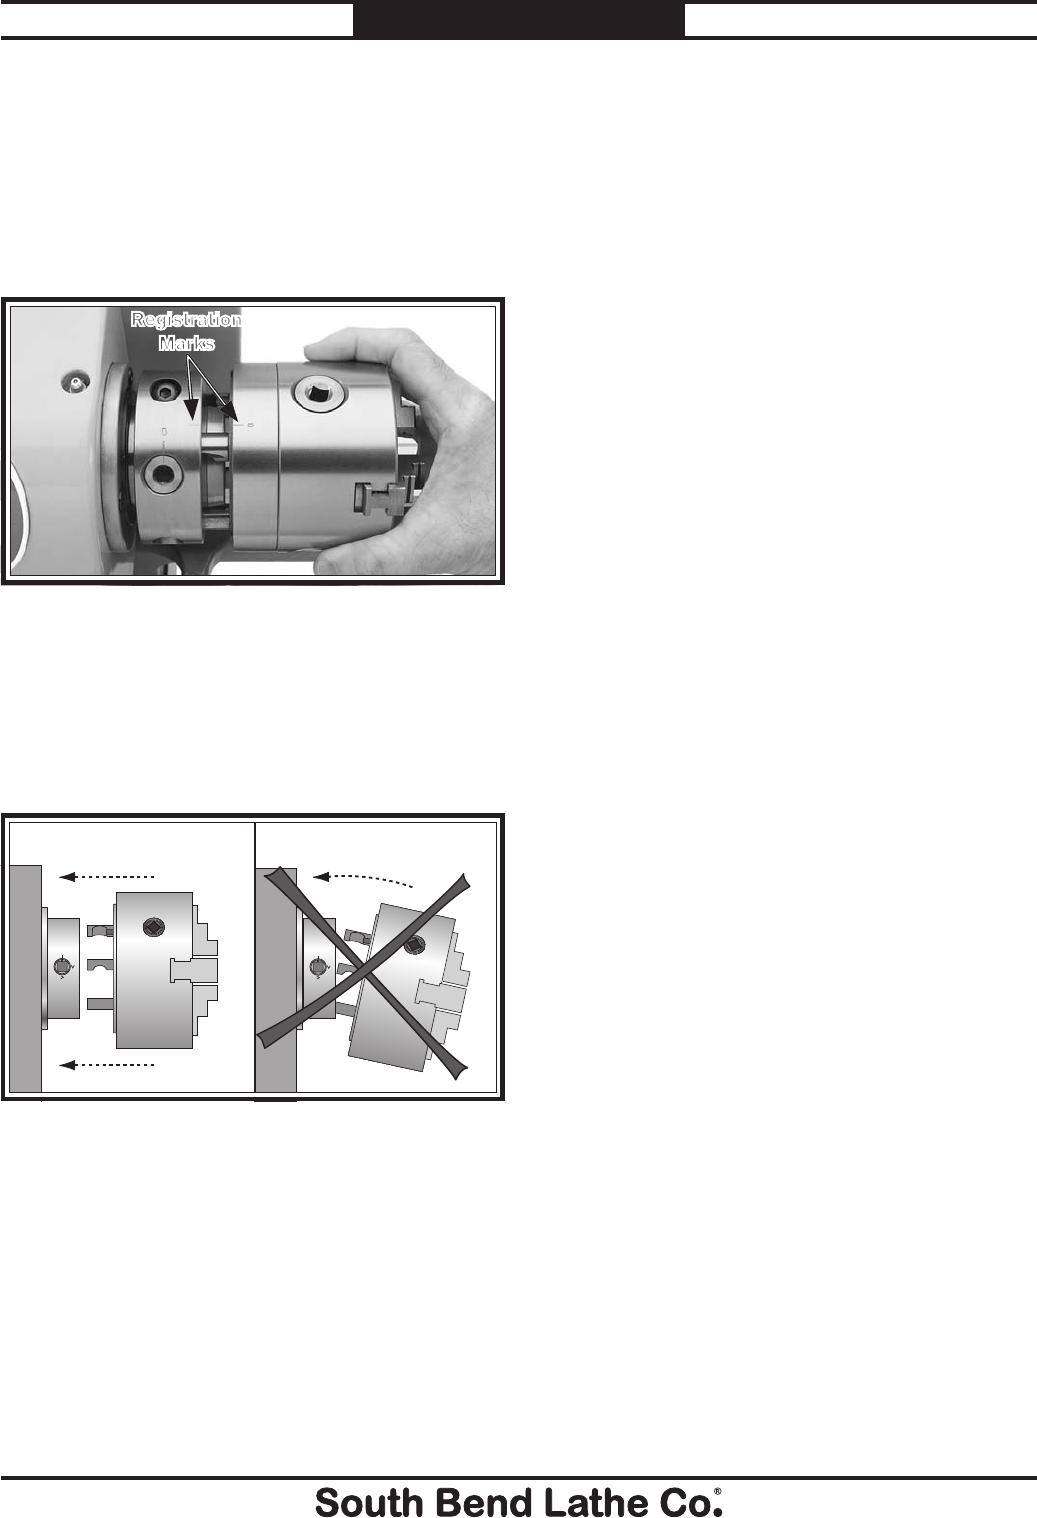
4. Align the registration mark on the chuck
(see Figure 19) with the one on the spindle.
Note: The camlock studs were adjusted at the
factory to correctly fit the corresponding
spindle cam hole, then the registration
marks were made so that the chuck can be
mounted with the same alignment each time.
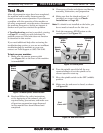
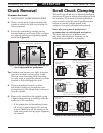
Figure 20. Inserting camlock studs into spindle cam
holes.
INCORRECTCORRECT
5. Install the chuck by inserting the camlock
studs straight into the spindle cam holes.
Important: Avoid inserting the studs at an
angle—this can damage studs or spindle cam
holes.
6. Incrementally tighten the camlocks in a
criss-cross or star pattern to ensure that the
chuck seats evenly against the spindle.
7. When the chuck is fully seated and all the
camlocks are tight, verify that the chuck fits
the spindle properly by checking for any gaps
between the mating surfaces.
— If there are no gaps, proceed to Step 8.
— If there is a gap, remove the chuck, re-
clean the mating surfaces carefully, and
re-install. If the problem persists, contact
our Tech Support.
8. Verify that the chuck/spindle tapers are
seated firmly together by removing the
chuck, per the Chuck Removal instructions
on the next page, and pay close attention to
how easily the tapers release.
— If it was necessary to bump the chuck or
use a mallet to release the tapers, then
they are seating together properly.
— If the tapers released easily with little
intervention, they are not seated together
firmly as required. Remove the chuck, re-
clean the mating surfaces carefully, and
re-install. If the problem persists, contact
our Tech Support.
Figure 19. Chuck and spindle registration marks.
Registration
Marks