


-34-
For Machines Mfg. Since 8/11
Model SB1001 8K
™
Lathe
OPERATION
Mounting Center in Spindle
1. DISCONNECT LATHE FROM POWER!
2. If mounted, remove the chuck, then mount
the optional SB1469 faceplate onto the
spindle.
2. Thoroughly clean and dry the tapered
mating surfaces of the spindle bore, tapered
spindle sleeve, and the MT#3 center, making
sure that no lint or oil remains on the tapers.
3. Insert the MT#3 dead center into the tapered
spindle sleeve, then insert the sleeve into the
spindle bore through the faceplate.
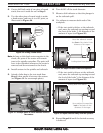
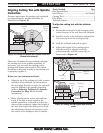
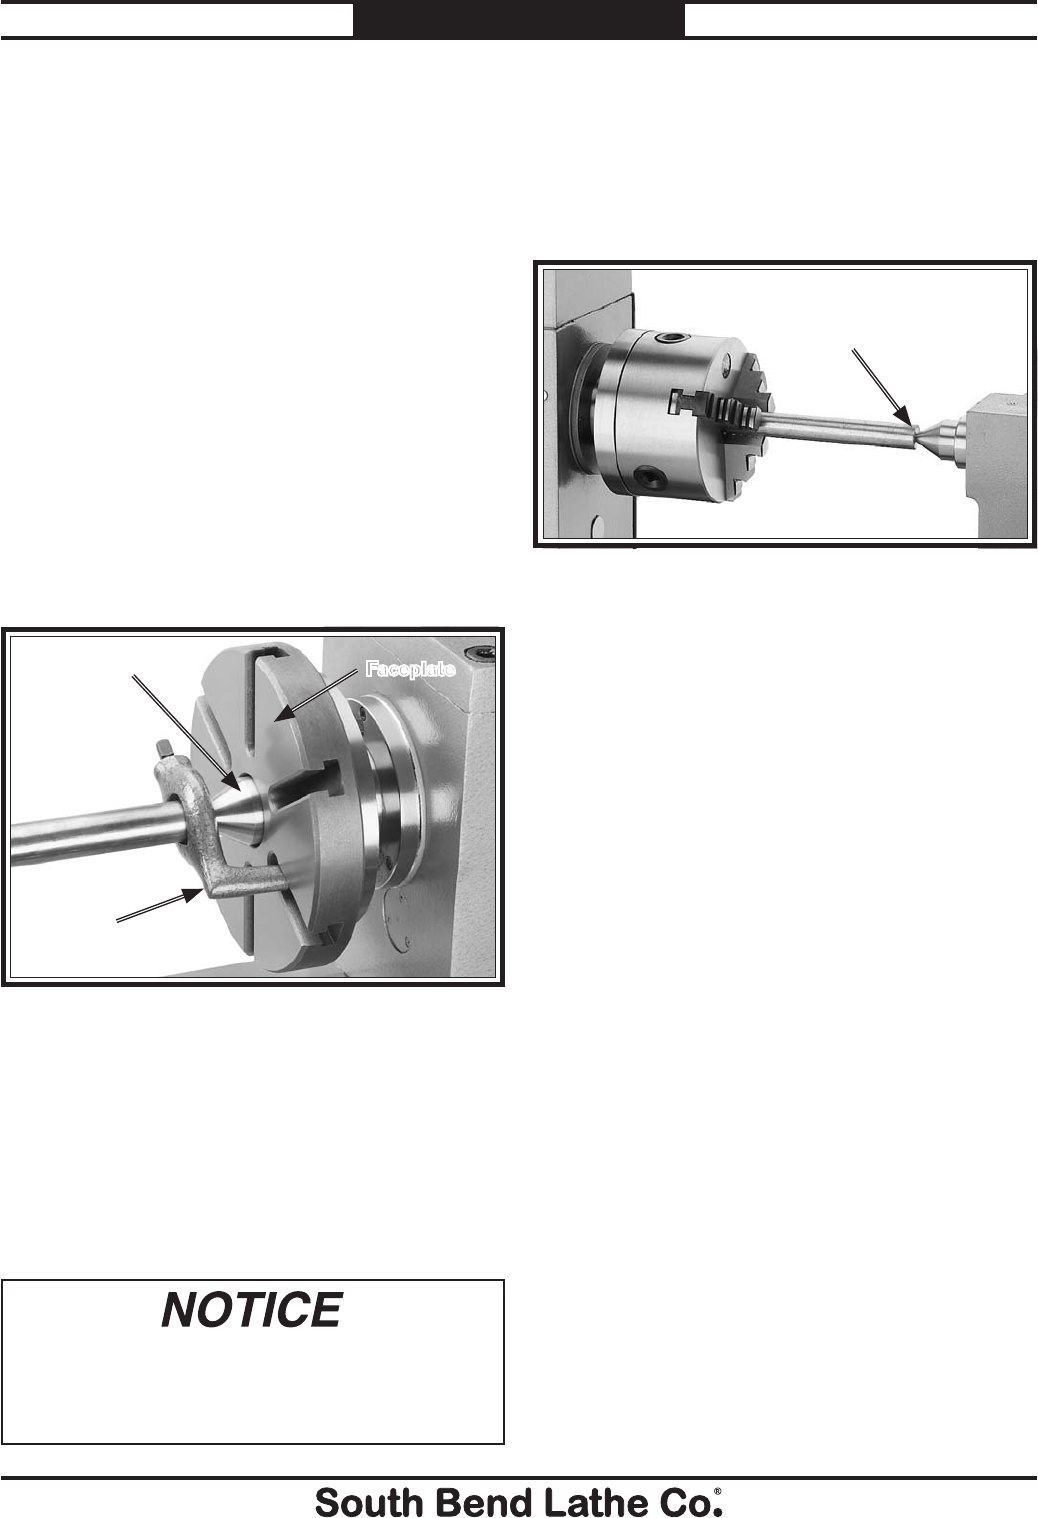
Figure 36 shows an example photo of a
dead center installed in the spindle, using a
lathe dog and faceplate for turning between
centers.
Figure 36. Example photo of using a dead center with
a faceplate and lathe dog.
Dead Center
Lathe
Dog
Faceplate
Removing Center from Spindle
To remove the sleeve and center from the
spindle, insert a piece of round bar stock or
similar tool through the outboard end (on the left
side of the headstock). Hold onto the sleeve and
center with a gloved hand or shop rag, then tap
the sleeve loose.
To avoid premature wear of the dead center
or damage to the workpiece, use low spindle
speeds and keep the tip of the dead center
mounted in the tailstock well lubricated.
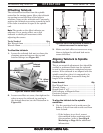
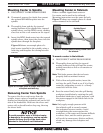
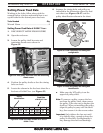
Mounting Center in Tailstock
Either a carbide-tipped dead center or
live center can be used in the tailstock.
Mounting instructions are the same for both.
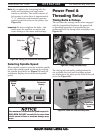
Figure 37 shows an example photo of a dead
center mounted in the tailstock.
To mount a center in the tailstock:
1. DISCONNECT LATHE FROM POWER!
2. Thoroughly clean and dry the tapered
mating surfaces of the quill and the center,
making sure that no lint or oil remains on
the tapers.
Note: This helps ensure that the tool seats
properly and has minimal runout.
3. With a firm and quick motion, insert the
tool into the quill. Check to see if it is firmly
seated by attempting to twist it—a firmly
seated tool will not twist.
4. Seat the center firmly into the quill during
workpiece installation by rotating the quill
handwheel clockwise to apply pressure, with
the center engaged in the center hole in the
workpiece.
Note: Only apply enough pressure with
the tailstock quill to securely mount
the workpiece between centers. Avoid
overtightening the center against the
workpiece, or the center may become difficult
to remove later, and the excess pressure
will result in unnecessary friction and heat,
which may damage the workpiece and
center.
Figure 37. Example photo of using a dead center in
the tailstock.
Carbide-Tipped
Dead Center