


-42-
For Machines Mfg. Since 8/11
Model SB1001 8K
™
Lathe
OPERATION
b. Install 48T pulleys on the upper right (B
pulley shaft) and the lower right pulley
shaft.
c. Install the 15T pulley on the B pulley
shaft (upper right).
d. Install the 20T pulley on the C pulley
shaft, then place the 120XL timing belt
between this pulley and the 48T pulley
on the lower right.
e. Place the 140XL timing belt on the
upper left 16T and 48T pulley on the B
pulley shaft.
f. Install the 48T pulley on the C pulley
shaft, then place the 120XL timing belt
between this pulley and the 15T on the
B pulley shaft.
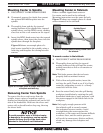
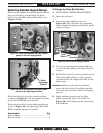
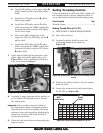
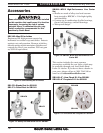
7. Apply upward and forward pressure to the
upper right and middle right pulleys (see
Figure 58) as you re-tighten the shaft hex
nuts you loosened in Step 3.
8. Continue to apply pressure on the pulleys as
you re-tighten the thumb screw to tension
the timing belts.
Important: Leave a slight amount of slack in
the timing belts when securing the pulleys.
Adjusting the tension too tightly will cause
excessive wear and stretching. Adjusting the
tension too loosely could cause the belt to
slip during operation.
9. Close the end cover before re-connecting the
lathe to power.
Setting Threading Controls
Using the controls on the lathe, follow along with
the example below to better understand how to
set up the lathe for the desired threading setup.
Tools Needed Qty
Wrench 13mm .......................................................2
Setting Thread Pitch of 12 TPI
1. DISCONNECT LATHE FROM POWER!
2. Open the end cover.
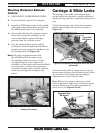
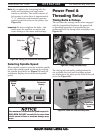
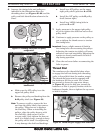
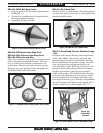
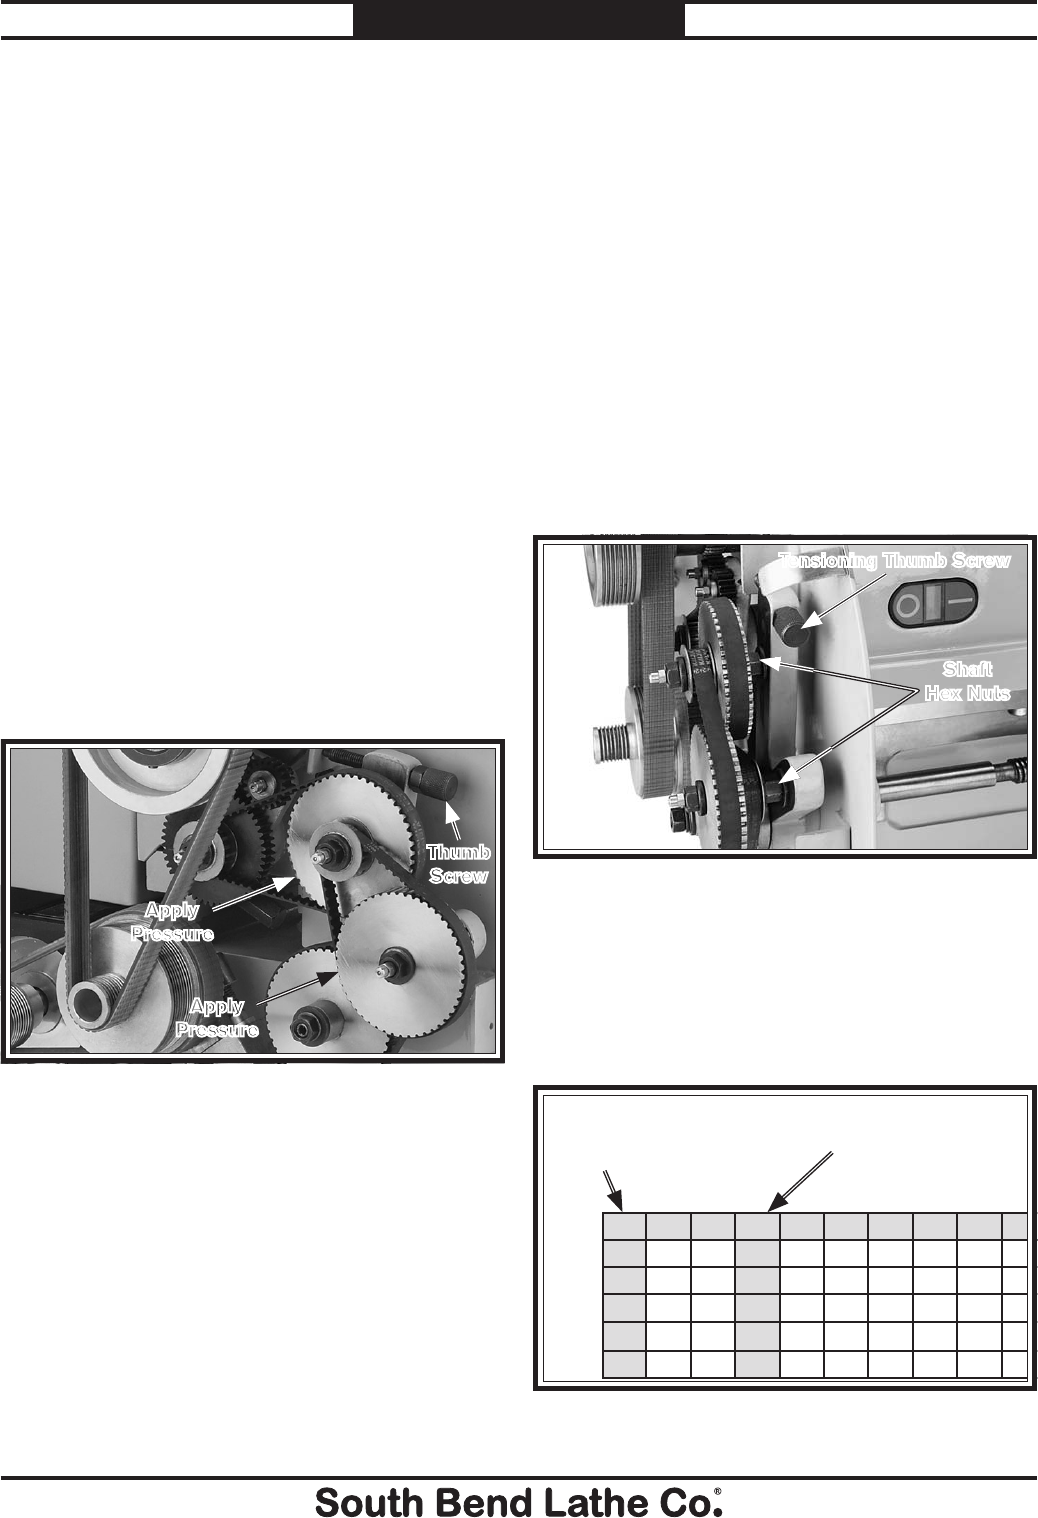
3. Loosen the pulley shaft hex nuts and
tensioning thumb screw shown in
Figure 59.
4. Position the pulley shafts so that the timing
belts are loose.
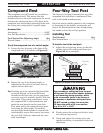
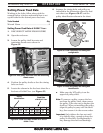
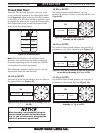
5. Locate the column in the inch thread chart
for 12 TPI (see Figure 60).
Figure 60. Thread chart example for 12 TPI.
F 140 120 140 140 140 140 120 120 120
in. 10 11 12 13 14 16 18 19 20
A 482448184848484848
B 483248244848323224
D152218262124181915
E 140 120 140 120 140 140 140 140 140
Pulley &
Belt
Identification
12 TPI
Thread
Pitch
Figure 58. Locations to apply pressure on pulleys.
Apply
Pressure
Apply
Pressure
Thumb
Screw
Figure 59. Pulley shaft hex nuts and tensioning thumb
screw.
Shaft
Hex Nuts
Tensioning Thumb Screw