


-48-
For Machines Mfg. Since 7/09
EVS Toolroom Lathes
OPERATION
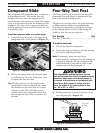
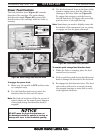
Note: Take care not to misplace the key from the
gear shaft.
b. Clean away debris and grime from the
gear and apply a light coat of machine
oil.
c. Swap the position of the gear, as shown
in Figure 87, then align it with the key
and insert it on the gear shaft.
d. Re-install the flat washer and cap screw.
Note: DO NOT overtighten the cap screw. The
cap screw merely holds the gear in place
and overtightening it will make it harder to
remove later and may restrict its rotation.
4. Close and secure the headstock side cover.
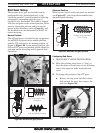
Half Nut Lever
The half nut lever engages the carriage with the
leadscrew which moves the cutting tool along the
length of the workpiece (see Figure 89).
When threading, we recommend using the
slowest speed possible and avoiding deep
cuts, so you are able to disengage the half nut
and prevent an apron crash!
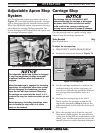
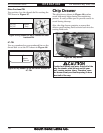
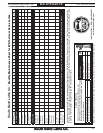
Figure 90. Feed control lever and half nut positions
for threading.
Threading Controls
If you are unfamiliar with how to cut threads on
a lathe, we strongly recommend that you read
books, review industry trade magazines, or get
formal training before beginning any attempting
any threading projects.
Power Feed Lever
The feed control lever must be in the neutral
(horizontal) position for threading operations or
the half nut will not engage with the leadscrew
(see Figures 89–90).
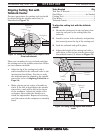
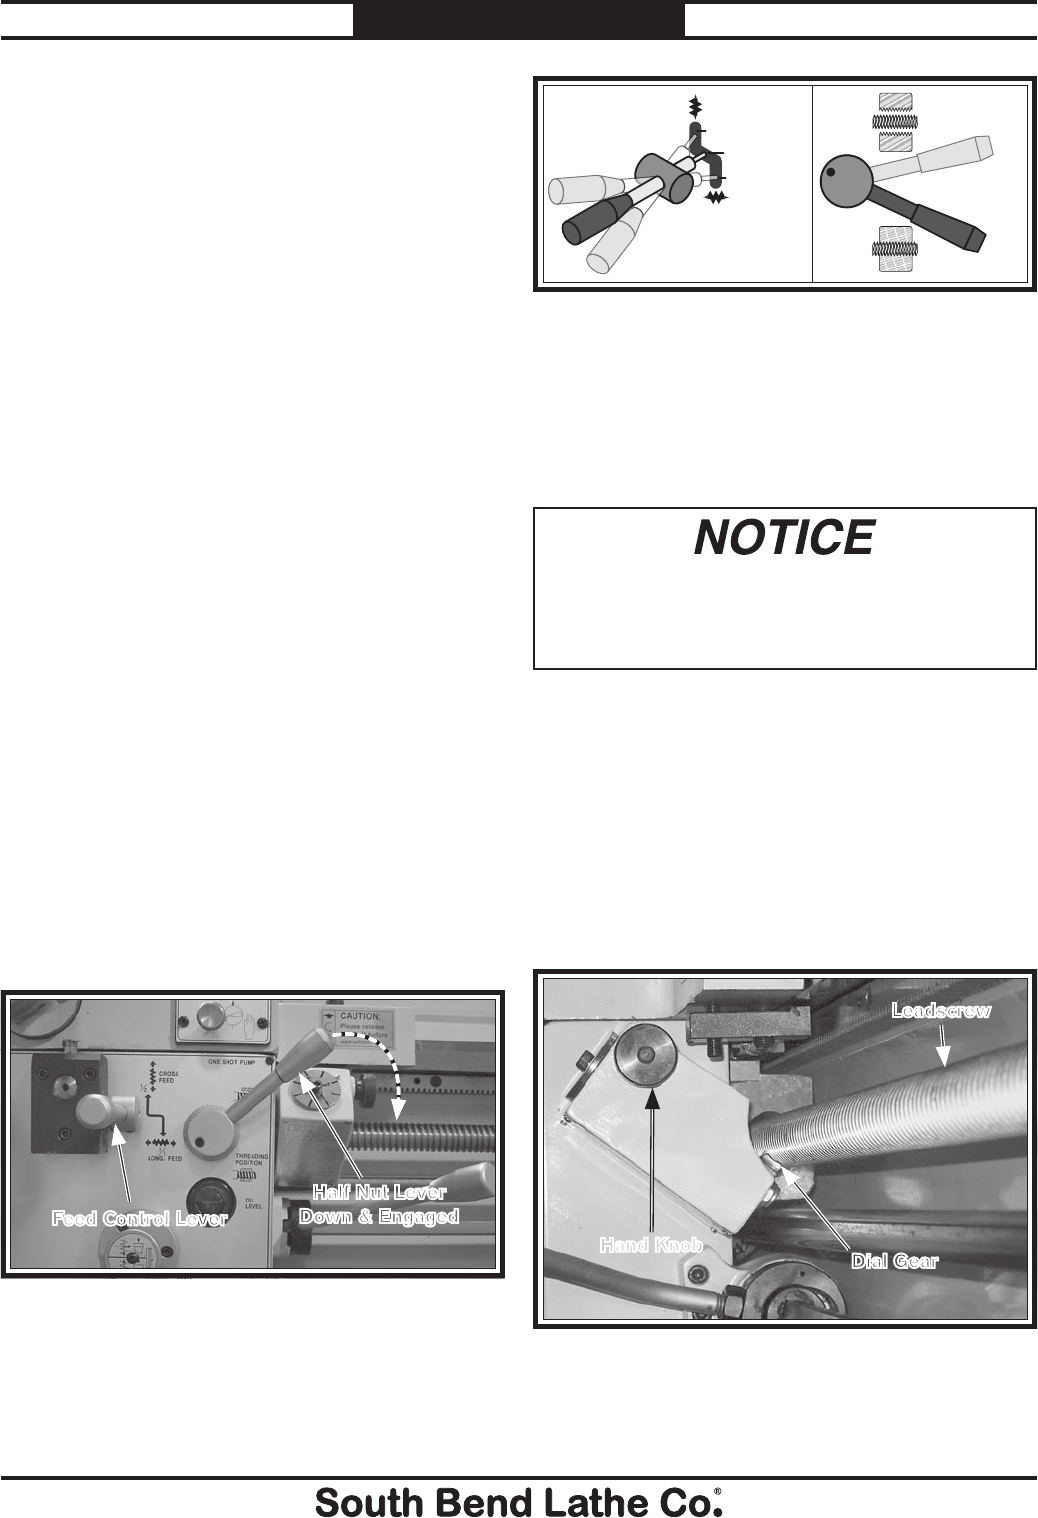
Figure 89. Carriage controls set up for threading.
Half Nut Lever
Down & Engaged
Feed Control Lever
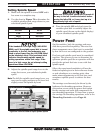
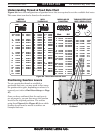
Thread Dial & Chart Overview
The numbers on the thread dial are used with
the thread dial chart to show when to engage the
half nut during inch threading. The thread dial
gear must be engaged with the leadscrew for this
to work. Loosen the knurled hand knob on the
thread dial, pivot the dial gear into mesh with
the leadscrew, then tighten the hand knob (see
Figure 91).
Figure 91. Thread dial engaged with the leadscrew.
Leadscrew
Hand Knob
Dial Gear
Engaged
Disengaged
Cross Slide
Neutral
FEED CONTROL
LEVER
Carriage