18
WAGNER Project Pro 117 - 0418B
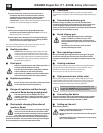
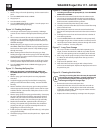
B) Startup
1. Remove the gun from the plastic bag. Stir the water into the
paint.
2. Turn the PRIME/SPRAY knob to PRIME.
3. Plug sprayer in.
4. Turn the switch to ON (I).
5. Turn the PRIME/SPRAY knob to SPRAY. Test the sprayer on a
practice piece and begin spraying.
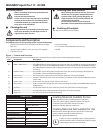
Figure 14 - Flushing the System
1. Lock the gun and remove spray tip assembly. Submerge
suction set into a bucket with appropriate cleaning solution
(a).
2. Place a waste container (b) next to the original material
container (c). The containers should be touching. Aim the
spray gun into the side of the original material container (c)
and hold the trigger.
3. While pulling the gun trigger, turn the pump ON (l), and turn
the PRIME/ SPRAY knob to SPRAY to purge material from the
hose back into the original container. Keep holding trigger
through next steps.
4. When cleaning solution ows from the spray gun, keep
holding the trigger and aim the spray gun into the side of the
waste container (ground gun with a metal container if ushing
with ammable solvent).
5. Trigger the gun until the uid owing out of the gun is clear.
You may need to dispose and obtain new cleaning solution.
6. Turn the PRIME/SPRAY knob to PRIME and trigger gun to
relieve pressure.
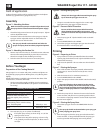
Figure 15 - Cleaning the Spray Gun
1. Make sure the pump is switched OFF (O). Make sure
the PRIME/SPRAY knob is turned to PRIME. Unplug the
sprayer.
2. Remove spray gun from the paint hose using adjustable
wrenches.
3. Unclip the trigger guard (a) from the lter housing (b) by
pulling outward from the lter housing. Unscrew the lter
housing.
4. Remove the lter (c) from the spray gun housing and clean
with the appropriate cleaning solution (warm suds for water-
soluble materials, solvents with a ash point of over 21°C for
solvent-based spray).
5. Remove spray tip (d) from spray guard assembly. Clean spray
tip with a soft-bristled brush and the appropriate cleaning
solution. Be sure to remove and clean the washer (e) and
saddle seat (f) located in the rear of the spray tip assembly.
6. Replace the cleaned lter, tapered end rst, into the gun
housing. The tapered end (g) of the lter must be loaded
properly into the gun. Improper assembly will result in a
plugged tip or no ow from the gun.
7. Install spray tip (d), saddle seat (f) and washer (e), and replace
spray guard assembly.
8. Thread the spray gun back onto the paint hose. Tighten with
a wrench.
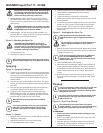
Figure 16 - Cleaning the Suction Set
1. Lock the gun and turn the pump OFF (O). Turn the PRIME/
SPRAY knob to PRIME.
2. Remove the suction hose from the inlet valve. Remove the
return hose, by pushing the blue circlip ring up and pulling
the hose down simultaneously. Coarsely clean the outside of
both hoses with a suitable cleaning solution.
3. Clean the thread of the inlet valve (a) with a cloth.
4. Carefully remove the lter disc (b) from the suction lter using
pliers, and clean both.
5. After cleaning the suction unit screw the suction hose back onto
the inlet valve and replace the return hose in the return connection
piece.
6. Submerge the suction hose and return tube into a bucket of
new cleaning solution.
7. Turn the PRIME/SPRAY knob to PRIME. Turn the pump ON (l),
and trigger the gun into a waste container to relieve pressure.
8. Let the pump circlulate cleaning solution through the suction
set for 2-3 minutes. Turn the pump OFF.
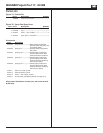
Figure 17 - Long-Term Storage
1. Fill a cup or another container with a little separating oil or
a light, common household oil. Hold the cup under the inlet
valve. The valve opening must be completely in the oil bath.
2. Place a rag over the spray hose port, and turn the switch ON
(l). When the oil has been pumped from the cup, turn the
pump OFF (O).
3. Fully insert the Quicko™ valve.
4. Wipe the entire unit, hose and gun with a damp cloth to
remove accumulated paint. Replace the high pressure hose to
the paint hose port.
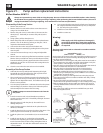
Figure 18 - Cleaning the Inlet Valve
i
Cleaning or servicing the inlet valve may be required if
the unit has priming problems. Priming problems may
be prevented by properly cleaning the sprayer and
following the long-term storage steps.
1. Remove the suction hose and return tube.
2. Remove the inlet valve unit (a) from the basic unit with an
adjustable wrench. Visually inspect the inside and outside
of the inlet valve assembly. Clean any paint residue with the
appropriate cleaning solution.
3. Replace inlet valve assembly by screwing it into the sprayer.


