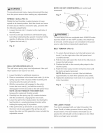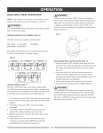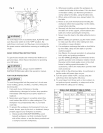
[AWARNING I
AVOID DIRECT EYE CONTACT
A Laser light is radiated when the laser guide is turned
on. Avoid direct eye contact. Always un=plug the
drill press from the power source before making any
adjustments.
A laser pointer is not a toy and should not come into
hands of children. Misuse of this appliance can lead
to irreparable eye injuries.
Any adjustment to increase the laser power is
forbidden.
When using the laser pointer, do not point the laser
beam towards people and/or reflecting surfaces.
Even a laser beam of lower intensity may cause eye
damage. Therefore, do not look directly into the laser
beam.
If the laser pointer is stored for more than three
months without use, please remove the batteries to
avoid damage from possibly leaking batteries.
The laser pointer includes no servicing components.
Never open the housing for repair or adjustments.
On units equipped with the laser attachment, repairs
shall only be carried out by the laser manufacturer or
an authorized agent.
Laser Warning label: Max output <1mW DIODE
LASER:630=670nm, Complies with 21CFR 1040.10
and 1040. 11.
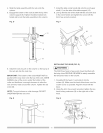
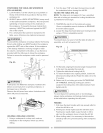
4_ Once adjustments are completed, retighten the four
screws (4)_
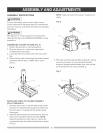
Fig. R
4
3
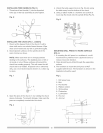
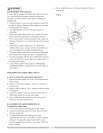
ADJUSTING THE LASER LINES ( FIG. R)
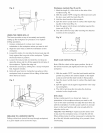
A. How to check the Laser-beam Alignment?
1. Adjust the table height so it is 5 in. below the bottom
of the chuck.
2. Scribe a round circle (approx. 1/8 in.) on a piece of
scrap wood.
3. insert a drill bit approx 1/8 in. diameter into the chuck
and tighten.
4. Lower the quill and align the scribed circle with the
drill bit and fasten the wood to the table.
5. Turn on the laser and verify the laser lines (x) are
centered onto the scribed circle.
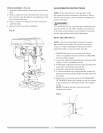
B. ALIGNING THE LASER-BEAM (FIG. R)
To adjust the laser lines:
1. Turn on the laser by pressing the rocker switch.
2. Lower the drill press quil! and loosen one turn each
the four screws (4).
3. To adjust the laser beam left/right, turn the
adjustment screw (1) no more than 1/8 turn in either
direction. To adjust the laser beam front to back,
turn the adjusting screw (2) no more than 1/8 turn in
either direction.
15


