


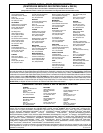
Fig. 41
CORRECT
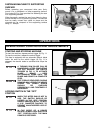
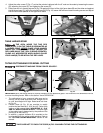
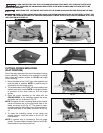
CUTTING BOWED MATERIAL
1. Check the workpiece. If it is bowed, position the workpiece on the table as shown in Fig. 41.
2. When the workpiece is positioned the wrong way (Fig. 42), it will pinch the blade near the completion of the cut.
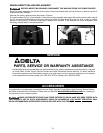
Fig. 39
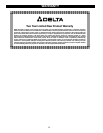
Fig. 40
FENCE
FENCE
BLADE
BLADE
16
CORRECT
INCORRECT
Fig. 42
INCORRECT
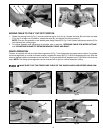
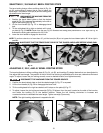
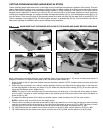
CUTTING ALUMINUM
TO REDUCE THE RISK OF INJURY, USE THE PROPER BLADE WHEN CUTTING THIS TYPE OF
MATERIAL.
Aluminum extrusions (aluminum screens and storm windows) can easily be cut with your miter saw. When cutting
aluminum extrusions, or other sections that can be cut with a saw blade and are within the capacity of the machine,
position the material so that the blade is cutting through the smallest cross-section, as shown in Fig. 39. The wrong way
to cut aluminum angles is illustrated in Fig. 40. Be sure to apply a stick wax (similar to Johnson’s stick wax #140) to the
blade before cutting any aluminum stock. This stick wax is available at most industrial mill supply houses. The stick wax
provides proper lubrication and keeps chips from adhering to the blade.
NEVER APPLY LUBRICANT TO THE BLADE WHILE THE SAW IS RUNNING.
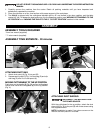
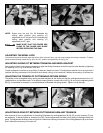
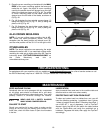
AUXILIARY FENCE SPACER
This machine is supplied with new design features that increase cutting capacity. The unit can (1) crosscut 4" x 6"
dimensional lumber at 0° miter and 0° bevel, (2) miter left and right 45° 4" x 4" dimensional lumber, and (3) bevel right
45° 2" x 8" dimensional lumber with a user provided spacer (A) Fig. 38.
NOTE: The spacer can be made from a 2" x 4" or any other 2" material as shown in Fig. 38.
C
B
A
C
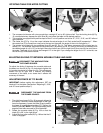
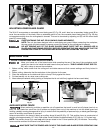
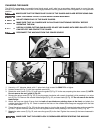
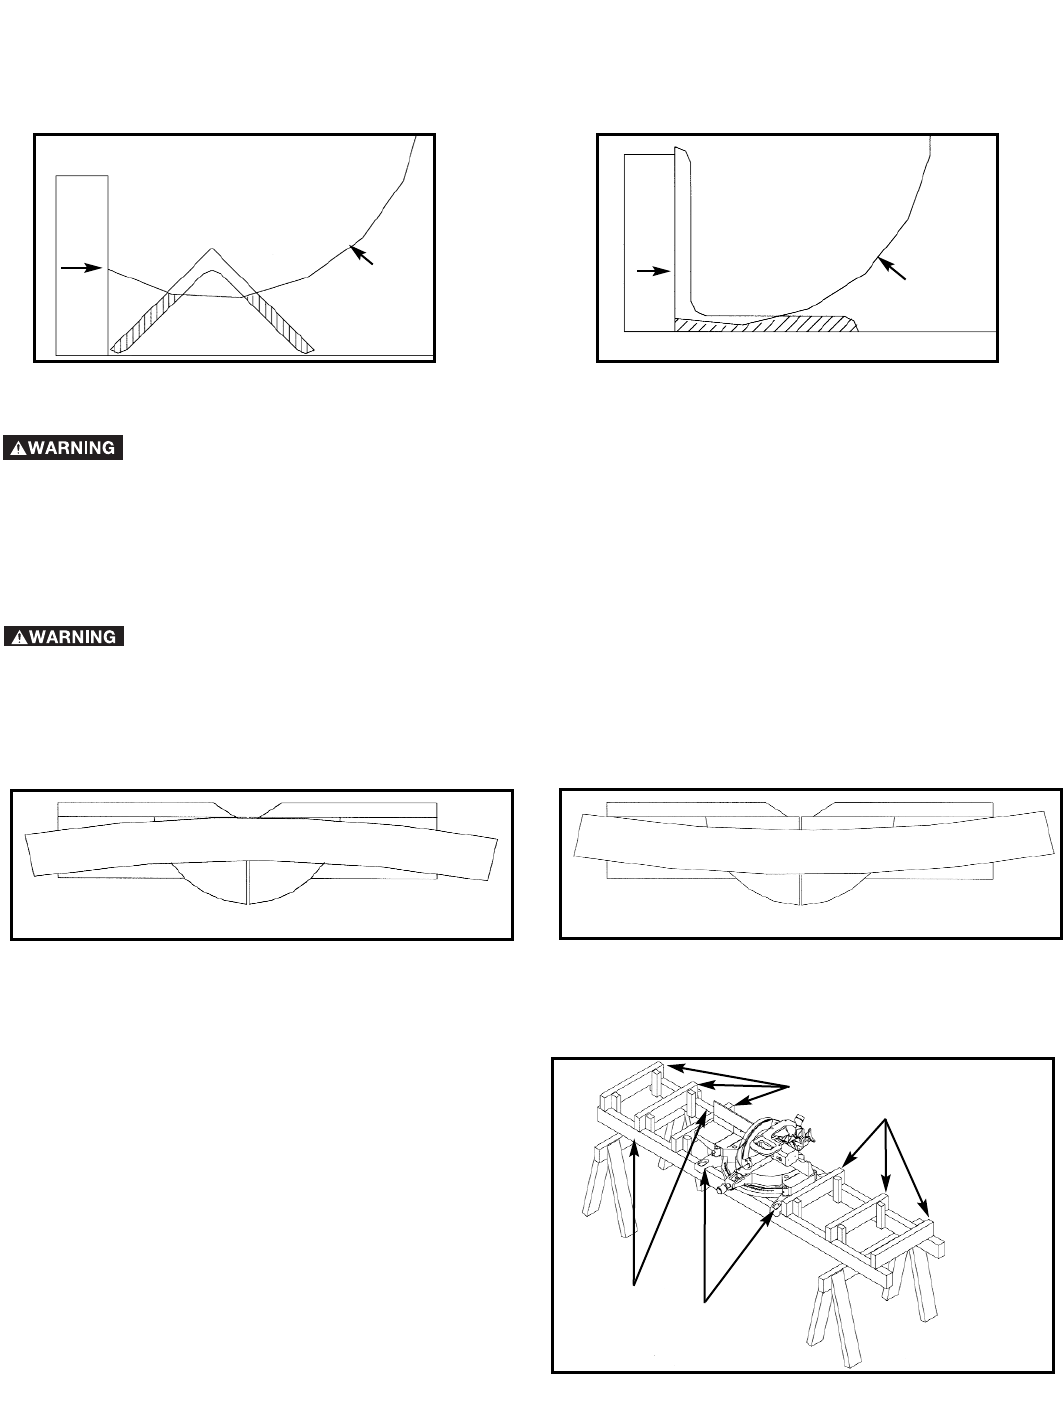
CONSTRUCTING WORK SUPPORT EXTENSIONS
Fig. 42A
For support when cutting long pieces, construct a work
support extension. Fig. 42A illustrates the miter saw
mounted on two standard 2 x 4’s (A). Fasten the four
mounting legs (two of which are shown at (B) Fig. 42A
to the 2 x 4’s, using four screws (not supplied) through
the four holes in the mounting legs. The length of the 2
x 4’s (A) can vary, depending on the workpiece.
NOTE: Make sure that the top of the support 2 x 4’s
(C) are level with the miter saw table.
This is critical because the distance from the top of the
2 x 4’s (A) to the miter saw table varies from saw to saw.
In most cases, standard 2 x 4’s (C) can used. If these
are too high, cut them to fit. If the 2 x 4’s are too low,
use 2 x 6’s. If these are high, cut them to the correct
height.