20
CHANGING THE BLADE
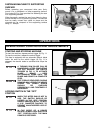
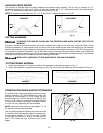
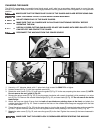
The 36-412 incorporates a moveable lower blade guard, and it also has a secondary blade guard to cover the rear
section of the blade. Make sure there is minimal gap between the two guards when the cuttinghead is in its uppermost
position.
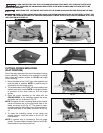
Fig. 52
E
G
C
D
H
J
Fig. 53
F
1. Use only a 12" diameter blade, with 1" arbor hole, that is rated for 5000 RPM or higher.
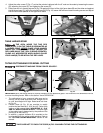
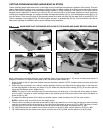
2. Loosen screws (A) Fig. 51 with the supplied wrench (B).
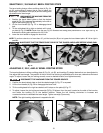
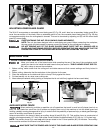
3. Rotate the arbor cover (C) Fig. 52, and move the guard (D) Fig. 52 to the rear, exposing the arbor screw (E). NOTE:
Do not remove the rear guard (J) Fig. 52.
4. Remove the arbor screw (E) Fig. 52, by turning screw clockwise with wrench (supplied), while pressing in on arbor
lock (F) Fig. 53. Remove the outside blade flange (G) Fig. 52, and saw blade (H) Fig. 52. Do not remove the inside
blade flange.
5. Attach the new saw blade. Ensure that the teeth of saw blade are pointing down at the front, and attach the
outside blade flange (G) Fig. 52. Check to see that the flats on the outside blade flange are engaged with the flats
on the arbor shaft.
6. Thread the arbor screw (E) Fig. 52, into the saw arbor by turning the screw (E) counterclockwise as far as possible
by hand. Tighten the arbor screw (E) with the supplied wrench while pressing in on the arbor lock (F) Fig. 53.
7. Rotate the arbor cover (C) Fig. 52, and move the guard (D) to the front.Tighten the screws (A) that were loosened in
STEP 2.
OVER-TIGHTENING THE NUT COULD IMPAIR GUARD MOVEMENT.
DO NOT REMOVE ANY OF THE BLADE GUARDS.
MAKE SURE THAT ALL GUARDS ARE IN PLACE AND FUNCTIONING PROPERLY BEFORE
OPERATING THE SAW.
USE ONLY CROSS-CUTTING SAW BLADES. DO NOT USE BLADES WITH DEEP GULLETS. THEY
CAN DEFLECT AND CONTACT THE GUARD.
DISCONNECT THE MACHINE FROM THE POWER SOURCE.
MAKE SURE THAT THE ARBOR LOCK IS DISENGAGED BEFORE STARTING THE MACHINE.
MAKE SURE THAT THE FENCES ARE CLEAR OF THE GUARD AND BLADE BEFORE USING SAW.
Fig. 51
B
A


