12
307–758
OPERATION
Use this procedure each time you start the sprayer to
help
ensure the sprayer
is ready to operate and that you
start
it safely
.
WARNING
To
reduce the risk of serious injury
, follow the illus
-
trated Pressure Relief Procedure warning on
page
4 whenever you are instructed
to relieve pres
-
sure.
NOTE: Flush
the sprayer if this is a first-time startup.
See page 15.
NOTE:
See Fig 12–2 except where noted.
1.
Plug in the sprayer
.
2.
Close the pressure drain valve.
3. Put the suction tube into the paint container.
4. Turn the pressure adjusting knob fully counter-
clockwise
to minimum pressure.
CAUTION
Do
not run the pump without fluid in it for more
than
30 seconds to avoid damage to the displacement
pump
packings.
0143
WARNING
To reduce the risk of static sparking and splashing
when
flushing, always remove the spray tip from the
gun
and hold a metal part of the gun firmly to the side
of
a grounded metal pail.
6.
Prime the pump
.
a.
Open the pressure drain valve. Turn on the
sprayer.
Slowly turn the pressure adjusting knob
clockwise until the sprayer starts. When fluid
comes
from the drain hose, close the valve.
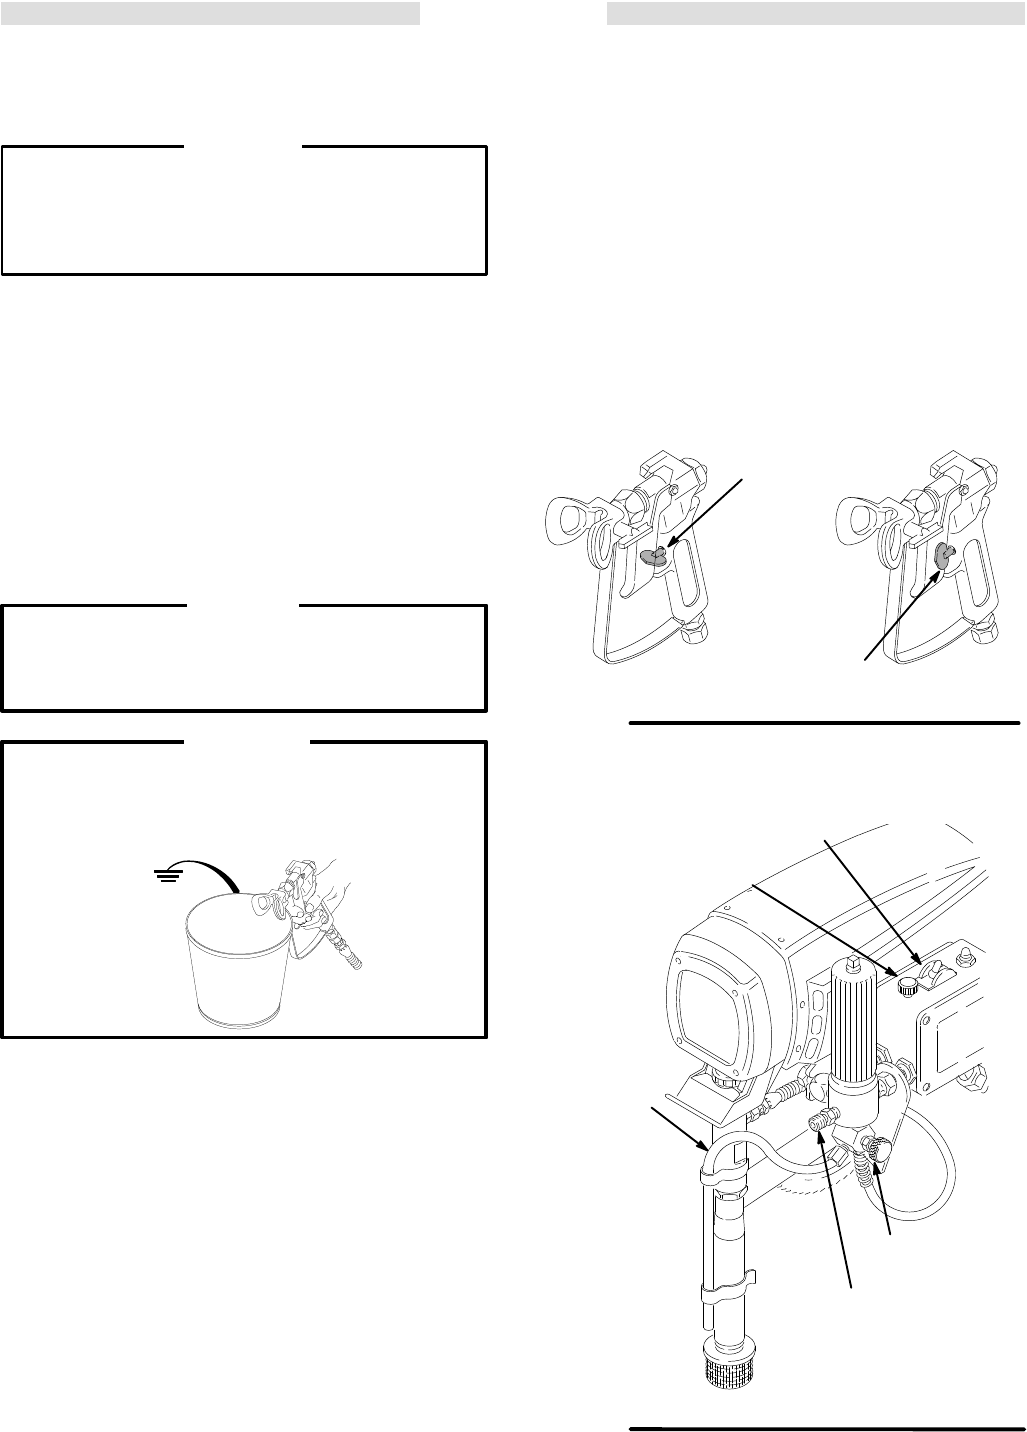
b. Disengage the gun safety latch. See Fig 12–1.
Following the warning, above, trigger the gun
until all air is forced out of the system and the
paint
flows freely from the gun.
c. Release
the trigger
.
Engage the gun safety latch.
7. Check
all fluid connections for leaks
. Relieve the
fluid
pressure before tightening connections.
8.
Install
the spray tip and tip guard.
Engage the gun
safety latch. See Fig 12–1. Install the spray tip
according
to the instructions supplied with it.
9.
Adjust the spray pattern
a. Increase the pressure just until spray from the
gun is completely atomized. Use the lowest
pressure
needed to
get the desired results. This
reduces over spray and fogging, decreases tip
wear
and extends the life of the sprayer
.
b.
If more coverage is needed, use a larger tip
rather
than increasing the pressure.
c.
Test the spray pattern. To adjust the pattern,
engage
the gun safety latch, loosen the
retaining
nut.
Position the tip guard horizontally for a hori
-
zontal pattern or vertically for a vertical pattern.
Then
tighten the retaining nut.
0137
GUN
SAFETY
LA
TCH SHOWN
ENGAGED
GUN SAFETY LA
TCH
SHOWN DISENGAGED
Fig 12-1
ON/OFF SWITCH
OUTLET NIPPLE
PRESSURE
ADJUSTING KNOB
PRESSURE
DRAIN V
ALVE
DRAIN HOSE
Fig 12-2
01566


