


D200S, D200, S20, and D60 Supply Systems Point of Operation Instructions
38 313526J
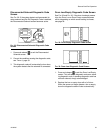
Start and Adjust Pump
1. Supply fluid to the pump, per the requirements of
your system.
2. Close the air motor slider valve. Set the ram air
regulator to about 50 psi (0.35 MPA, 3.5 bar). Set
the director valve to DOWN.
3. Reduce the air motor regulator pressure and open
the air motor slider valve.
4. Adjust air motor regulator until the pump starts.
5. Cycle the pump slowly until all air is pushed out and
the pump and hoses are fully primed.
6. Release the gun/valve trigger and lock the trigger
safety. The pump should stall against pressure.
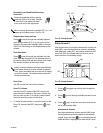
7. If the pump fails to prime properly, open the pump
bleed valve slightly. Use the bleed hole, on the
underside of the valve, as a priming valve until the
fluid appears at the hole. Close the plug.
8. With the pump and lines primed, and with adequate
air pressure and volume supplied, the pump will
start and stop as you open and close the gun/valve.
In a circulating system, the pump will speed up or
slow down on demand, until the air supply is shut
off.
9. Use the air motor regulator to control the pump
speed and the fluid pressure. Always use the lowest
air pressure necessary to get the desired results.
Higher pressures cause premature tip/nozzle and
pump wear.
Change Drums
1. Close the air motor slider valve to stop the pump.
2. Set ram director valve to UP to raise the platen and
immediately press and hold the blowoff air button
until the platen is completely out of drum. Use mini-
mum amount of air pressure necessary to push the
platen out of the drum.
3. Release the blowoff air button and allow the ram to
rise to its full height. 2-Button Interlock: If system
has this feature, the ram will stop as it nears the top.
Press and hold both buttons to raise ram com-
pletely.
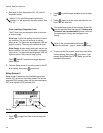
4. Remove empty drum.
5. Inspect platen and, if necessary, remove any
remaining material or material build–up.
6. Go to Step 4 of Start and Adjust Ram.
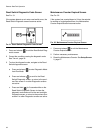
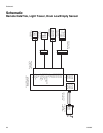
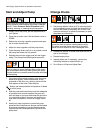
Remote DataTrak Operation
Key Functions When in Run Mode
1. To enter Prime Mode, press and release .
a. When a new drum is installed, press and hold
while in Prime Mode to reset the drum vol-
ume remaining to the drum fill volume.
b. To exit Prime Mode, press . The Prime sym-
bol will disappear and the LED will stop flashing;
the screen will return to Run Mode.
2. To reset the job total counter, press and hold
from Run Mode for 3 seconds.
3. To enter Setup Mode, press and hold for 3 sec-
onds.
4. To enter Diagnostic Mode, press and release .
The system will enter Diagnostic Mode only if there
are active warnings/alarms.
Keep hands and fingers away from the priming piston
during operation and whenever the pump is charged
with air. Follow Pressure Relief Procedure before
checking, clearing, or cleaning the priming piston.
To reduce the risk of fluid injection, do not use your
hand or fingers to cover the bleed hole on the under-
side of the bleed valve body when priming the pump.
Use the handle or a crescent wrench to open and close
the bleed plug.
Always use lowest possible fluid pressure to bleed
air out of pump.
Excessive air pressure in the material drum could
cause the drum to rupture, causing serious injury.
The platen must be free to move out of the drum.
Never use drum blowoff air with a damaged drum.