


Repair
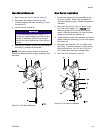
Gun Barrel Rem
oval
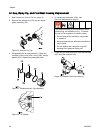
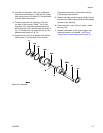
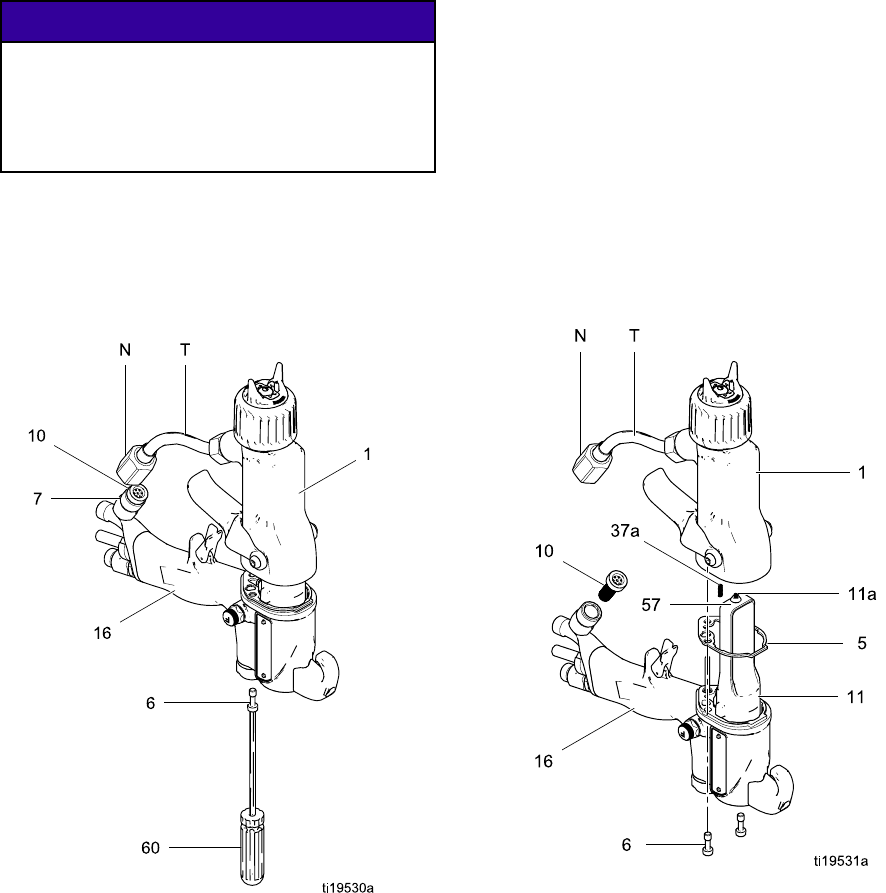
1. See Prepare the Gun for Service, page 39.
2. Disconnect the bottom fluid tube nut (N).
Carefully separate the tube assembly (T) from
the bracket (7).
3. Loosen the two screws (6).
NOTICE
To avoid dam
aging the power supply (11),
pull the gun
barrel straight away from the gun
handle. If
necessary, gently move the gun
barrel fro
msidetosidetofreeitfromthegun
handle.
4. Hold the gun handle (16) with one hand and pull
the barrel (1) straight off the handle.
NOTE: If t
he power supply remains in the barrel,
remove th
e alternator/power supply assembly from
the barr
el.
Figure 27 Gun Barrel Removal
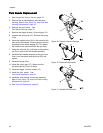
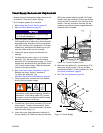
Gun Barrel Ins
tallation
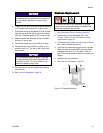
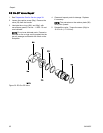
1. Be sure the gasket (5*) and grounding spring
(37a) are in place. Make sure the gasket air
holes are aligned properly. Replace the gasket if
damaged.
2. Make sure the spring (11a) is in place on the
tip of the power supply (11). Liberally apply
dielectric grease (57) to the tip of the power
supply. Place the gun barrel (1) over the power
supply and onto the gun handle (16).
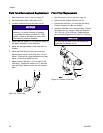
3. Tighten the two screws (6) oppositely and evenly
(about a half turn past snug). Do not over-tighten
the screws (6).
4. Make sure the fluid filter (10) is in place in the
fluid fitting. Tighten the bottom nut (N) onto the
fitting and torque to 140–150 in-lb (15.8–16.9
N•m). Make sure the top nut remains tight.
5. See Test Gun Resistance, page 32.
Figure 28 Gun Barrel Installation
3A2495C 43