


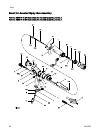

Repair
Smart Module R
eplacement
If the Error display appears, the Smart Module has
lost communication with the power supply. Check for
good connections between the Smart Module and
the power supply.
If the module
’s LEDs are not lighting, replace the
module.
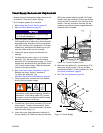
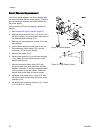
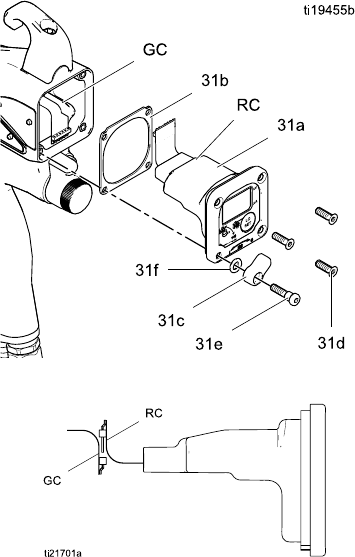
1. See Prepare the Gun for Service, page 39.
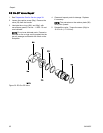
2. Remove the pivot screw (31e), o-ring (31f), and
ES HI/LO switch (31c) at the bottom left corner of
the Smart Module cartridge (31a).
3. Remove the remaining three screws (31d) from
the cartridge.
4. Pull the Smart Module out the back of the gun.
Disconnect the ribbon cable (RC) from the
connector (GC) in the gun handle.
5. Remove the gasket (31b).
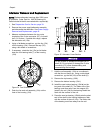
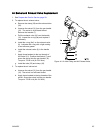
6. Install a new gasket (31b) on the new cartridge
(31a). Make sure the notched corners of the
gasket are at the top.
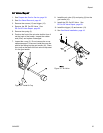
7. Align the module’s ribbon cable (RC) with
the gun’s cable (GC) and slide them securely
together, as shown. Tuck the connected cables
into the recess of the gun handle. Install the
module flush to the back of the gun handle.
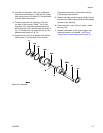
8. Install the pivot screw (31e), o-ring (31f), and
ES HI/LO switch in the bottom left corner of the
cartridge (31a).
9. Install the three remaining screws (31d). Torque
to 7–9 in-lb (0.8–1.0 N•m).
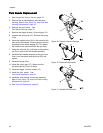
Figure 42 Smart Module
Figure 43 Align Ribbon Cables
52 3A2495C