


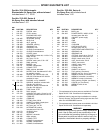

24 308-084
SERVICE
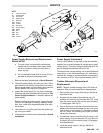
Fluid Packing Rod Removal and Repair
(continued)
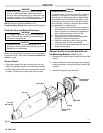
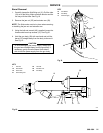
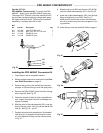
8. Place the fluid packing (3f), rod packing (3e), and
housing
(3a) on
the fluid rod (3b) as shown in Fig 22 .
9. Lightly
tighten the packing nut (3c). The packing nut
is
properly tightened when there is 2 lbs. (9 N)
of drag
force
when sliding the packing housing (3a) assem
-
bly
along the shaft. T
ighten
or loosen the packing nut
as
needed.
10. Lubricate
the o-ring (3h) on the outside of the packing
housing (3a).
11. Install
the fluid packing rod assembly (3) into the gun
barrel.
Using the 9 mm hex nut driver (45), tighten the
assembly
until just snug, then
check the drag on the
fluid rod.
12. Make
sure the spring (1
1) is installed on the nut (E)
as
shown
in Fig 22 .
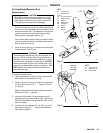
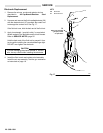
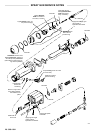
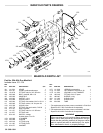
7. Install the electrode, nozzle and resistor stud
assembly and the air cap assembly as described in
Electrode
Replacement
.
8. Install
the arm
(29) and jam nut (25), with the jam nut
assembled
flush to the end of the rod. See Fig 20 ,
page 22.