


G0460/G0461 12" Sliding Table Saw
-23-
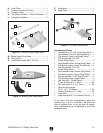
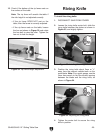
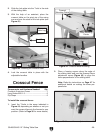
4. Align the square tube w/scale parallel with
the top of the table and secure it with the five
cap screws, flat washers, and hex nuts (see
Figure 27).
Note: Two of the cap screws attach directly
into the table without washers or hex nuts.
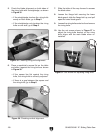
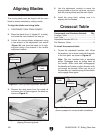
5. Slide the rip fence body onto the rail and
move it all the way to the left, until it stops
against the stop screw at the end of the rail.
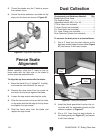
6. Adjust the nut shown in Figure 28 until the
pinion gear teeth under the rip fence body
mesh with the teeth on the square tube
when the micro-adjust knob is pushed down.
Tighten the hex nuts on that stud to secure
the rail on that end.
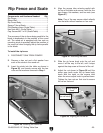
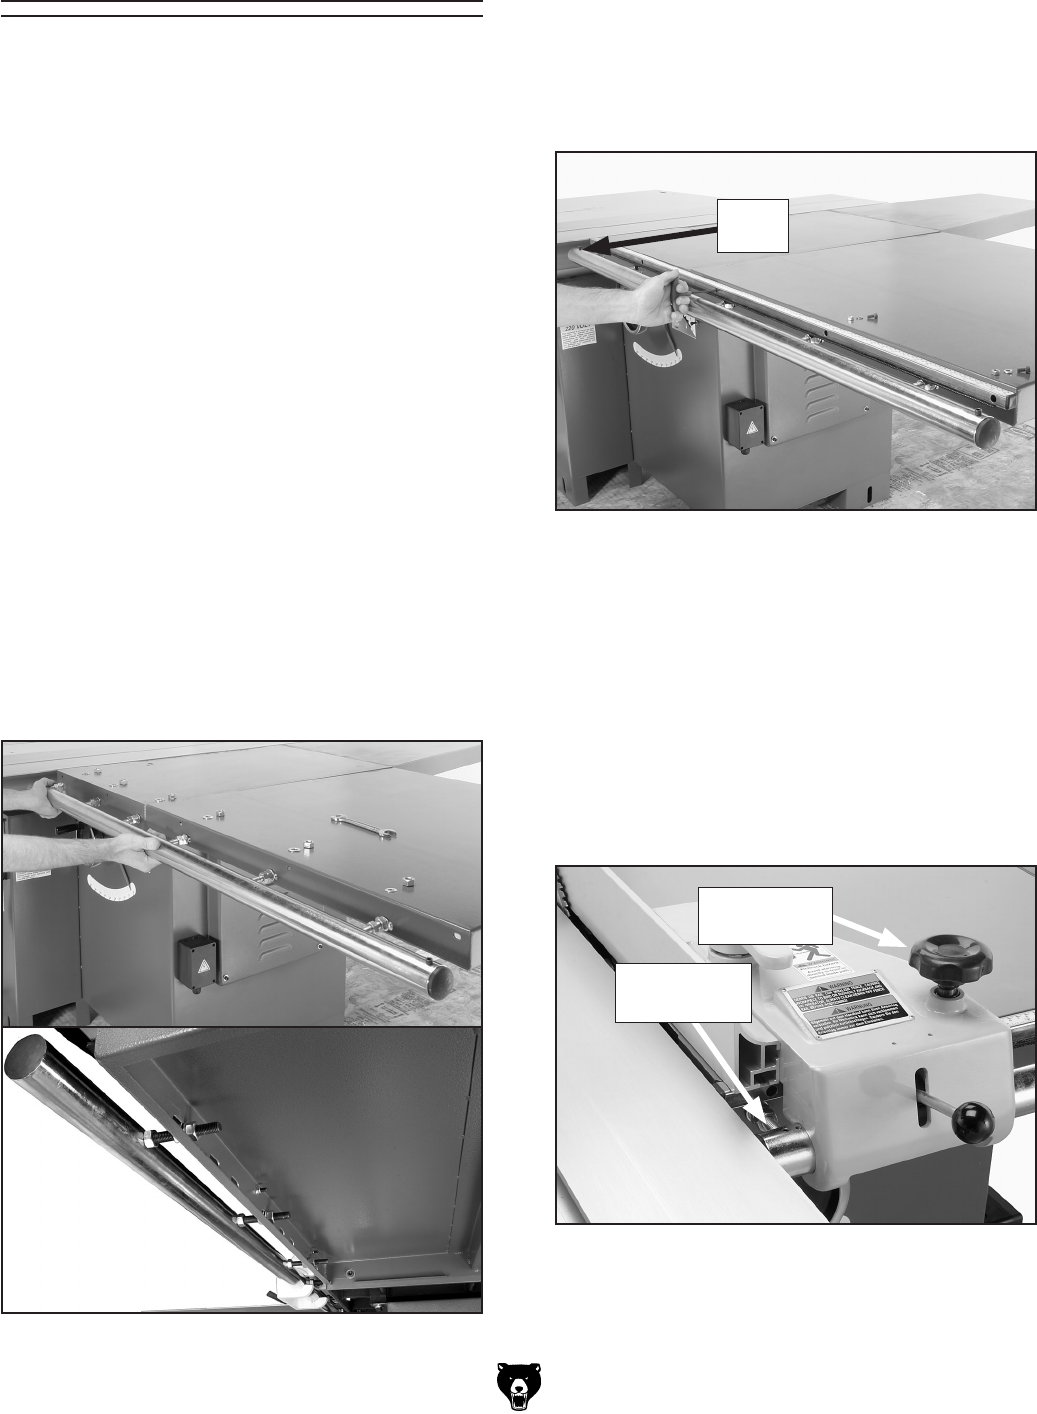
Figure 26. Installing the round rail.
Figure 27. Attaching the scale.
Stop
Screw
Figure 28. Aligning the round rail.
Nut
(on rail stud)
Rip Fence and Scale
Components and Hardware Needed: Qty
Rip Fence ...........................................................
1
Round Rail ..........................................................
1
Rip Fence Body ..................................................
1
Square Tube w/Scale .........................................
1
Flat Washers 6mm (Scale/Table) .......................
5
Hex Nuts M6-1 (Scale/Table) .............................
5
Cap Screws M6-1 x 20 (Scale/Table) ................
5
The accuracy of the rip fence being parallel to the
blade is dependent on the position of the
round
rail. The
round rail is equipped with hex nuts on
mounting studs to precisely adjust the position of
the round rail when bringing the rip fence parallel
to the blade.
To install the rip fence
:
1. DISCONNECT SAW FROM POWER!
2. Remove a hex nut and a flat washer from
each of the studs in the round rail.
3. Insert the studs into the table as shown in
Figure 26, and loosely secure with the hex
nuts and flat washers removed in Step 1
.
Micro-Adjust
Knob