


-28-
G0460/G0461 12" Sliding Table Saw
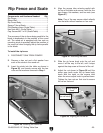
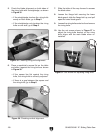
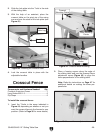
Figure 41. Fence against blade as a guide for
aligning the scoring blade.
5. Use the adjustment controls to move the
scoring blade so that the rip fence can touch
both the scoring blade and the main blade.
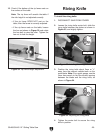
6. Install the riving knife, making sure it is
aligned with the blades.
4. Remove the stop screw from the round rail
and move the rip fence against the blade as
shown in
Figure 41.
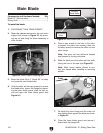
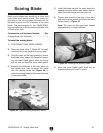
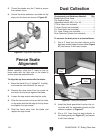
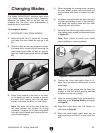
Horizontal
Adjustment
Vertical
Adjustment
Figure 40. Scoring blade adjustment controls.
Adjustment
Lock
The scoring blade must be aligned with the main
blade to ensure satisfactory cutting results.
To align the blades and riving knife:
1. DISCONNECT SAW FROM POWER!
2. Move the blade tilt to 0° (blade 90° to table),
and raise the main blade all the way up.
3. Unlock the scoring blade adjustment using
a hex wrench in the adjustment lock socket
(Figure 40) and raise the blade to its high-
est point using a hex wrench in the vertical
adjustment socket.
Aligning Blades
Crosscut Table
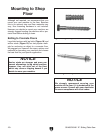
Components and Hardware Needed: Qty
Crosscut Table ...................................................
1
Lock Plate ...........................................................
1
Adjustable Handles M10-1.5 ...............................
1
Flat Washers 10mm ...........................................
2
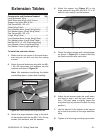
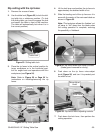
To install the crosscut table:
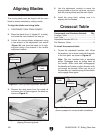
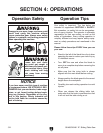
1. Thread the adjustable handles, with 10mm
flat washers, two or three turns onto the studs
in the lock plate, as shown in
Figure 42.
Note: The lock handles have a ratcheting
action. Disengage them by pulling back on
the handle. When held back (disengaged),
the handles will rotate in either direction with
-
out turning the threads. When you let go of
the handles, the internal spring will automati
-
cally engage them again.
Figure 42. Adjustable handles threaded into lock
plate to prepare for crosscut table installation.
Crosscut
Table
Lock Plate
Adjustable
Handles