


G0605X/G0606X Extreme Series 12" Table Saw
-53-
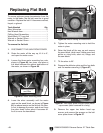
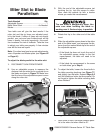
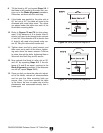
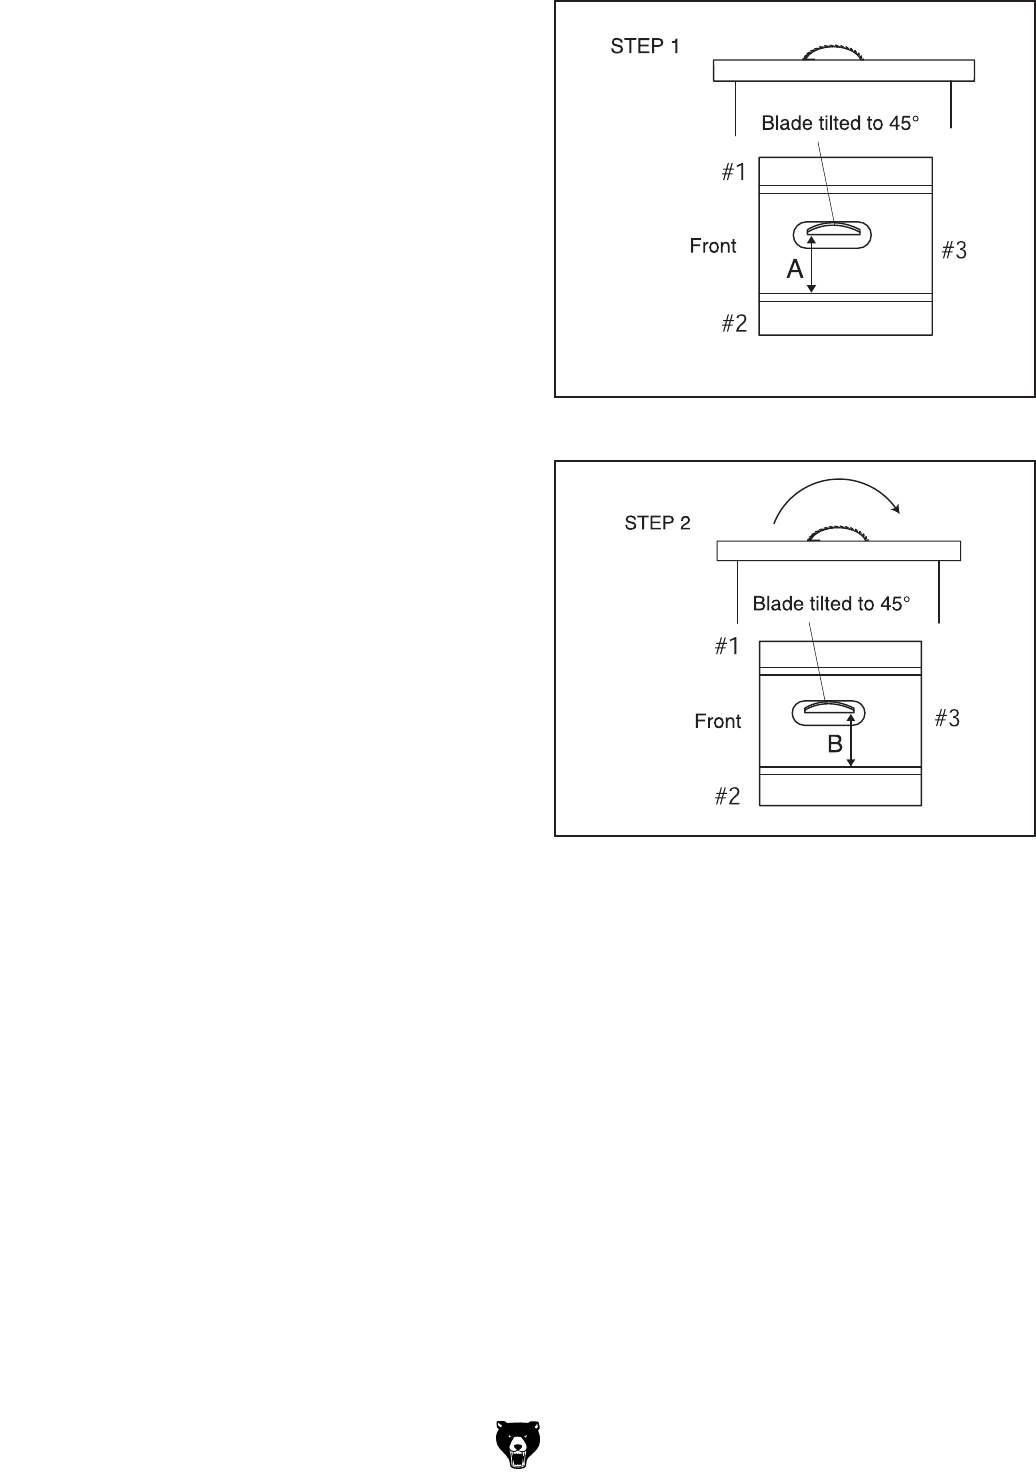
Figure 78. Shim procedure diagram A.
Figure 79. Shim procedure diagram B.
8. Tilt the blade to 45° and repeat Steps 2-6. If
the blade is still parallel to the miter slot, con
-
tinue on to the Blade Alignment procedure.
Otherwise, continue with the next step.
9. If the blade was parallel to the miter slot at
90° but not at 45°, the table will need to be
shimmed with metal shim stock. The shims
are placed under the table over each of the
three table mounting bolts.
10. Refer to Figures 78 and 79 for shim place-
ment. If the distance of A is shorter than B,
shim(s) will need to be placed under corners
#1 and #2. If the distance of B is shorter than
A, shim(s) will need to be placed under cor
-
ner #3. Very thin shim stock works well.
11. Tighten down one bolt a small amount and
then move on to each of the others, tighten
-
ing each down the same amount. Continue
to rotate through the bolts, tightening them a
little each time until they are all secure.
12. Now recheck the blade to miter slot at 90°
and 45° by repeating Steps 2-6. If the dis
-
tance of A and B are equal, continue to the
Blade Alignment procedure. If the distances
are still off, repeat Steps 10-13.
13. Once you feel you have the miter slot adjust-
ed to the blade, recheck all measurements
and be sure the table mounting bolts are
secure. Also, if you ever remove the table
in the future, be sure to make note of shim
placements and reassemble exactly how it
came apart.