


Model G0771 (Mfd. Since 8/15)
-19 -
Assembly
Assembly consists of installing the extension
wings, fence rails, fence, blade, blade guard, and
minor components.
To assemble table saw:
1. Inspect extension wings and main table mat-
ing surfaces for burrs or foreign materials that
may inhibit assembly.
For a correct fit, mating edges of table and
wings must be clean, smooth, and flat. If nec-
essary, use a wire brush or file to remove any
flashing, dings, or high spots.
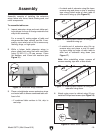
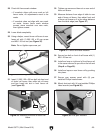
2. While a helper holds extension wings in
place, attach each wing flush with main table
using (3) M10-1.5 x 30 cap screws, 10mm
flat washers, and 10mm lock washers (see
Figure 15).
Figure 15. Extension wings installed.
x3
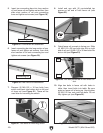
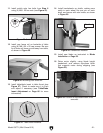
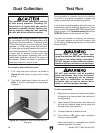
3. Place a straightedge across extension wings
and main table to ensure combined table sur-
face is flat.
— If combined table surface is flat, skip to
next step.
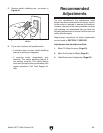
Figure 16. Masking tape location for tilting the
extension wing up.
— If outside end of extension wing tilts up,
remove wing and place a strip of mask-
ing tape along top edge of main table to
shim end of extension wing down (see
Figure 17).
Note: After reinstalling wings, remove all
excess masking tape with a razor blade.
Figure 17. Masking tape location for tilting the
extension wing down.
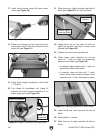
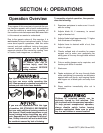
4. Attach motor cover to cabinet using (6) pre-
installed Phillips head screws (see Figure 18).
Figure 18. Motor cover installed.
— If outside end of extension wing tilts down,
remove wing and place a strip of masking
tape along bottom edge of main table to
shim end of wing up (see Figure 16).
x 6
Motor
Cover