


For technical questions, please call 1-800-444-3353;
Troubleshooting section at end of manual.
Page 13SKU 55525
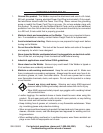
WARNING!
EXERCISE EXTREME CAUTION - RISK OF FIRE AND/OR ELECTRIC SHOCK!
The following steps require applying power to the Welder. Do not touch
anything with the Torch Handle or Welding Wire or an arc will be ignited.
Do not touch the internal components of the unit while it is plugged in.
Plug the Power Cord (13) into its 220 volt, grounded, electrical outlet. Then, turn
the Welder ON.
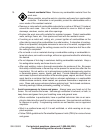
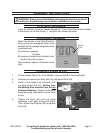
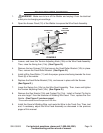
Point the Torch Handle away from all objects. Then, squeeze the Trigger Switch
(15d) on the Torch Handle until the Welding Wire feeds through the Head Tube
(15f) of the Torch Handle about 2 inches. If necessary, move the Torch Handle
slightly in a circular motion to help feed the Welding Wire properly out of the Head
Tube. (See Figure F.)
NOTE: If the Welding Wire does not feed properly, and the Spool is stationary,
turn the Welder off. Unplug the Welder. Slightly tighten the Tension Adjusting
Knob (10b) on the Wire Feed Assembly, and rewind the Welding Wire slightly
before retrying. (See Figure E.)
To check the tension on the Wire Feed Assembly, feed the Welding Wire against a
piece of scrap wood from 2 to 3 inches away. If the Wire stops instead of bending,
turn the Welder OFF. Unplug the unit from its electrical outlet. Then, slightly tighten
the Tension Adjusting Knob (10b) on the Wire Feed Assembly. (See Figure E.)
8.
9.
10.
11.
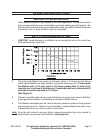
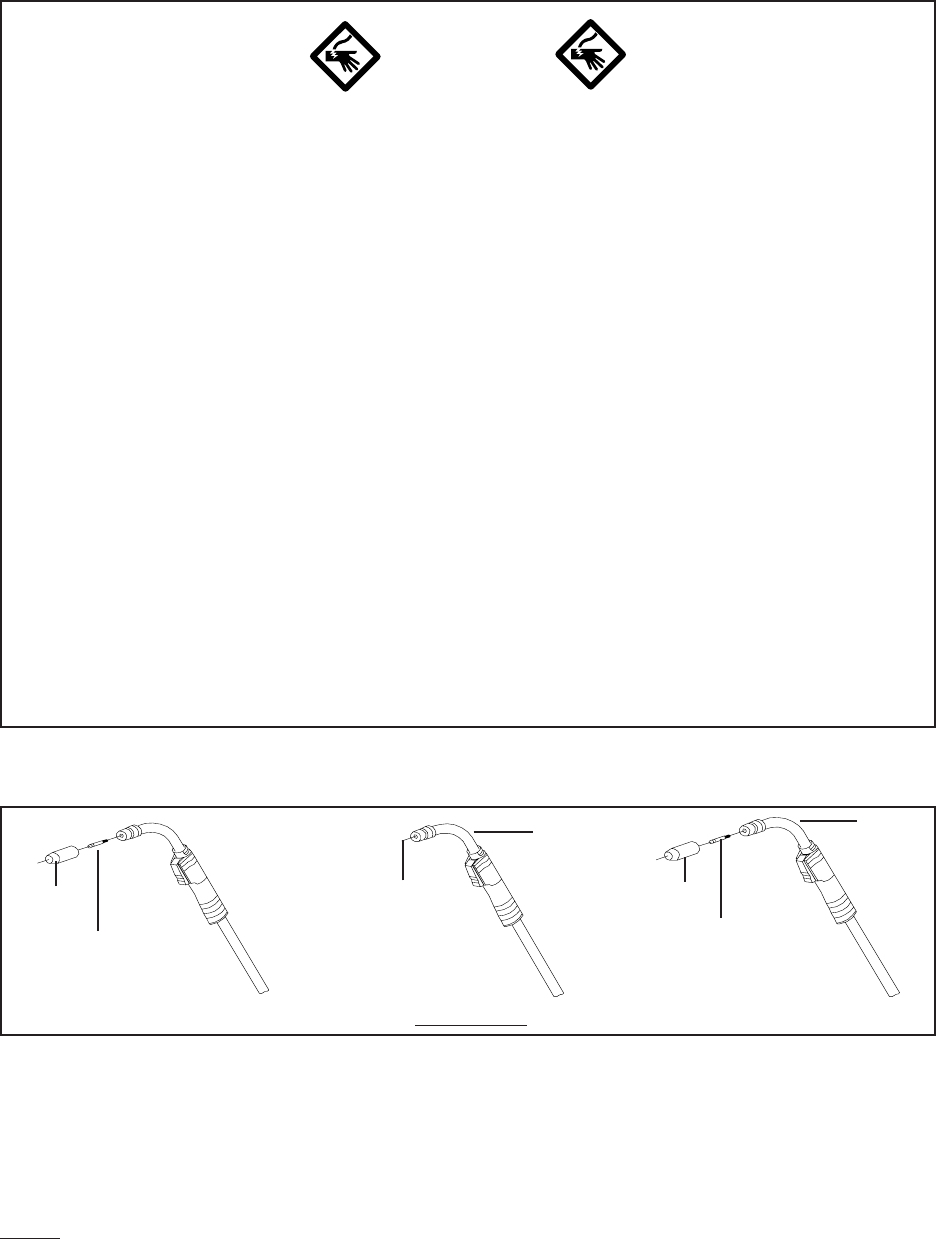
FIGURE F
CONTACT
TIP
(15g)
NOZZLE
(15h)
WELDING
WIRE
HEAD
TUBE
(15f)
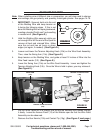
NOZZLE
(15h)
CONTACT
TIP
(15g)
HEAD
TUBE
(15f)
Turn the Welder OFF, unplug it, and discharge the electrode to ground. Insert
the Contact Tip (15g) onto the Welding Wire and screw it firmly into the Head Tube
(15f) of the Torch Handle. Replace the Nozzle (15h), and cut off any excess Weld-
ing Wire over 1/2 inch. Then, close the Access Panel (12) of the Welder.
(See Figure F.)
Note: When installing wire of a different size or composition, you will also need to change
wire settings, set the gun polarity, and, possibly, install a gas cylinder. See pages
14-16.
12.