


Page 6SKU 97009 For technical questions, please call 1-800-444-3353.
SPECIFIC SAFETY RULES
Maintain labels and nameplates on the tool. These carry important safety
information. If unreadable or missing, contact Harbor Freight Tools for a
replacement.
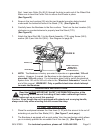
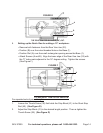
Make sure the Bandsaw is located on a at, level, sturdy surface capable of
supporting the weight of the tool, accessories, and workpieces. Always “chock”
the Wheels to prevent the Bandsaw from accidentally moving.
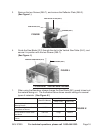
Make sure the Table of the Bandsaw and surrounding area are clear with the
exception of the workpiece to be cut.
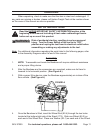
Before using the Bandsaw, check to make sure the Saw Blade is properly
mounted and in good condition.
Never stand on the Bandsaw. Serious injury could result if the Bandsaw is tipped
or if the rotating Saw Blade is accidentally contacted.
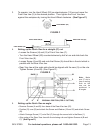
Never attempt to cut more than one workpiece at a time.
When cutting a large workpiece, make sure its entire length is properly
supported. If necessary, use a roller stand (not included).
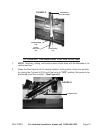
Do not lean on the Bandsaw when the tool is in its upright position.
When moving the Bandsaw, always have its Head lowered to its horizontal
position.
Allow the Saw Blade to rotate to full speed before feeding the Blade into a
workpiece. When turning off the Bandsaw, allow the Saw Blade to spin down
and stop on its own. Do not press against the Saw Blade to stop it.
To avoid injury, always wear ANSI-approved safety goggles and heavy duty work
gloves when changing the Saw Blade.
The Saw Blade becomes hot while cutting. Allow the Blade to completely cool
before handling.
Do not force the Saw Blade into the workpiece when cutting. Apply moderate
pressure, allowing the Blade to cut without being forced.
Turn off the Bandsaw and allow the Saw Blade to completely stop if the Blade is
to be backed out of an incomplete cut.
Never attempt to remove material stuck in the moving parts of the Bandsaw while
it is plugged in and running.
Keep all safety guards in place and in proper working order.
Always adjust and position the Blade Guide Arm before starting the cut.
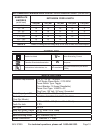
1.
2.
3.
4.
5.
6.
7.
8.
9.
10.
11.
12.
13.
14.
15.
16.
17.