


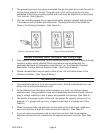


Page 16SKU 91815
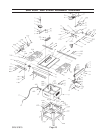
5. While holding the Fence Body (50) in place, move the Fence so that it is exactly
parallel to the miter fixture slot the entire length of the Fence.
6. Tighten the four Hex Cap Bolts (38). Check the final alignment. If out of parallel, loosen
the bolts and realign.
7. If the Pointer on the Fence Body is not at zero while the Fence is flush to the Saw
Blade, loosen the Screw holding the Pointer and move it to zero. Retighten the Screw.
8. Check the adjustment of the Rear Hook (35) at the back of the Fence. It should be
adjusted so that it overlaps the Rear Rail (21) by about 1/8”.
9. Remove the Fence (37) from the Table (22) and set aside.
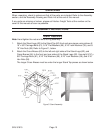
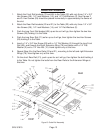
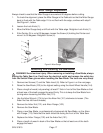
Figure J. Fence Assembly
ADJUSTMENTS
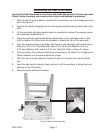
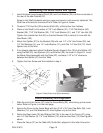
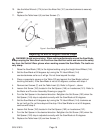
Aligning the Blade Guard and Splitter to the Saw Blade
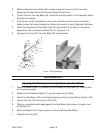
1. Raise the Blade Guide (10) assembly up and away from the Table (22). See Figure H
on the previous page.
2. Raise the Anti-Kickback Pawls (17) up and away from the Table.
3. Raise the Saw Blade (103) to the highest setting using the Hand Wheel Handle (144).
4. Loosen Hex Nut (32) at the end of Shaft (33).
5. Place an accurate straight edge against the Saw Blade (flat surface, not teeth) and
the Splitter (27).
6. Move the Splitter until it aligns (center-to-center) with the Saw Blade.
7. Retighten Hex Nut (32).