


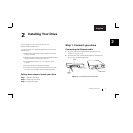


Installing Your Drive 7
2
English
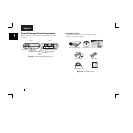
Step 3. Set up your drive
1.
Insert the Maxtor Quick Start CD.
The Choose Setup Language screen will appear.
If this screen does not appear, you can access it
manually, by double-clicking the Quick Start CD icon.
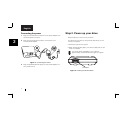
2.
Select your language and click
OK
.
The Installshield Wizard screen will appear, followed by the
Welcome screen.
3.
Click
Next
.
The License agreement screen will appear.
4.
Click
Yes
.
The Choose Destination Location screen will appear.
If you wish to change the location of the installation, you
may do so by clicking the
Browse
button and selecting
a new location.
5.
Click
Next
.
The Setup Status screen will appear as the software is
installed, followed by the Installshield Wizard Complete screen
when the installation is complete.
Click
Finish.
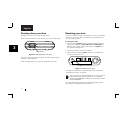
The Quick Start software will open and the Maxtor screen will
appear, with the message: “Locating Shared Storage drives
on the Network.”
When your Shared Storage Drive is found, you will see its
Network ID number and IP address
appear in a drop-down
menu in the middle of the screen.
For example: MSS-000335 (192.168.0.5)
If you have multiple Shared Storage Drives connected to
your network, each will appear in the drop-down menu.
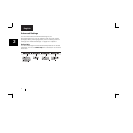
6.
Click
Next
.
The next screen will show the Network ID of your drive.
7.
Click
Set up Shared Storage on this computer.
The Set Up Your Shared and Private Folders screen will appear.
8.
Enter a name and password, re-enter the password and
click
Set Up
.
The Quick Start software will now create your new user
account and both public and private folders.
The Set Up Completed screen will appear and a shortcut to
your Shared Storage Drive will appear on the desktop of
your computer.
9.
You can open your private folder on your Shared Storage Drive
immediately, by clicking
Open
or by using the shortcut on
your desktop.
Congratulations. Your drive is now set up and ready for use!