WAN Service Configuration 66
Models 2603, 2621, and 2635 Getting Started Guide 6 • WAN Services
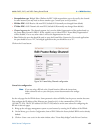
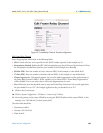
• Cost: 1
• Interface: frame-0
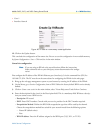
Figure 40. IP route for Frame Relay routed application
12. Click on the Update button.
This concludes the configuration of the remote site. Be sure to save the configuration in non-volatile memory
by System Configuration > Save > Click on Save in the main window.
Central site configuration.
Note If you are using an IPLink at the central location, follow the instructions
below, otherwise refer to your third party router documentation for configu-
ration.
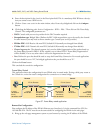
First configure the IP address of the IPLink’s Ethernet port (interface ip1) via the command line (CLI) for
192.168.172.3/24. The PC must be on the same subnet for configuring the IPLink via the web pages.
1. Bring up the web-page management system on your browser by entering the IP address of the IPLink.
2. On the Menu, go to Services Configuration, then to WAN. Delete the factory default WAN services already
defined.
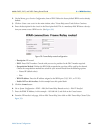
3. Click on Create a new service in the main window, select “Frame Relay routed” and click on Continue.
4. Enter the description for the circuit in the Description field. This is a mandatory field. Without a descrip-
tion you cannot create a WAN service.
– Description: FR routed
– DLCI. Enter DLCI number. Consult with your service provider for the DLCI number required.
– Encapsulation Method. Defines the RFC1490 encapsulation type that will be used by the channel.
Choose the encapsulation method best suited for your network needs from the following options:
– Routed IP (default value)
–Raw
– WAN IP address. Enter the IP address assigned to the WAN port (V.35, X.21, or T1/E1)


