


-25-
Df[\cN(/(0&N(/)'D]^%J`eZ\()&('
J<KLG
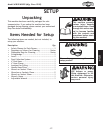
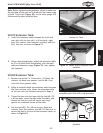
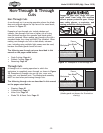
Efk\1 9\]fi\k`^_k\e`e^k_\]Xjk\e\ij#Z_\ZbkfdXb\jli\
k_\kfg\[^\f]k_\i\XiiX`c`j]clj_n`k_k_\cfn\jk\[^\
f]Yfk_K$jcfkjj\\=`^li\)' # jfk_\d`k\i ^Xl^\n`cc
jc`[\jdffk_cpn_\e`ejkXcc\[cXk\i%
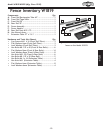
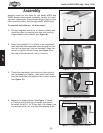
N(/(0<ok\ej`feKXYc\
(% Install the extension table between the front and
rear rails with the four M6-1 x 16 hex bolts, eight
6mm flat washers, four 6mm lock washers, and four
M6-1 hex nuts, as shown in =`^li\)(.
)% Using a long straightedge, adjust the extension table
so it is flat (both flush and parallel) with the main
table and extension wings (=`^li\))), then tighten
the fasteners.
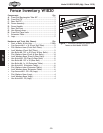
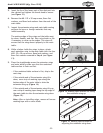
N(/)'<ok\ej`feKXYc\
(% Remove the six M6-1 x 16 hex bolts, (12) 6mm flat
washers, six 6mm lock washers, and six M6-1 hex
nuts from the extension table.
)% While an assistant holds the extension table between
the front and rear rails, fasten the extension table
to the rails with the fasteners removed in Jk\g(.
*% Thread the feet into the legs with the two M8-1.25
x 60 hex bolts, place the legs under the table, and
thread the feet out until the top of each leg is
against the underside corner of the table.
+% Use the four M8-1.25 x 20 cap screws, 8mm lock
washers, 8mm flat washers, and M8-1.25 hex nuts to
secure the legs to the end of the extension table, as
shown in =`^li\)*.
=`^li\)'% Verifying rear rail is flush with
bottom of T-slot.
=`^li\ )(. Model W1819 extension table
installed.
=`^li\))% Adjusting Model W1819
extension table flush with wing and table.
=`^li\)*% Model W1820 extension table
installed.
x4
Foot