


-28-
Df[\cN(/(0&N(/)'D]^%J`eZ\()&('
J<KLG
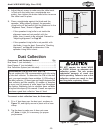
On the Model W1819, if you move the pointer window to
the right side of the fence, you may have to trim the last
two inches of the scale so it will not protrude past the
end of the fence tube.
One option for using the pointer window on the left side
of the fence is to use it in conjunction with a small, left-
reading scale (not included).
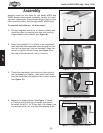
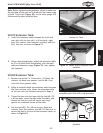
Kf`ejkXcck_\]\eZ\jZXc\#[fk_\j\jk\gj1
(% Slide the fence up against the saw blade and lock it
in place.
)% Place the front rail tape scale on the fence tube,
making sure it is parallel with the tube and that the
"0" end is directly under the red line on the pointer
window, as shown in =`^li\)0.
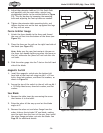
*% Lightly mark the "0" location on the fence tube with
a pencil, then remove the fence.
+% Peel the tape and carefully align the "0" mark on the
scale with the pencil mark you made on the fence
tube.
— If you make a mistake, loosen the screws on the
pointer window, slide the fence against the blade,
adjust the pointer window so the red line on the
window is over the 0" mark on the tape, then
secure the screws.
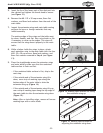
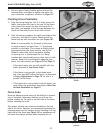
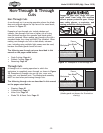
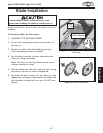
9cX[\>lXi[
(% Re-install the table insert, slide the knurled knob out
(see =`^li\*') and rotate it forward so it engages
the upper bracket.
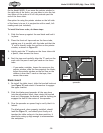
)% Slide the blade guard spreader all the way down
into the adjustment block, then rotate the knurled
knob so it disengages the bracket and the locking pin
engages the hole in the center of the spreader.
*% Give the spreader an upward tug to verify that it is
locked.
The blade guard, when properly installed, should
look like =`^li\*(, and should pivot freely so it
touches the table surface in the down position. It
should also swing up high enough to accommodate
the workpiece.
=`^li\*(% Blade guard installed.
=`^li\*'% Knurled knob used to secure
spreader.
Locking Pin
Knurled
Knob
Bracket
Adjustment Block