


-73-
Df[\cN(/(0&N(/)'D]^%J`eZ\()&('
J<IM@:<
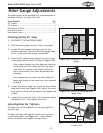
D`k\i>Xl^\8[aljkd\ekj
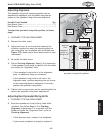
The miter gauge can be adjusted so it is perpendicular to
the blade and so it is snug in the T-slot.
KffcjE\\[\[ Hkp
90° Square .......................................................1
45° Square .......................................................1
Hex Wrench 2.5mm .............................................1
Hex Wrench 2mm ...............................................1
Hex Wrench 3mm ...............................................1
:_\Zb`e^&J\kk`e^0'Jkfgj
(% DISCONNECT THE SAW FROM POWER!
)% Slide the miter gauge into the T-slot on the table.
*% Loosen the miter gauge lock knob, pull out the
positive stop knob, then pivot the miter gauge body
to 90° so the stop knob springs into position.
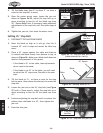
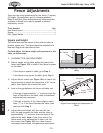
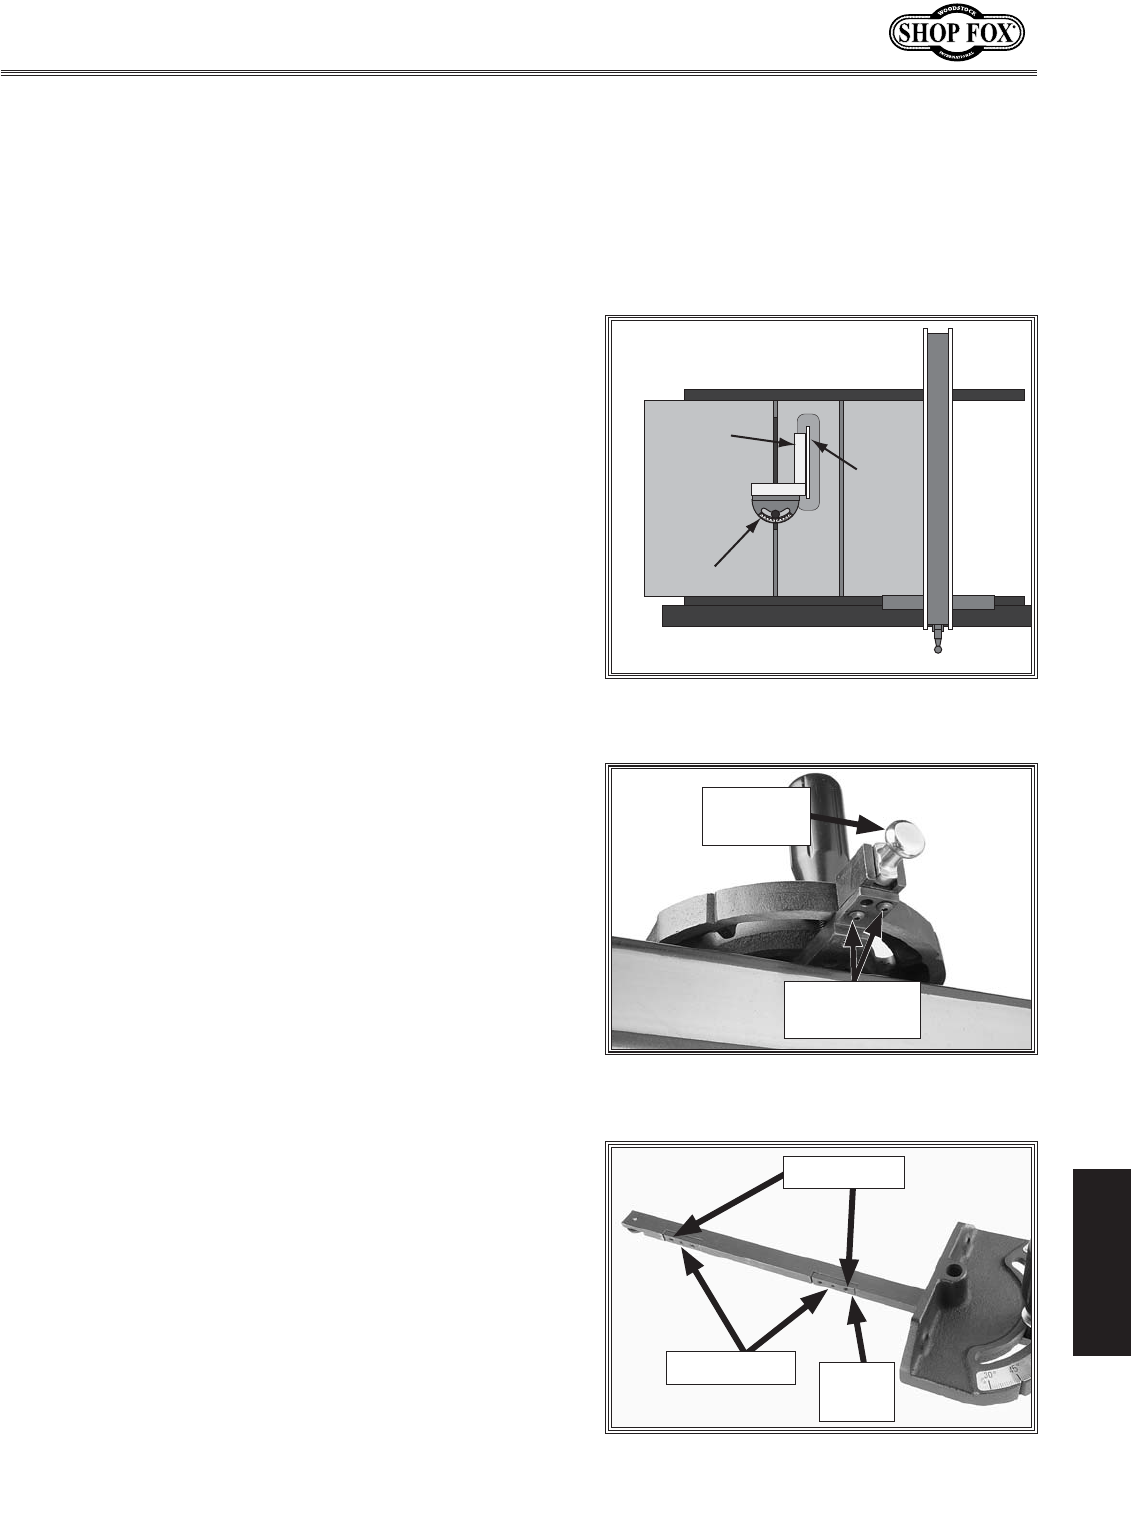
=`^li\('0% Checking 90° stop on miter
gauge.
JhlXi\
D`k\i>Xl^\
9cX[\
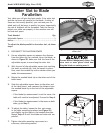
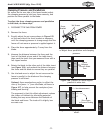
=`^li\(('% Screws for adjusting miter
gauge body.
Button Head
Cap Screws
Positive
Stop Knob
,% Loosen the button head cap screws on the positive
stop knob block (see =`^li\ (('), adjust the miter
body until it is flush with the square, then tighten the
screws.
-% Loosen the screw on the front of the miter bar, adjust
the pointer to 0°, then tighten the screw.
+% Place the 90° square evenly against the face of the
miter gauge and the blade, as shown in =`^li\('0.
— If the square touches the miter body and the body
of the blade (not the teeth) evenly at the same
time, then it is square to the blade and the 90°
stop is set correctly. No further adjustments are
necessary.
— If the square does not touch the miter body and
blade body evenly at the same time, then proceed
to Jk\g,.
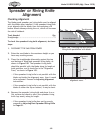
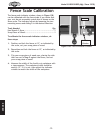
8[aljk`e^D`k\i9XiK`^_ke\jj
The miter bar can be adjusted so it fits more tightly in
the miter slot.
To adjust the miter bar tightness, loosen the cap screw
on each guide block (see =`^li\(((), adjust the set
screws as needed, then tighten the cap screw.
=`^li\(((% Screws for adjusting miter bar
in miter slot.
Set Screws
Cap Screws
Guide
Block