


-67-
Df[\cN(/(0&N(/)'D]^%J`eZ\('&('
J<IM@:<
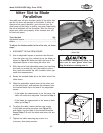
D`k\iJcfkkf9cX[\
GXiXcc\c`jd
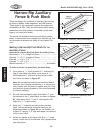
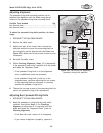
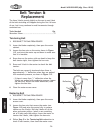
Figure 98. Example of adjusting blade to
miter slot.
Your table saw will give the best results if the miter slot
and the rip fence are parallel to the blade. If either of
these are not exactly parallel, your cuts and your fin-
ished work will be lower in quality, but more importantly,
the risk of kickback will be increased. Take the time to
adjust your table saw properly. A few minutes now will
be time well spent.
KffcjE\\[\[ Hkp
Adjustable Square ..............................................1
Marker ............................................................1
KfX[aljkk_\YcX[\gXiXcc\ckfk_\d`k\ijcfk#[fk_\j\
jk\gj1
(% DISCONNECT THE SAW FROM POWER!
)% Use an adjustable square to measure the distance
from the miter slot to a carbide tip on the blade, as
shown in =`^li\0/. Make sure that the face of the
adjustable square is even along the miter slot.
*% With the end of the adjustable square just touching
the tooth or carbide tip, lock the square in place.
Now, mark the carbide tip with a marker where you
made this measurement.
+% Rotate the marked blade tip to the other end of the
table insert.
,% Slide the adjustable square down to the other end
of the table insert, and compare the distance from
the marked blade tip to the end of the adjustable
square.
— If the blade tip measurement is not the same, the
table will need to be adjusted. Proceed to Jk\g-.
— If the blade tip measurement is the same on both
sides, go to Jk\g..
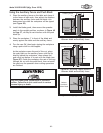
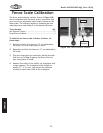
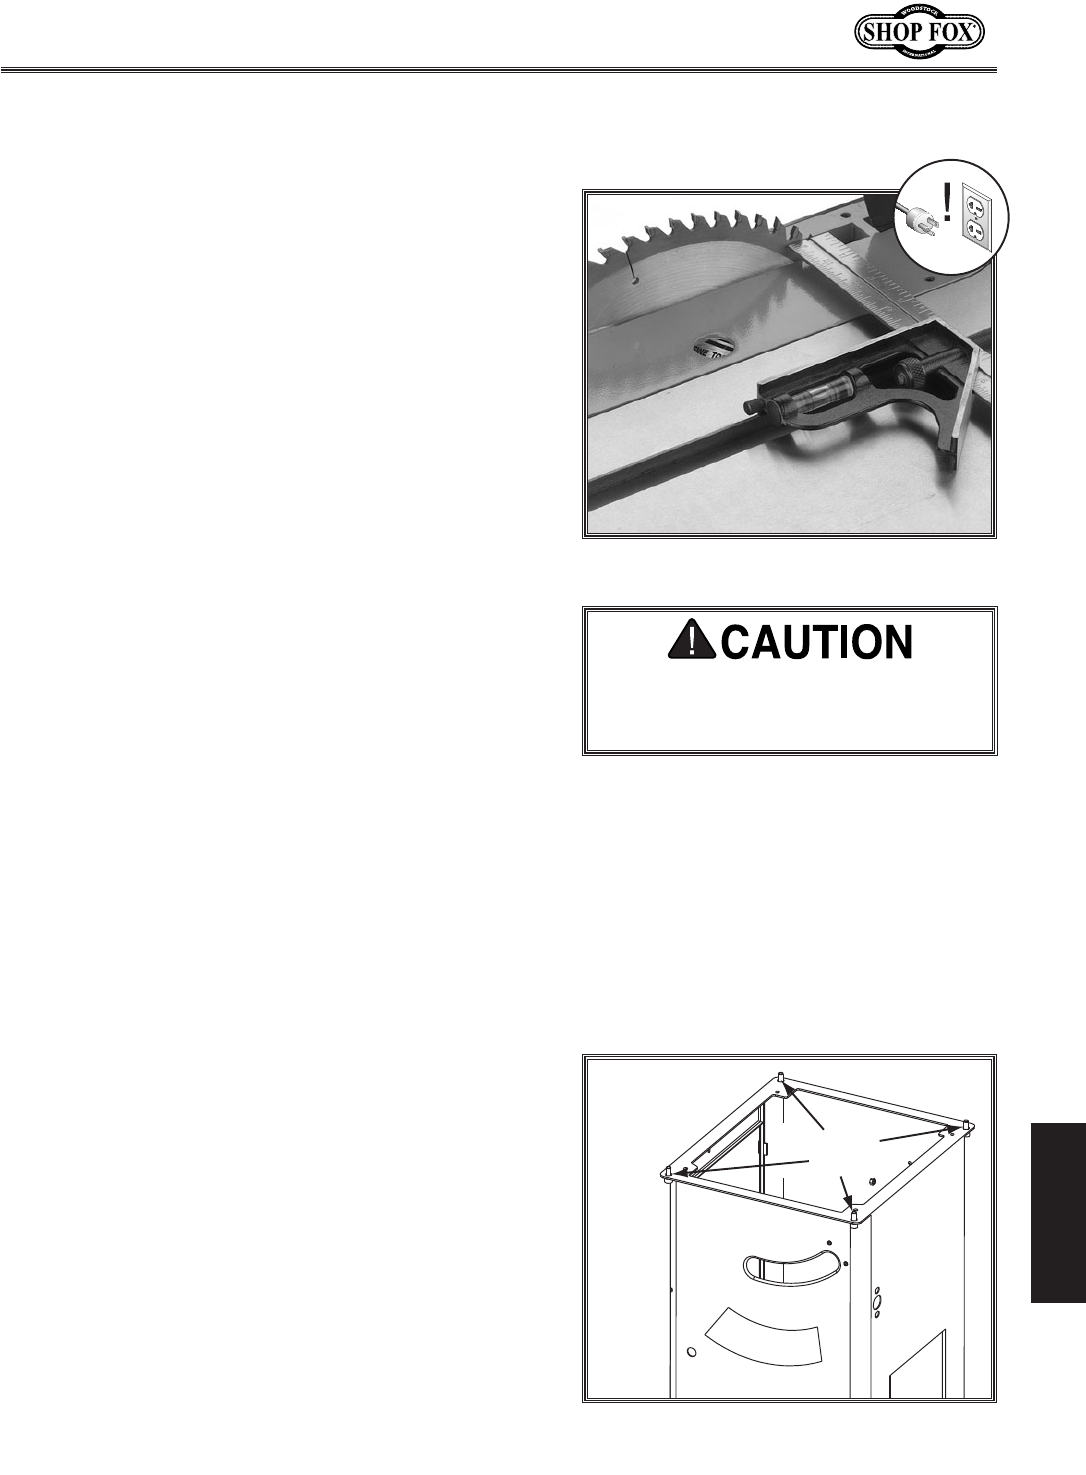
-% To adjust the table, loosen the four cap screws
in the table mounting locations (see =`^li\00)
and slightly tap the table in the needed direction.
Repeat Jk\gj )Æ,until the blade and miter slot are
parallel.
.% Tighten the table mounting cap screws in a
crisscross, alternating manner.
K_\jXnYcX[\`j[Xe^\ifljcpj_Xig%Lj\
\okiX ZXi\ fi n\Xi ^cfm\j n_\e _Xe$
[c`e^k_\YcX[\finfib`e^e\Xi`k%
Figure 99. Table mounting bolts.
Dflek`e^
9fckj