


16 Dealer Service
MAN0155 (Rev. 2/16/2007)
DEALER SERVICE
The information in this section is written for dealer ser-
vice personnel. The repair described here requires
special skills and tools. If your shop is not properly
equipped or your mechanics are not properly trained in
this type of repair, you may be time and money ahead
to replace complete assemblies.
Keep hands and body away from pressurized
lines. Use paper or cardboard, not hands or other
body parts to check for leaks. Wear safety goggles.
Hydraulic fluid under pressure can easily penetrate
skin and will cause serious injury or death.
Make sure that all operating and service person-
nel know that if hydraulic fluid penetrates skin, it
must be surgically removed as soon as possible by
a doctor familiar with this form of injury or gan-
grene, serious injury, or death will result. CON-
TACT A PHYSICIAN IMMEDIATELY IF FLUID
ENTERS SKIN OR EYES. DO NOT DELAY.
Never perform service or maintenance with
engine running.
Keep all persons away from operator control
area while performing adjustments, service, or
maintenance.
Check that all hardware is properly installed.
Always tighten to torque chart specifications
unless instructed otherwise in this manual.
Always wear relatively tight and belted clothing
to avoid entanglement in moving parts. Wear
sturdy, rough-soled work shoes and protective
equipment for eyes, hair, hands, hearing, and head.
GEARBOX MAINTENANCE
NOTE: Read this entire section before starting any
repair. Many steps are dependent on each other.
Fill gearbox with 6 pints of SAE 80W or 90W gear lube.
NOTE: Repair to this gearbox is limited to replacing
bearings, seals, and gaskets. Replacing gears, shafts,
and a housing is not cost effective. Purchasing a com-
plete gearbox is more economical.
Inspect gearbox for leakage and bad bearings. Leak-
age is a very serious problem and must be corrected
immediately.
Bearing failure is indicated by excessive noise and
side-to-side or end-play in gear shafts.
Remove Hub
1. Position stump grinder on a hard level surface with
foot pads and jack stand firmly on the ground.
2. Remove hardware and side shield from the right
side of the cutter frame.
3. Remove hardware and cutting wheel from hub.
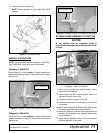
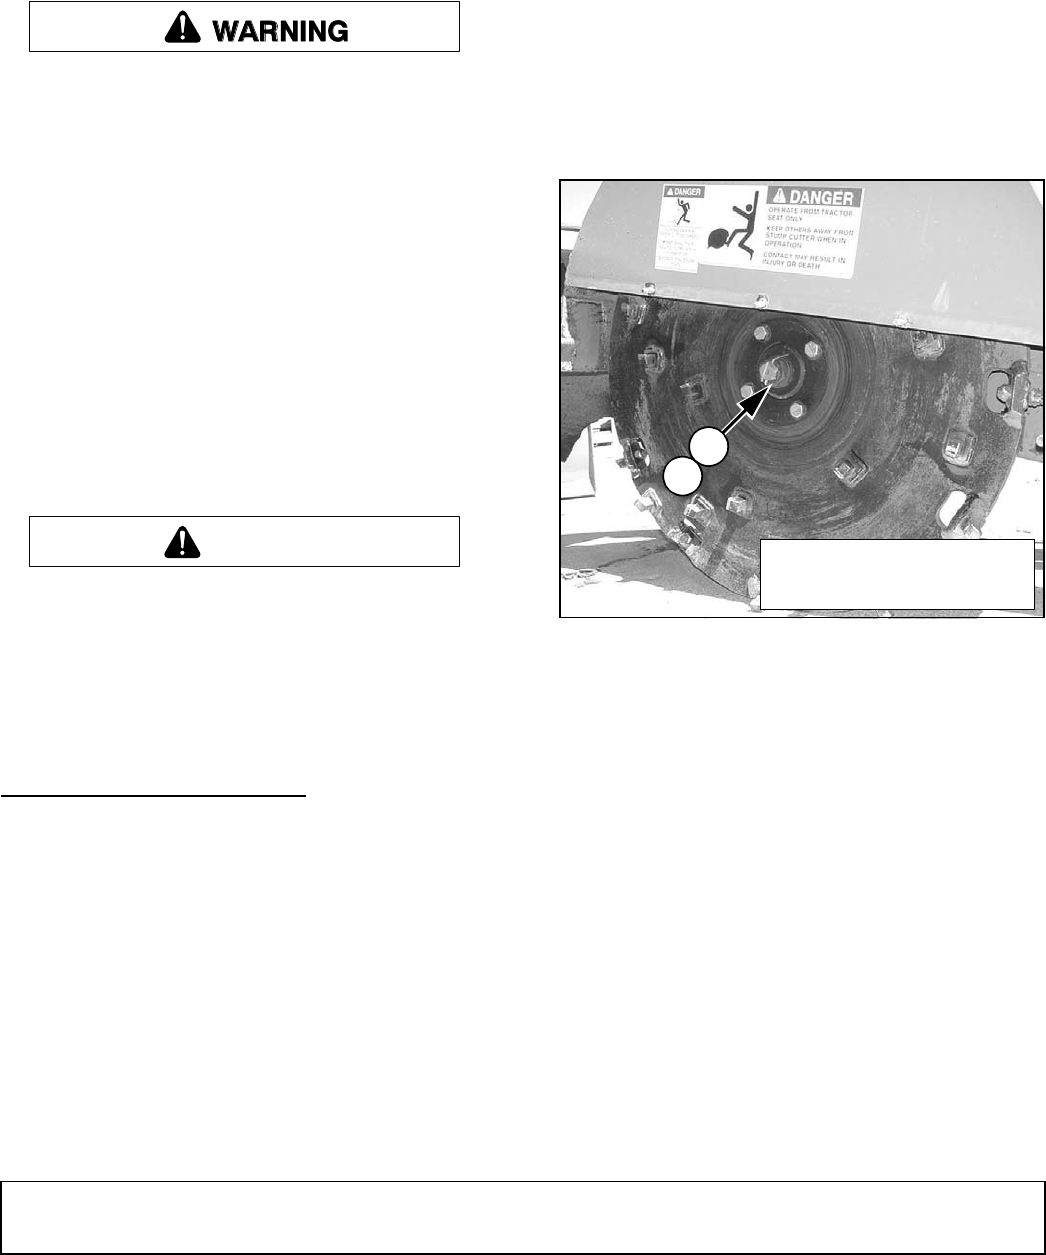
4. Remove cotter pin (23) and slotted hex nut (14)
from end of horizontal gearbox shaft.
5. Remove hub.
NOTE: You will need to use a heavy duty puller to
remove tapered hub from gearbox shaft.
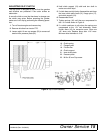
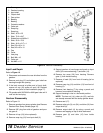
Figure 10. Cutting Wheel and Hub Assembly
(Side Shield Removed)
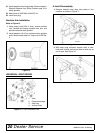
Remove Gearbox from Stump Grinder
1. Disconnect and remove the driveline from the
tractor.
2. Remove safety pin and clevis pin from top cylinder
mount.
3. Rotate top cylinder out of work area.
4. Disconnect and remove the driveline from the
gearbox.
5. Remove vent plug and siphon gear lube from
housing through this opening.
6. Remove the four bolts that attach gearbox to stump
grinder.
7. Remove gearbox.
CAUTION
DP4
14
23
14. Slotted hex nut M30 x 2
23. Cotter pin B6 x 60