Fort Assembly
Phase 5
Phase Notes
• Assemble with hardware as shown.
Note: It is vital that the fort
be level before and after
each phase of assembly.
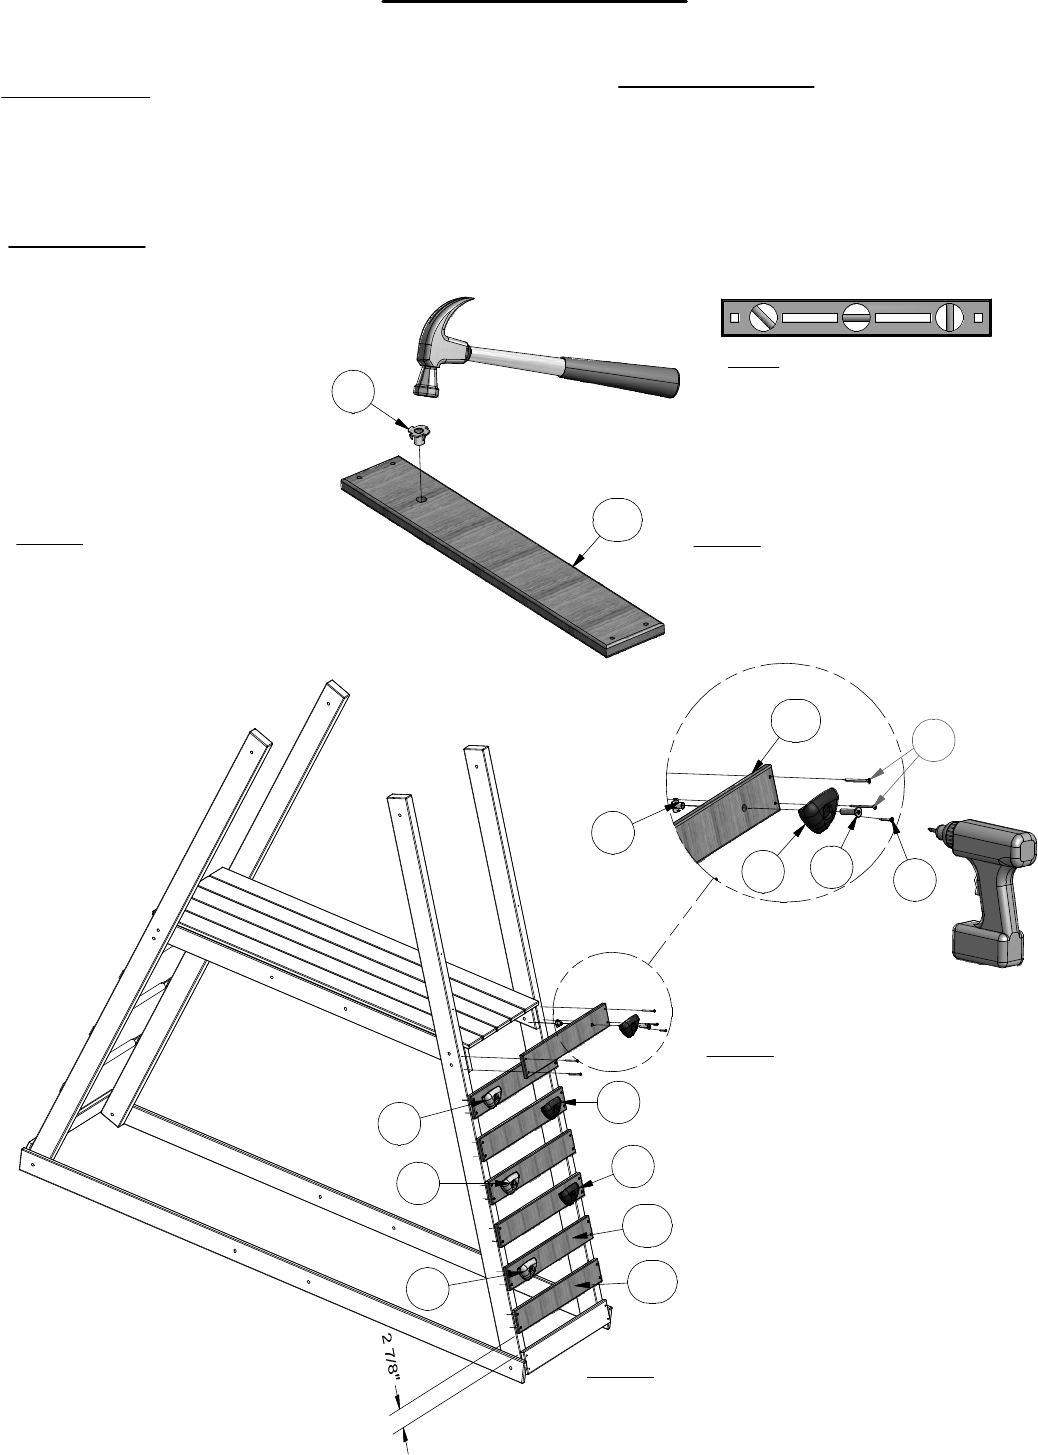
Parts needed:
• (6) M71 - ROCK BOARD - W100022
• (1) M72 - ROCKWALL SLAT - W100023
• (3) GX - CLIMBING ROCK BLUE SMALL - A100159
• (3) GY - CLIMBING ROCK YELLOW SMALL - A100160
Hardware needed:
• (6) BF - T-NUT 3/8 - H100073
• (6) A - BOLT FA 3/8x1-1/2 - H100001
• (6) BR - SCREW TAPPING 8x1-1/8 - H100088
• (28) BV - SCREW PFH 8x2-1/4 - H100091
Step 1: Gather the (6) Rockwall Boards
'M71' and hammer 3/8" T-nuts 'BF' into
large hole on each board.
Step 2: Attach first Rockwall Board
'M71' by placing the board flush with
the bottom of the fort floor where
shown and attaching to Uprights 'E2'
with screws 'BV', as shown. (The
T-nut must go to the inside of the
fort.) Repeat process for remaining
(5) Rockwall boards making sure to
space boards 2 7/8" apart. Boards
must be placed so the rock holes
alternate from top to bottom.
Step 3: Attach Rockwall Board 'M72'
to fort eaqually spaced below last
Rockwall Board 'M71', as shown.
Step 4: Attach Rockwall Rocks 'GY'
and 'GX' to Rockwall Boards 'M71'
using bolts 'A' through rock and board
and into previously placed T-nut, and
with screw 'BR' , as shown.
M72
GX
A
BV
BR
BF
M71
M71
BF
GY
GX
GY
GX
GY
M71


