Fort Assembly
Phase 9
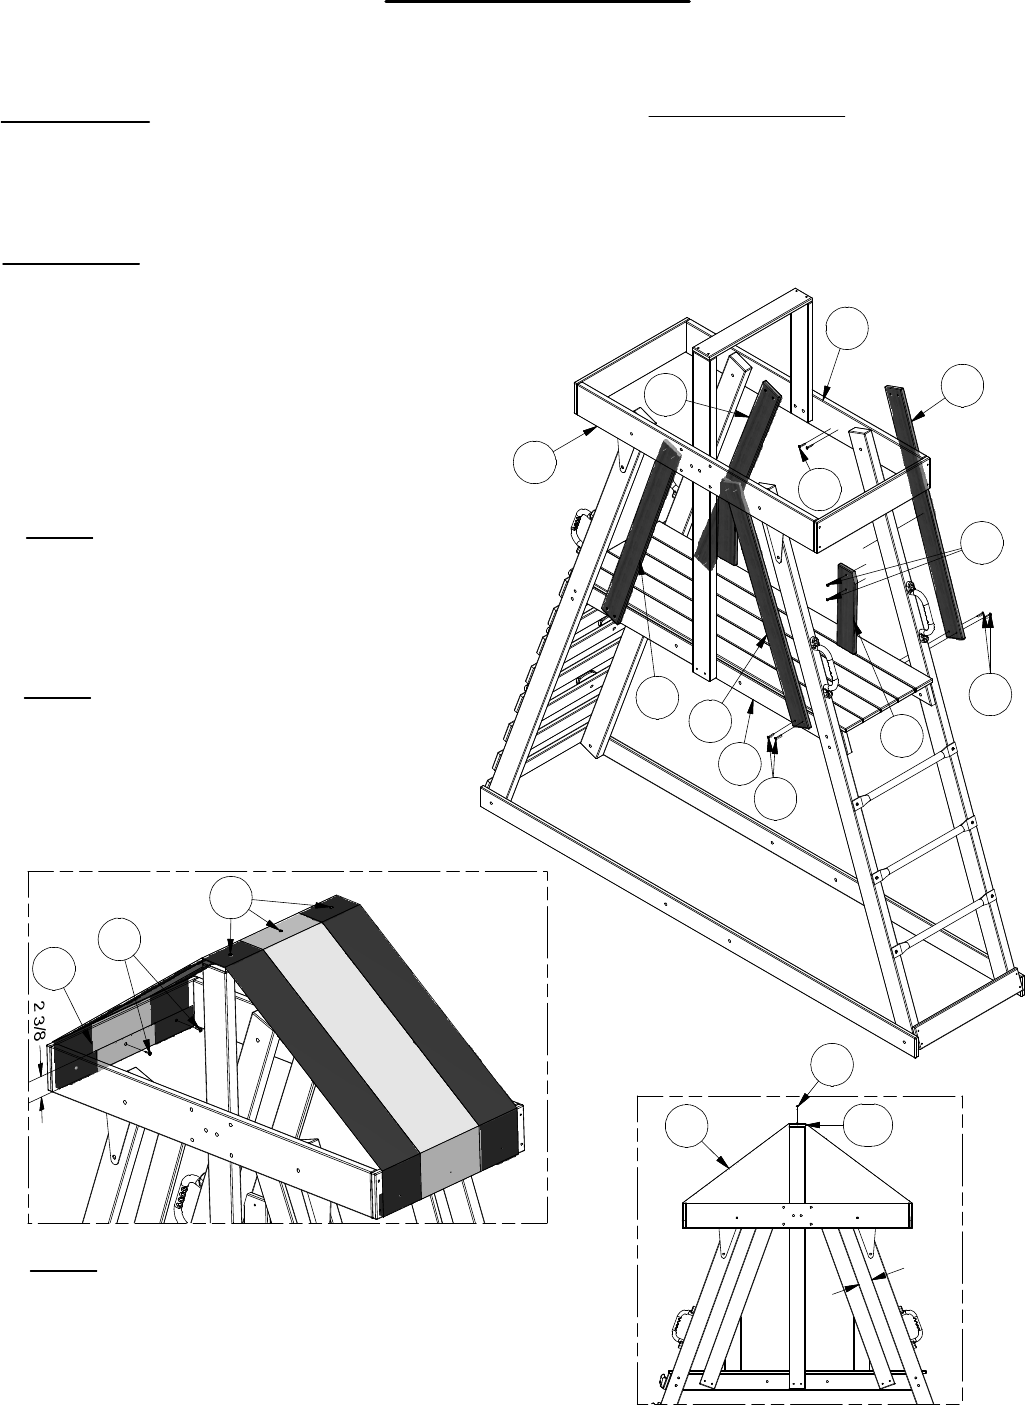
Phase Notes
• Assemble with hardware as shown.
Parts needed:
• (4) M3 - WALL SLAT - W101148
• (2) M5 - LOWER WALL RAIL - W101154
• (1) GP - ROOF TARP - A100150
Hardware needed:
• (9) BC - SCREW PWH 8x3/4 - H100070
• (20) BQ - SCREW PFH 8x1-1/4 - H100087
BC
K1
BC
BC
BQ
BQ
M3
BQ
G2
G1
M5
BQ
M3
M3
M3
2
3
/
4
GP
M72
H1
Step 1: Attach one end of each Wall Slats
'M3' to the inside of the Corss Beams 'G1' &
'G2' with Screws 'BQ' and attach the other
end to the outside of Floor Supports 'H1'
with Screws 'BQ', as shown.
The wall slats should be spaced
2 3/4" away from uprights.
Step 3: Drape Tarp 'GP' over support 'M72' and Tarp
End Caps 'K1'. Attach one side of tarp to inside of of
'K1' with (3) Screws 'BC'. Pull other side of tarp tight
and attach to the inside of other 'K1' end cap using (3)
Screws 'BC'. Finally, secure tarp to 'M72' support with
(3) Screws 'BC', as shown.
Step 2: Attach top end of each Lower Wall
Rails 'M5' to the inside of wall slats 'M3' with
Screws 'BQ', as shown. Make sure the
diagonal corners of 'M5' rails are flush with
the outside edge of 'M3' wall slats.


