Fort Assembly
Phase 11
Phase Notes
• Assemble with hardware as shown.
Hardware needed:
• (6) D - NUT BARREL WH 5/16x7/8 - H100005
• (6) AD - WASHER LOCK EXT 12x19 - H100031
• (6) AC - WASHER LOCK EXT 8x19 - H100030
• (4) K - BOLT WH 5/16x2 - H100012
• (2) H - BOLT WH 5/16x1-1/2 - H100010
• (32) BP - SCREW PFH 8x1-1/2 - H100086
• (4) BS - SCREW PFH 8x1-3/4 - H100089
Parts needed:
• (8) M4 - PICNIC TABLE BOARD - W101151
K
AC
K
AC
K
AC
K
AC
D
D
AD
AD
AC
AC
H
H
M4
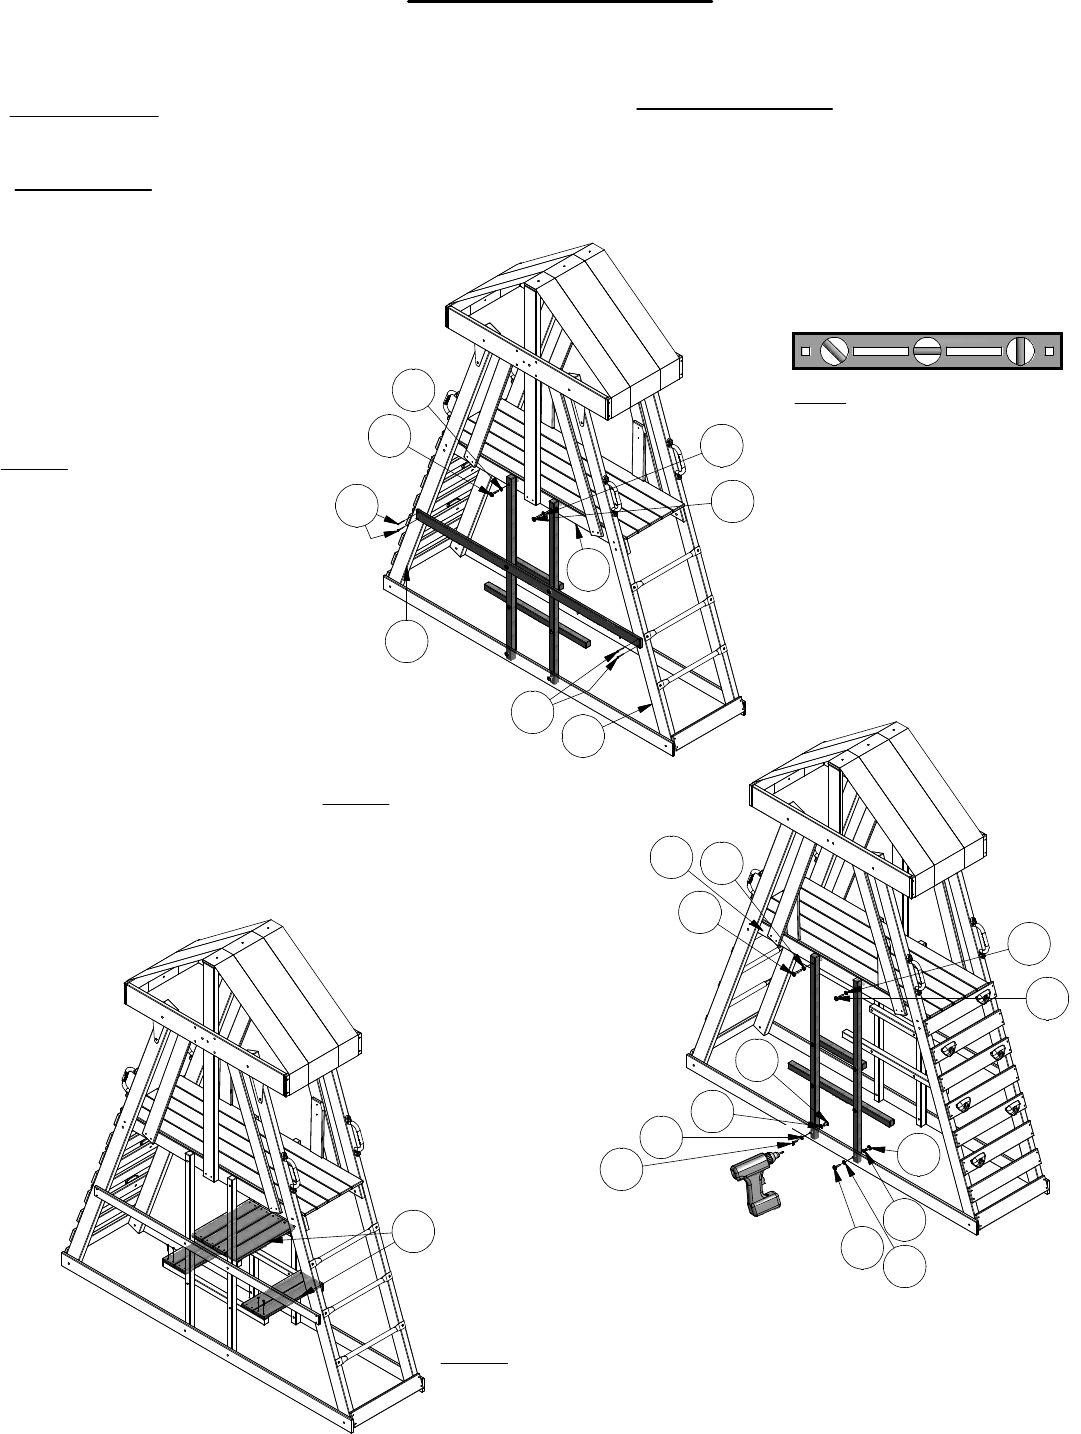
Step 1: Attach back side Picnic
Table Frame to 'H1' Floor Support
using "Safe-T-Fuse" hardware.
Attach 'N2' Swing Block Safety
Rail to the outside of 'E1' & 'E2'
Left Fort Upright Assembly with
screws 'BS', as shown.
H1
H1
Step 2: Attach front side Picnic Table
Frame to 'H1' Floor Support and 'M1'
Ground Floor using "Safe-T-Fuse"
hardware, as shown.
Step 3: Attach the Picnic Table
Boards 'M4' to the frame with Screws
'BP', as shown. (2) Boards 'M4' will be
used for each seat and (4) Boards will
be used for the table top.
Note: It is vital that the fort
be level before and after
each phase of assembly.
E2
E1
BS
BS


