


21 - English
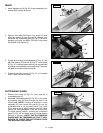
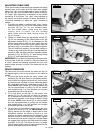
9. The knives are adjusted correctly when the cutting
edge of the knife extends out .060" (1.5 mm) from the
cutterhead diameter.
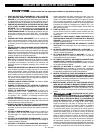
10. Carefully rotate the cutterhead (G) Fig. 60, until the
round portion of the cutterhead is on top as shown.
11. Place a .060" (1.5 mm) feeler gage (H) Fig. 60, on the
cutterhead and using a straight edge (J) on the rear
table adjust the height of the rear table until it is .060"
(1.5 mm) above the cuttinghead diameter.
12. Lock the rear table in position and remove the feeler
gage.
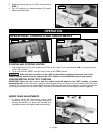
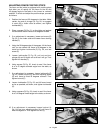
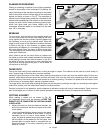
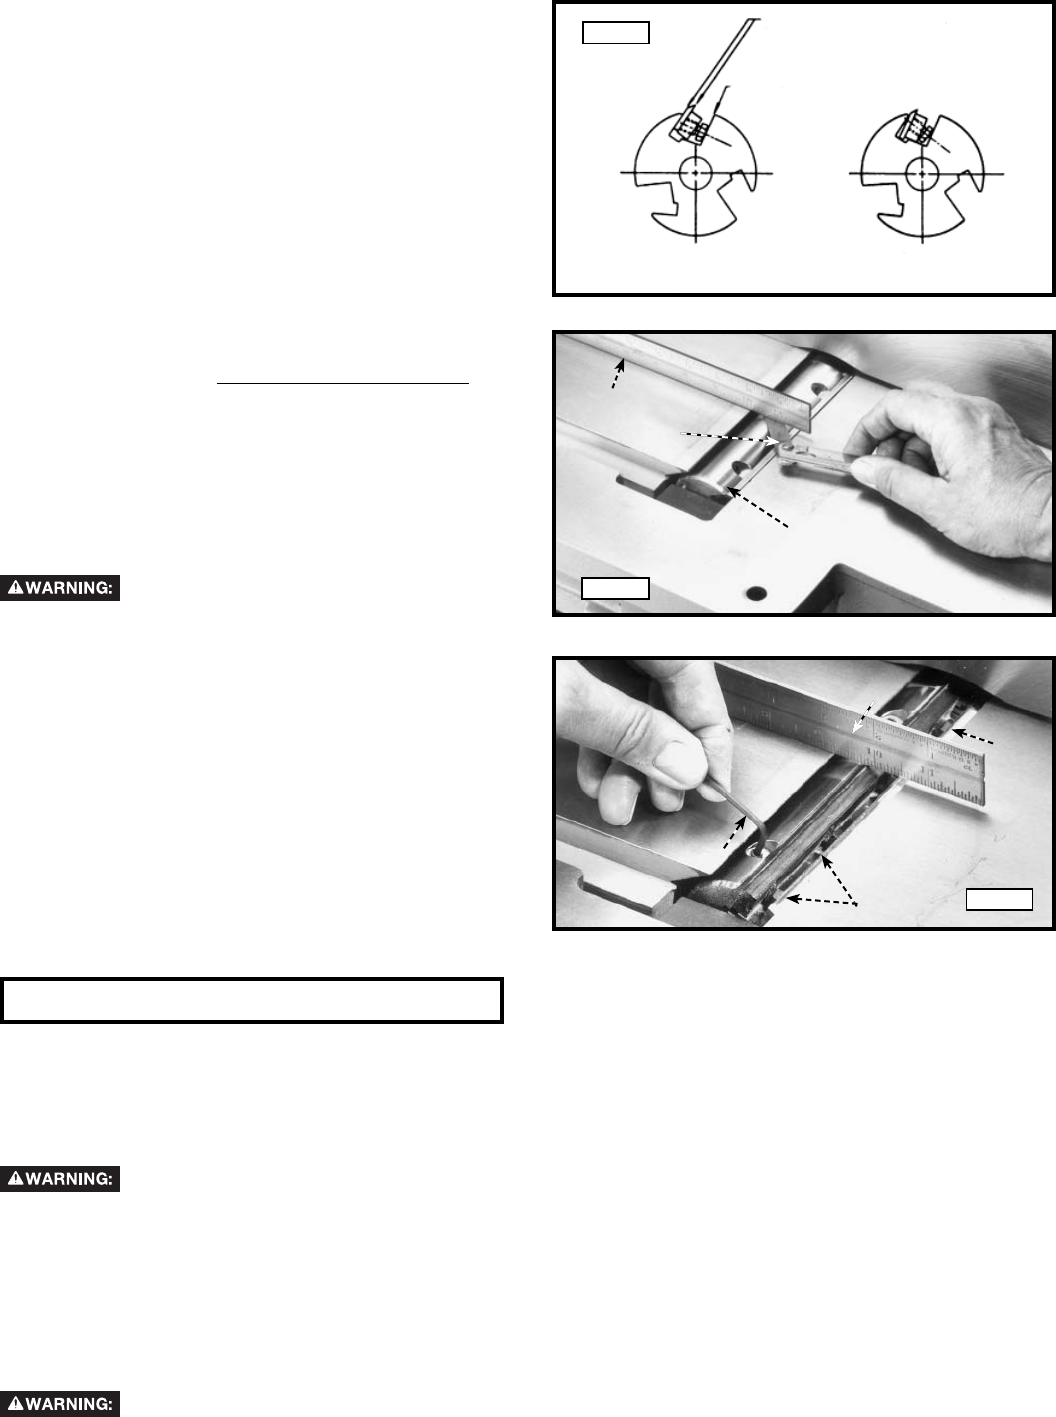
13. Lower the infeed table and place a straight edge
(J) Fig. 61, on the outfeed table extending over the
cutterhead as shown.
14. Rotate the cutterhead by hand until the knife is at
its highest point at each end of the cutterhead. To
raise the knife, use wrench (E) Fig. 61, and turn
raising screw clock wise until the knife just touches
the straight edge (J) on each end and center of the
cutterhead when the knife is at its highest point.
When you are certain the knife is adjusted properly,
tighten the four locking screws (B) by turning them
counterclockwise.
15. Adjust the remaining two knives in the same manner.
Make certain that all knives are secure-
ly fastened in cutterhead before turning on power.
16. Replace cutterhead guard.
J
G
E
B
B
J
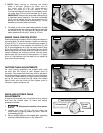
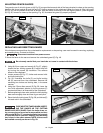
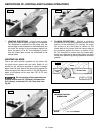
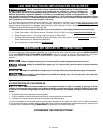
Mating surfaces of cutterhead to blade
and blade to bar to be tight and parallel
Face of screw and face of cutterhead
to be parallel
DO
DON’T
WARNING: Insure cutter blades are installed properly
H
MACHINE USE
The following directions will give the beginner a start on jointer operations. Use scrap pieces of lumber to check settings
and to get the feel of the operations before attempting regular work.
NOTE: The knives on the jointer will not wear evenly by feeding the through the same spot on the table every
time. Feed the wood through the jointer at different spots on the table when possible, to help eliminate uneven
wear of the knives.
Always use cutterhead guard and keep hands away from cutterhead. Always use push blocks
whenever possible. Never make jointing and planning cuts deeper than 1/8" in one pass.
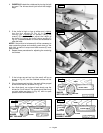
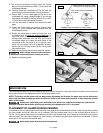
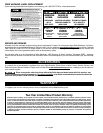
PLACEMENT OF HANDS DURING FEEDING
At the start of the cut, the left hand holds the work firmly against the infeed table and fence, while the right hand pushes
the work toward the knives. After the cut is un der way, the new surface rests firmly on the outfeed table as shown in
Fig. 64. The left hand should then be moved to the work on the outfeed table, at the same time maintaining flat contact
with the fence. The right hand presses the work forward, and before the right hand reaches the cutterhead, it should
be moved to the work on the outfeed table.
Never pass hands directly over the cutterhead.
Fig. 60
Fig. 61
Fig. 59