


Setup
30 334135B
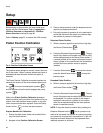
Adjust Phasing
9. Watch the dispense valve carefully to observe which
material is dispensed first. Press the Dispense
Request button ( ) or the footswitch to dispense
material.
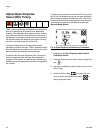
10. If the materials do not exit the dispense valve at the
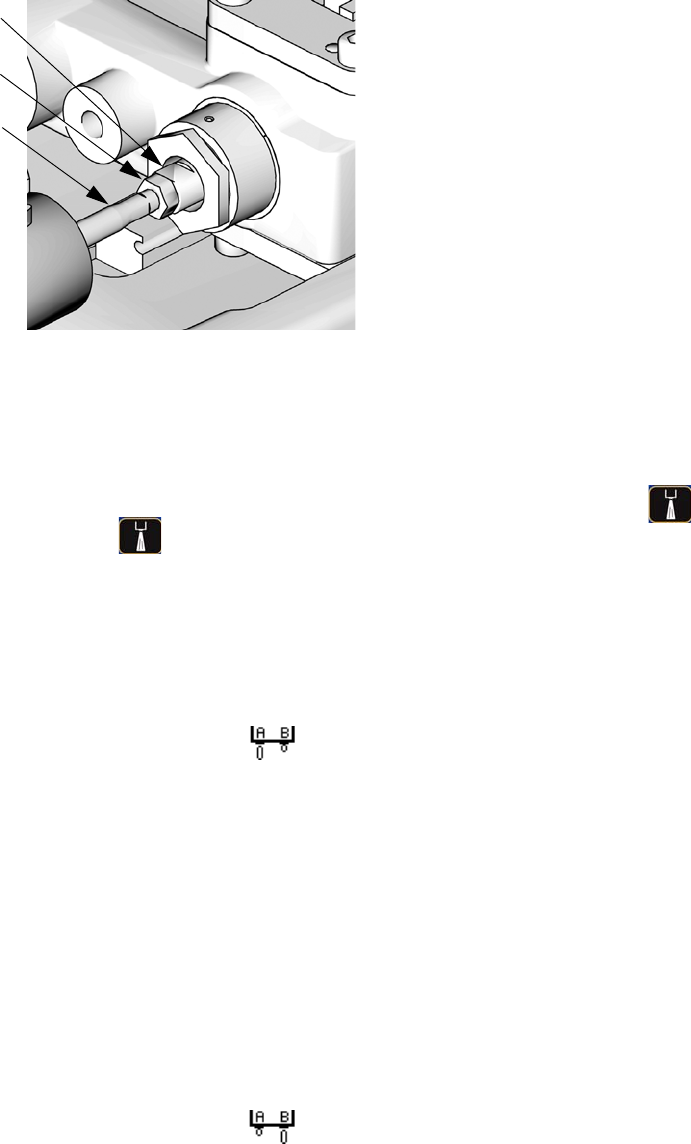
same time, adjust the piston Phase Adjustment
Screw (003) as follows.
• If the A side material exits the dispense nozzle
before the B side material ( ):
a. Use two 13 mm wrenches to break loose
the locking nut (002) from the phase adjust-
ment screw (003) on the B material side.
b. Hold the phase adjustment screw (003) sta-
tionary with a 13 mm wrench.
c. Use a 7 mm wrench to turn the piston
shaft (001) counterclockwise 1/4 turn or
less to move the B piston forward.
• If the B side material exits the dispense nozzle
before the A side material ( ):
a. Use two 13 mm wrenches to break loose
the locking nut (002) from the phase adjust-
ment screw (003) on the A material side.
b. Hold the phase adjustment screw (003) sta-
tionary with a 13 mm wrench.
c. Use a 7 mm wrench to turn the piston
shaft (001) counterclockwise 1/4 turn or
less to move the A piston forward.
NOTE: It is highly recommended that all of the phasing
adjustment be done to one side or the other; not both.
NOTE: Ensure the piston shaft and phase adjustment
screw do not rotate while tightening the locking nut (002)
in the following step.
11. Hold piston shaft (001) and phase adjustment
screw (003) in place with a 7 mm and 13 mm
wrench and tighten locking nut (002) against phase
adjustment screw with a 13 mm wrench.
12. Watch the dispense valve carefully to observe which
material is dispensed first. Press the Dispense
Request button ( ) or the foot switch to dispense
material. If one material exits the dispense nozzle
before the other, go back to step 10.
Exit Calibration Mode
13. Navigate to the Shot Mode Screen or Operator
Mode Screen.
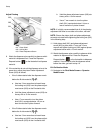
001
002
003
Key:
001 Piston Shaft
002 Locking Nut
003 Phase Adjustment Screw
ti12389a