


Repair
46 334135B
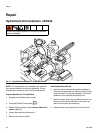
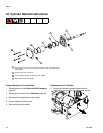
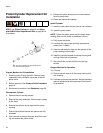
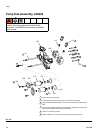
Piston/Cylinder Replacement Kit
Installation
NOTE: See Piston Package on page 20 and Nylon
and UHMW Piston Replacement Kits on page 65 for
kit numbers.
Prepare Machine for Kit Installation
1. Drain the pump. Empty the tanks. Perform shots
repeatedly until no material comes out of the dis-
pense valve.
2. Relieve pressure. See Pressure Relief Procedure,
page 33.
3. Shut down the machine. See Shutdown, page 34.
Disassemble Cylinder
4. Remove the four end cap screws.
5. Remove the pump end caps. Allow the cap to hang
by the hose.
6. Remove the cylinder and o-rings from the pump
housing.
7. Push the drive block forward until pistons are fully
extended.
8. Use a wrench to prevent the pump shaft from rotat-
ing and remove the piston screw.
9. Remove the piston and any front or rear washers
from the pump shaft.
10. Clean and inspect the washers.
Install Cylinder
11. Install the new piston and any front or rear washers.
12. Install the piston screw.
NOTE: Tighten the piston screw until the screw stops
rotating, then turn the screw an additional 1/8 turn.
13. Fully retract the piston.
14. Lubricate the new o-rings with high temperature
grease (part 115982).
15. Insert the lubricated o-rings into the grooves of the
pump housing and end caps.
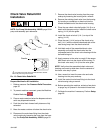
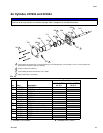
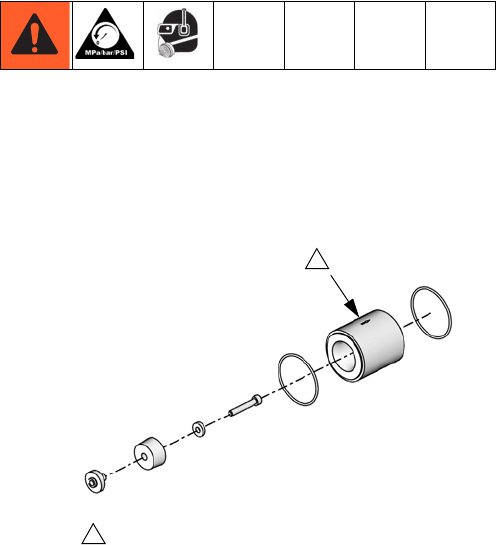
16. Install the cylinder between the pump housing and
end cap. See note in illustration.
17. Secure cylinder in place with the four end cap
screws.
Prepare Machine for Operation
18. Fill tanks.
19. Perform several shots to fill the pump housing with
new material.
20. Calibrate and phase the machine. See the operation
manual referenced at the beginning of this manual
for procedure.
1
The arrow imprinted on the cylinder points
toward the pump outlet.
1