


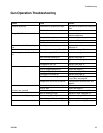
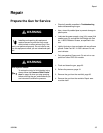
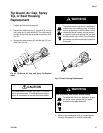

Repair
309298J 41
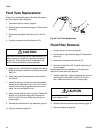
Fluid Needle Replacement
1. Prepare the gun for service, page 35.
2. Remove the air cap assembly and seat housing,
page 37.
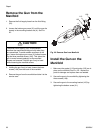
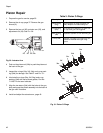
3. Remove the barrel (6), page 44.
4. Remove the spring cap (45) and the spring (8a)
from the barrel. See F
IG. 27..
5. Be sure the seat housing (5) is removed. Place the
2 mm ball end wrench (44) in the back of the fluid
needle assembly. Push the tool in and turn it coun-
terclockwise about 12 full turns to unthread the nee-
dle.
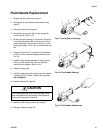
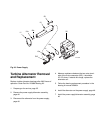
6. Using the multi-tool (37), pull back on the packing
nut (N) to remove the fluid needle assembly. See
F
IG. 28..
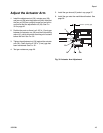
7. Install the fluid needle assembly in the gun barrel.
Push in on the needle with the 2 mm ball end
wrench (44) and tighten. See F
IG. 29..
8. Install the spring (8a).
9. Install the spring cap (45), making sure the ground-
ing spring (25) is in place. Tighten until snug. Do
not overtighten.
10. Install the barrel (6), page 45.
11. Install the seat housing and air cap, page 37.
12. Test gun resistance, page 29.
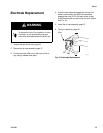
Fig. 27. Spring Cap and Springs
Fig. 28. Fluid Needle Removal
Fig. 29. Fluid Needle Replacement
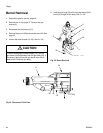
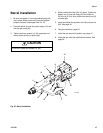
CAUTION
To avoid damaging the seat housing and gun barrel,
never overtighten the seat housing. Overtightening
may result in improper fluid shutoff.
8a
45
25
37
N