


Repair
42 309298J
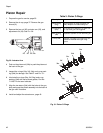
Piston Repair
1. Prepare the gun for service, page 35.
2. Remove the air cap, page 37. Remove the gun
shroud (2).
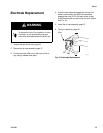
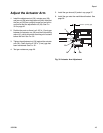
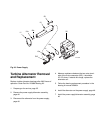
3. Remove the jam nut (28), actuator arm (29), and
adjustment nut (30). See F
IG. 30..
Fig. 30. Actuator Arm
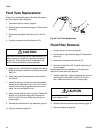
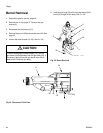
4. Push on the piston rod (34b) to push the piston out
the back of the gun.
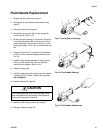
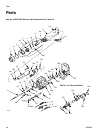
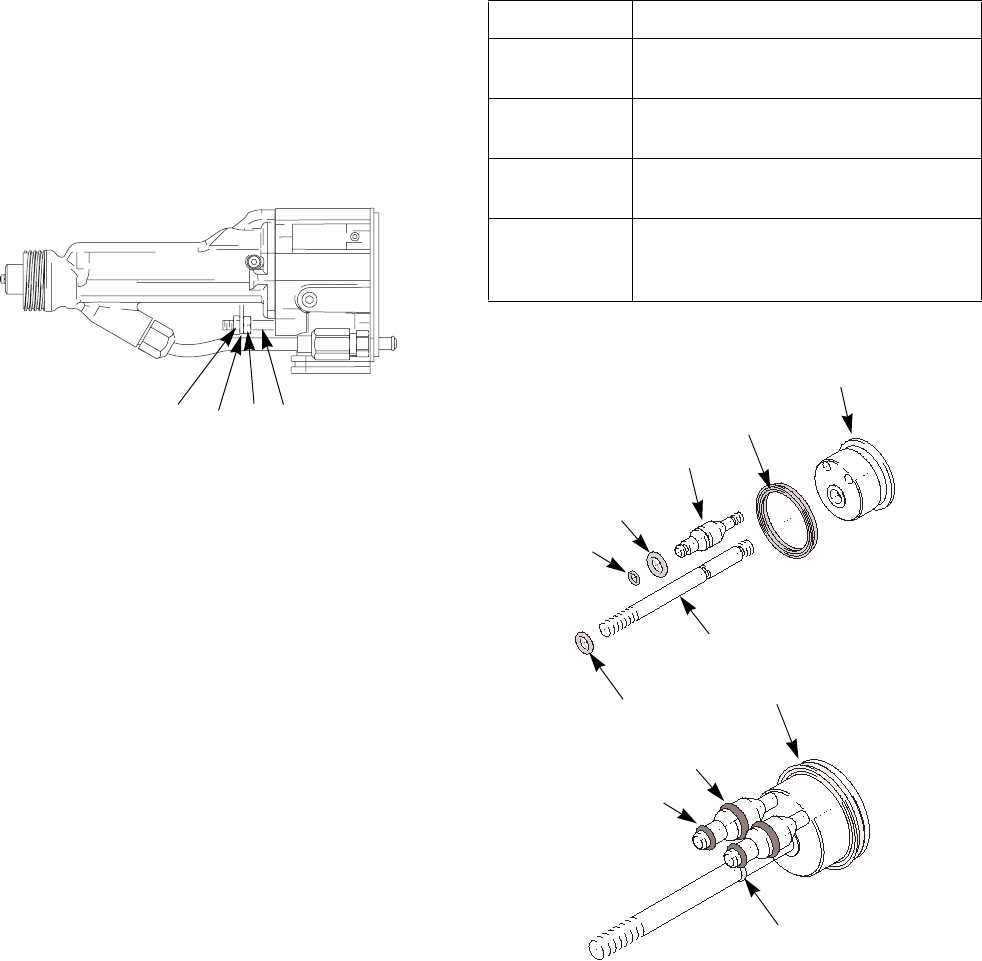
5. Inspect the o-rings (34e, 34f, 34g) and u-cup pack-
ing (34d) for damage. See Table 3 and F
IG. 31..
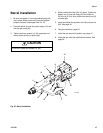
6. Lubricate the o-rings (34e, 34f, 34g) and u-cup
packing (34d) with non-silicone grease, Part No.
111265. Do not over-lubricate.
7. Align the two stems (34c) with the holes in the gun
body and press the piston assembly into the back of
the gun until it bottoms.
8. Install and adjust the actuator arm, page 43.
Fig. 31. Piston O-Rings
TI1732A
28
29
30
34b
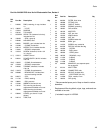
Table 3: Piston O-Rings
Description Function
Shaft O-Ring
(34g)
Seals cylinder air along the piston rod
(34b). Replace if air leaks along rod.
Front O-Ring
(34e)
Air shutoff seal. Replace if air leaks from
air cap when gun is de-triggered.
Back O-Ring
(34f)
Separates cylinder air from atomizing air.
U-Cup (34d) Replace if air leaks from small vent hole
at back of manifold when gun is trig-
gered.
TI1575A
TI1576A
34a
34d
34c
34f
34e
34g
34b
34e
34g
34f
34d